
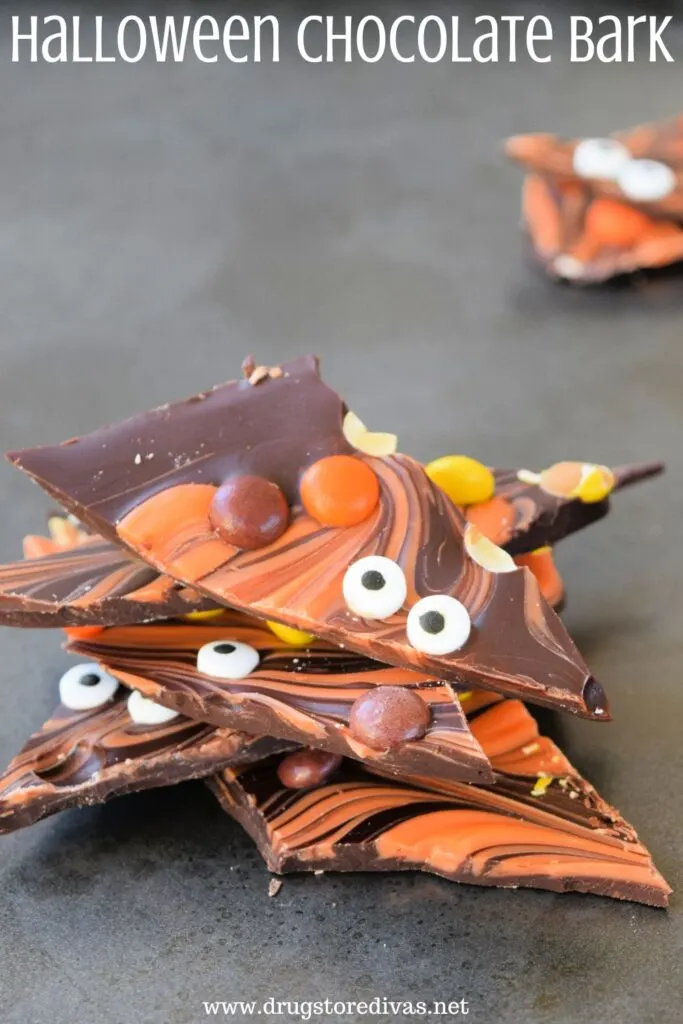
This Halloween chocolate bark recipe, made from only four ingredients, is the easiest thing you’ll make all spooky season. This easy chocolate bark only takes minutes to make.
For more ways to make this the best holiday, check out all of our Halloween posts.

A few years ago, we got an invitation to a Halloween party with a message to bring something to share. If you know me, you know I always read that as “bring dessert.” I always bring a sweet treat with me because I love desserts so I love making new ones, but also because I love dessert and always want some available at dinner or a party.
Because if I’m bringing dessert, that means there will be dessert, ya know?
So, this party was a great reason to make my Halloween chocolate bark. It’s such an easy Halloween dessert that you can throw together in just a few minutes. So if you’re looking for a fun treat for an upcoming Halloween party or to give to your family for Halloween, this is it.
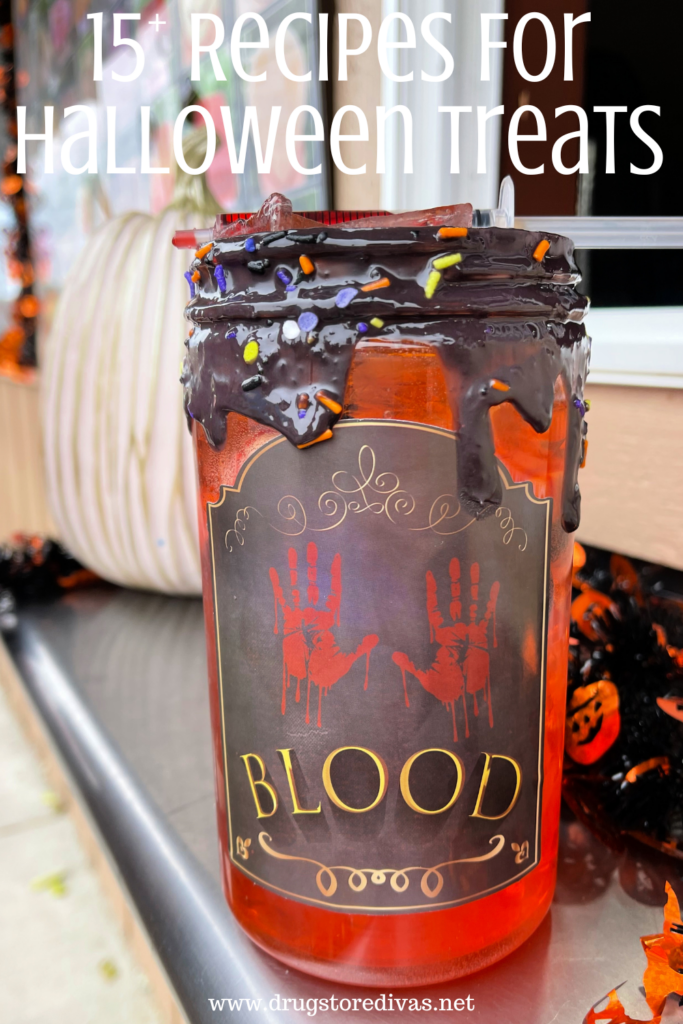

This Halloween candy bark recipe is just one of our recipes for spooky season. For more easy Halloween treats, be sure to check out our list of Recipes For Halloween Treats.
There are delicious recipes for mummy Oreo cookies, spider web pretzel sticks, ghost meringue cookies, and more.
Halloween Chocolate Bark Recipe
Affiliate links are included in this post and Drugstore Divas may make a small commission if you use them.
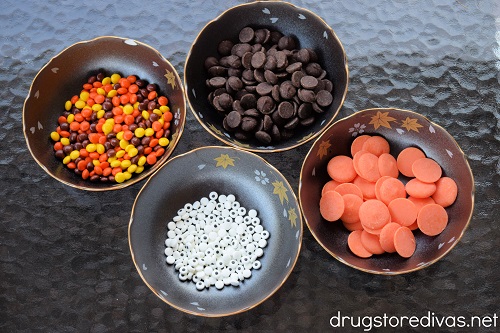

Halloween Chocolate Bark Ingredients:
- 10 oz. dark chocolate baking chips
- 3 oz. orange candy melts
- 5 oz. Reese’s Pieces
- Candy eyeballs
How To Make Halloween Chocolate Bark:
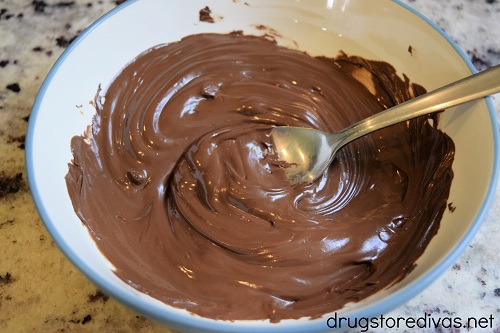
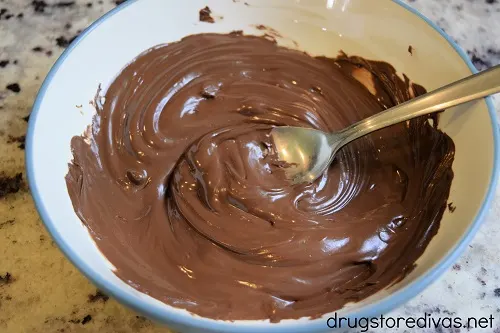
Melt the chocolate chips according to the package.
An easy way to do this is to melt the chocolate chips in the microwave for a minute. Stir. If they’re not completely melted, return them to the microwave and heat and stir in 30 second intervals until the chocolate is completely melted.
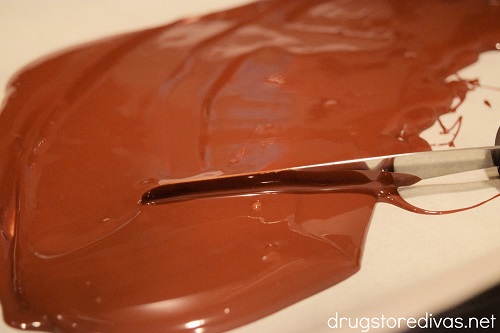

Pour the melted chocolate chips onto a piece of parchment paper on a cookie sheet. Spread it out with an icing knife until you have an even layer.

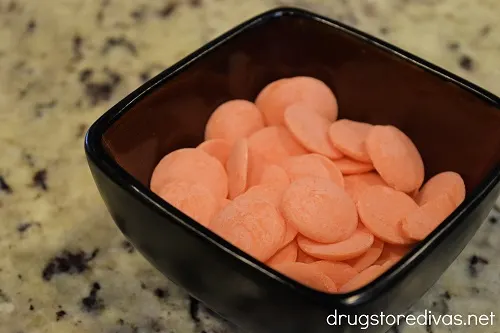
Melt the orange candy wafers according to the package.
Just like chocolate chips, heat them for a minute in the microwave and stir. If they’re not completely melted, reheat them for an additional 30 seconds and stir. If you’ve never used candy melts, read our Tips For Using Candy Melts post for some advice.
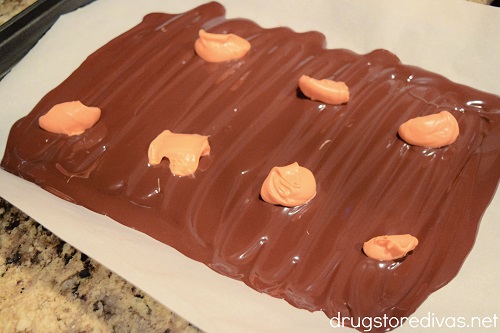
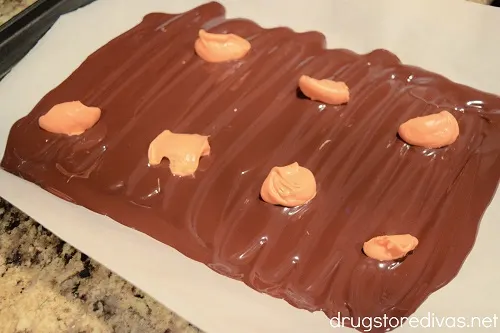
Drop dollops of it throughout the chocolate.

Stick a toothpick shallowly into the melted chocolate.
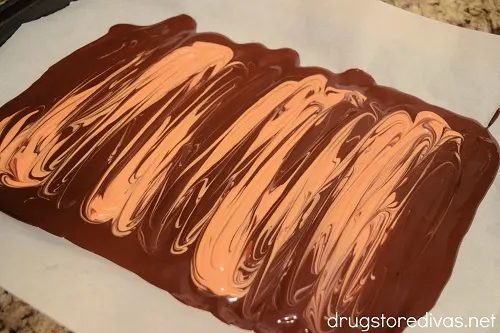
Go side to side to incorporate the orange chocolate. You can go side to side as many times as it takes to really spread it out so it’s not clumpy. Don’t worry if there are gaps with no orange. We’ll take care of that next.
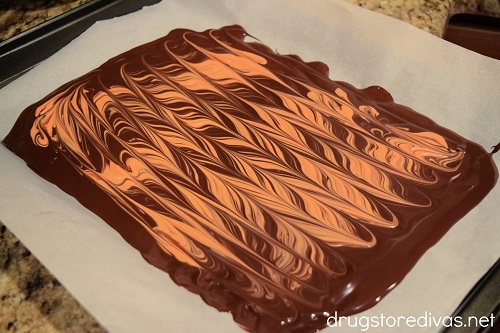
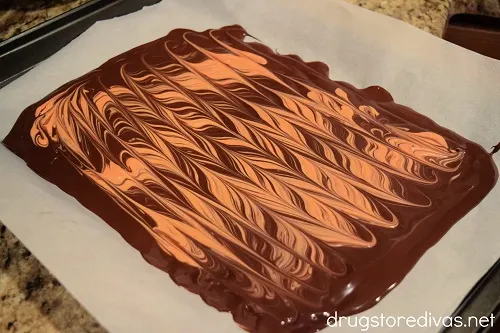
When you’re completely satisfied with going side to side, use the toothpick to go up and down the tray once. You cannot do this more than once without it looking like a mess.

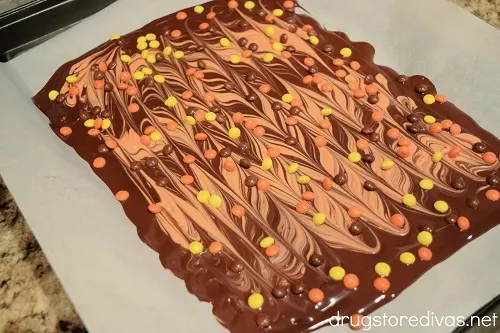
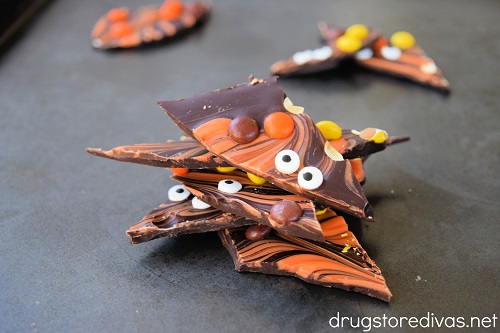
Quickly place the peanut butter candies into the chocolate. Use a toothpick to gently stick them into the chocolate a little.
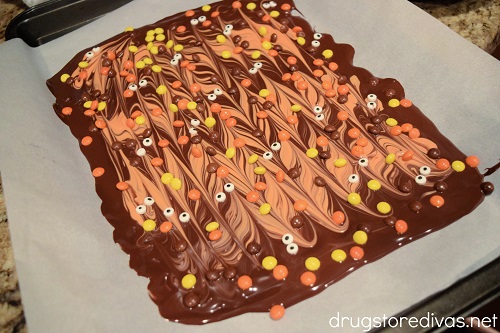
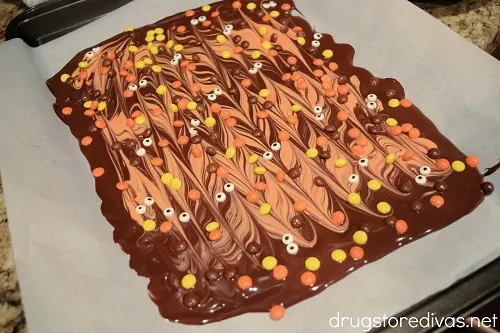
Carefully, place the candy eyeballs in the chocolate. Again, use a toothpick to gently stick them into the chocolate bark.
Allow the Halloween chocolate bark to cool in the fridge, preferably overnight.
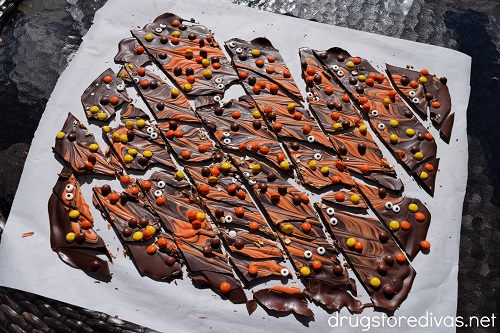
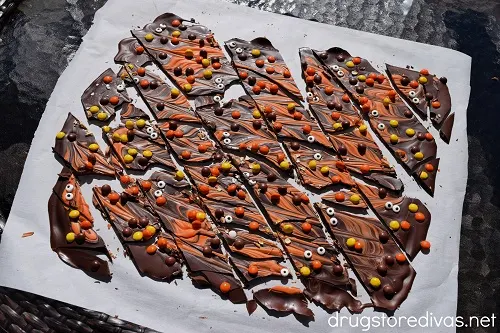
The next day, move the parchment paper to a cutting board and use a sharp knife to cut your bark into small pieces.
Serve it on a platter if you’re having a Halloween party. If you’re making these to boo your neighbors, tie them in festive treat bags with butchers twine.

Halloween Chocolate Bark: Frequently Asked Questions
If you want, you can use chocolate almond bark in this recipe. It’s a lot easier to work with than chocolate chips because if it hardens, you can remelt it. You can’t do that with chocolate chips.
However, I do really feel like this recipe tastes so much better when you use a good quality dark chocolate as the base, especially because it offsets the flavor from the candy melts (which I personally don’t love the taste of). If you don’t love dark chocolate, you can use milk chocolate or semi-sweet chocolate chips instead.
Personally, I wouldn’t use white chocolate chips because the white candy eyes wouldn’t stand out on white chocolate bark. However, if you can find colored candy eyes at your local grocery store, or you skip the eyes and just use Halloween sprinkles, you can change the chocolate of the base.
The best chocolate you can afford is the best chocolate for bark. We’re all trying to be frugal, so you can use store-brand chocolate chips if that’s what fits in your budget.
However, if you can splurge just a little, I personally use Ghirardelli when I’m making this or something where chocolate is the dominant flavor (like our chocolate peanut clusters).
You don’t need to temper chocolate for bark. Tempered chocolate will be shinier, but for chocolate bark, where you’re covering the chocolate with colored candy melts, it’s not necessary.
Store any leftover candy bark in an airtight container in the fridge. We don’t recommend you keeping it at room temperature as that can cause it to melt.
Chocolate bark will last about two to three weeks. So you can definitely make it ahead of time, which is nice.
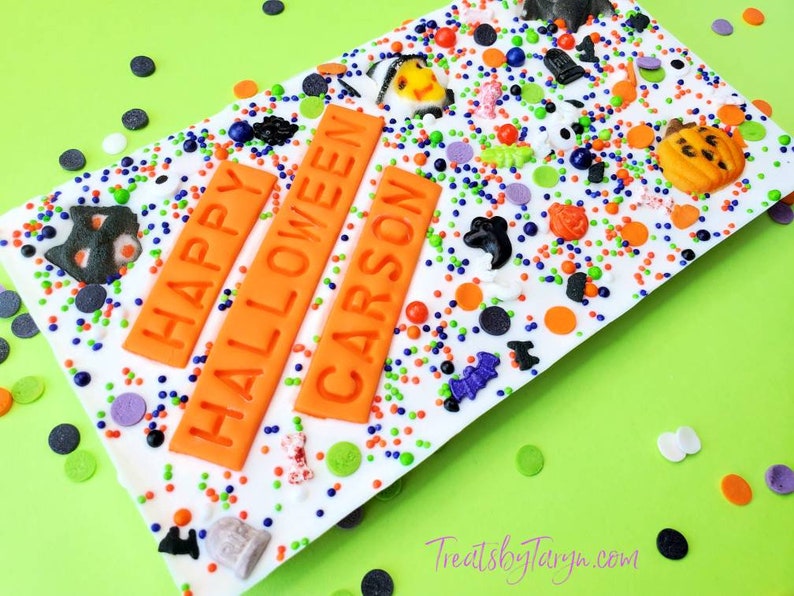
Purchase Halloween Candy Bark:
If this looks delicious to you, but you just don’t have the time to make it, that’s okay. There are options online for you to purchase similar Halloween Candy Bark.
- Personalized Halloween Chocolate Bar (pictured above)
- Halloween Chocolate Candy Bark
- Spooky White Chocolate Bark
You can find more Halloween candy bark options to satisfy your sweet tooth on Etsy. Be mindful of the shipping timing if you do order, though. You want to make sure it’ll arrive in time for Halloween.
More Chocolate Bark Recipes:
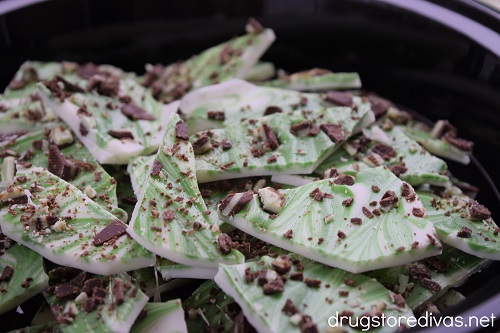
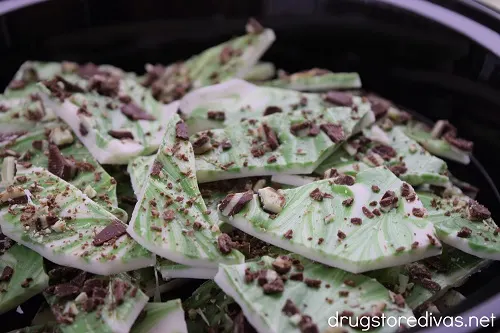
This Halloween bark recipe is our most popular chocolate bark recipe, but it’s not our only one. We have a Peanut Butter Chocolate Bark Recipe that’s so good and a Mint Chocolate Bark Recipe that’s a great recipe for St. Patrick’s Day.
Check out our list of 10+ Unique Candy Bark Ideas to see all of them.
Halloween Chocolate Bark


Need to bring a treat to a Halloween party? Try this Halloween chocolate bark recipe, made from only four ingredients.
Ingredients
- 10 oz. dark chocolate baking chips
- 3 oz. orange candy wafers
- 5 oz. Reese's pieces
- Candy eyeballs
Instructions
- Melt the chocolate chips according to the package.
- Pour the melted chocolate onto a parchment paper-lined cookie sheet. Spread it out with an icing knife until you have a very thin layer.
- Melt the orange candy wafers. Drop dollops of it throughout the chocolate.
- Using a toothpick, go side to side to incorporate the orange chocolate. You can go side to side as many times as it takes to really spread it out so it’s not clumpy.
- When you’re completely satisfied with going side to side, use the toothpick to go up and down the tray once.
- Quickly place the peanut butter candies into the chocolate.
- Carefully, place the candy eyeballs in the chocolate.
- Allow it to cool in the fridge, preferably overnight. Use a knife to cut your bark into pieces. Serve it in chunks or in treat bags.
Nutrition Information
Yield
48Serving Size
1Amount Per Serving Calories 56Total Fat 3gSaturated Fat 1gTrans Fat 0gUnsaturated Fat 1gCholesterol 0mgSodium 11mgCarbohydrates 8gFiber 1gSugar 5gProtein 1g
Have you made this Halloween Chocolate Bark recipe? Let us know how it went in the comments.
chickenruby
Monday 16th of October 2023
This looks nice and easy to make, I'll give it a go.
Laurie
Saturday 14th of October 2023
I’m betting it is a big hit!
Helen at the Lazy Gastronome
Saturday 14th of October 2023
I love this - the eyeballs really make it fun!!
Paula Short
Friday 13th of October 2023
Lisa, this is such a cute idea for a party. It seems easy to make as far as not having to bake anything. I have issues with burning things so this sounds right up my alley. Lol.
Laura @ Our Grand Lives
Wednesday 11th of October 2023
Pinning this for our next family Boo Bash! Simple and adorable! THANK YOU!