
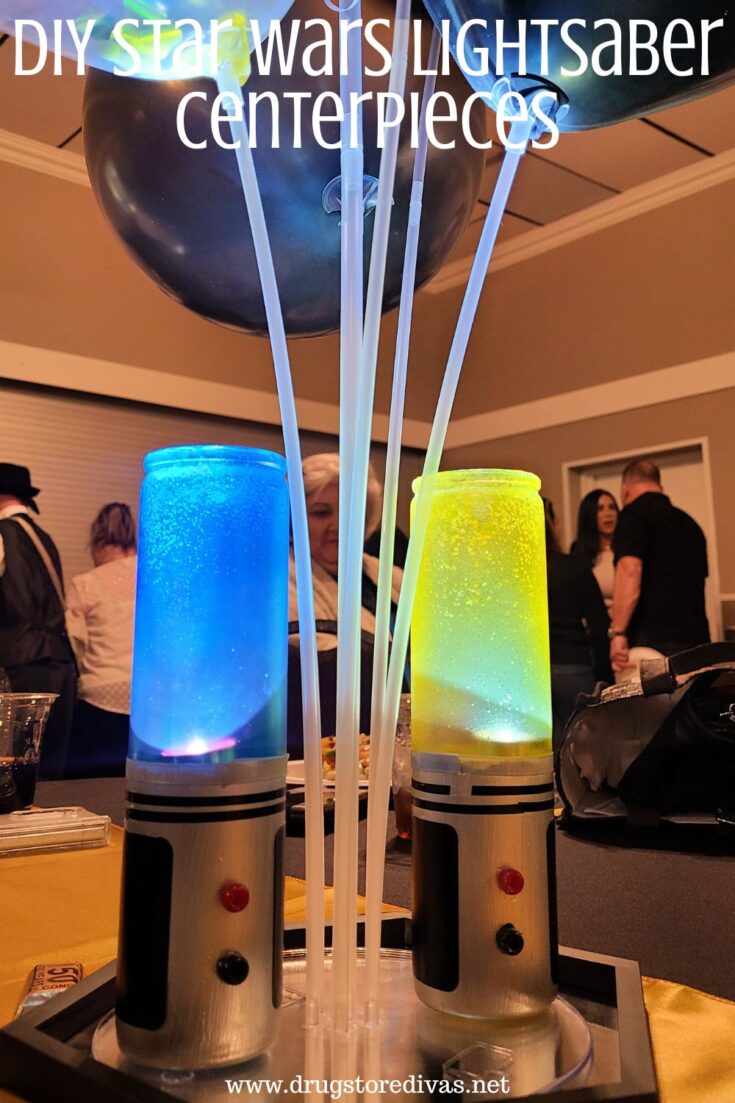
Find out how to make your own DIY lightsaber centerpieces for your next Star Wars party or themed event using simple supplies and the step-by-step directions in this post.
For more crafts, check out all of our DIY posts.

Star Wars came out almost 50 years ago and it’s still so popular. Case in point, my cousin made these DIY Star Wars Lightsaber Centerpieces for her friend’s 50th birthday celebration, which was, of course, Star Wars themed.
Maybe you’re throwing a birthday party too or just want to do something fun for May 4th (you know, “May The Fourth Be With You”).
No matter your reason, you should make these lightsaber centerpieces.
They look impressive and difficult, but I’ll let you in on a secret. They’re made from common items you can easily find in a craft store, dollar store, or Walmart.
And, if you follow our step-by-step instructions, they’re pretty easy to make too.


If you’re making these for a Star Wars-themed party, you might need some gifts for the guest of honor. For some ideas, check out our list of gifts for Star Wars fans. There are ideas for soap, LEGO sets, and everything in between.
DIY Star Wars Lightsaber Centerpieces
Affiliate links are included in this post and Drugstore Divas may make a small commission if you use them.
DIY Star Wars Lightsaber Centerpieces Supplies:
You can get the full list of supplies in the how to card below.
- Tall glass candles – We use 8-inch candles, which Dollar Tree calls “tall” glass candles. They’re similar to glass prayer-style candles with wax inside.
- Frosted glass spray paint – This paint gives a semi-transparent, etched look to the glass candles, creating a cool effect when the flashlight is turned on.
- Mini flashlights – You need these to be about 4-inches, so they’re small enough to be hidden in the bottom half of your glass candle.
- Pencil – You’ll use this to measure onto the glass.
- Silver paint – Cheap acrylic paint works best. You could also use spray paint, but it may come out streaky.
- Paint brush – You need this to paint the silver paint onto the glass and also to stir the Mod Podge and food coloring together.
- Mod Podge – This is mixed with food coloring to add color to the top of the lightsaber.
- Food coloring – Gel food coloring will give you more vibrant colors, but traditional food coloring works too.
- Cup – You need something to mix together the Mod Podge and food coloring.
- Decorations – You’ll need silver ribbon, black chalkboard stickers, electrical tape, and beads (plus glue) to decorate the lightsabers’ handle and grip.
How To Make DIY Star Wars Lightsaber Centerpieces:
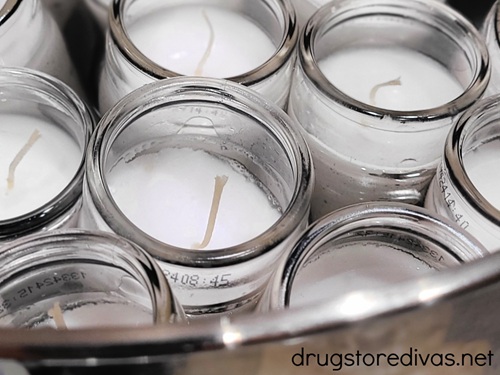
We’re starting with tall glass candles, but we only want the glass portion, not the candle. In theory you could use tall glasses and skip the next couple steps, but those are actually more expensive than buying the tall candles at the dollar store.
Remove any stickers from the candles.
If there’s any stickiness left behind, you can remove it with a little Goo Gone.
Put all the candles into a large pot of water on the stove. Heat over medium heat until the water heats up enough to melt the wax in the candles.
Carefully pour the wax into a different container so you can save it for future projects. Personally, I pour it into silicone molds to make wax melts. If you are going to throw your wax away, please remember not to toss the wax down the sink.
If all the wax isn’t out, you can pour hot water (not boiling) into the candles and it’ll float all the extra wax to the surface so you can remove it.
Just be really careful if you do this because you don’t want the glass to crack.
Dry your candles.
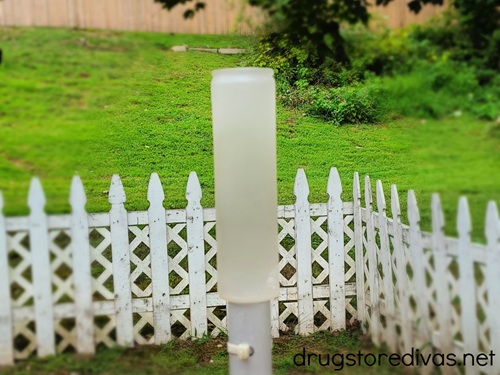
Spray paint the entire outside with the frosted glass spray paint.
Spray it thinly and from far away. If you spray it too close or too thick, it will come out streaky.
Quick note: You want to spray paint outdoors, not indoors, in a well ventilated area. You can put these on a piece of scrap paper to spray them. My cousin actually stood them on an umbrella stand for an outdoor table.
Let the paint dry completely.
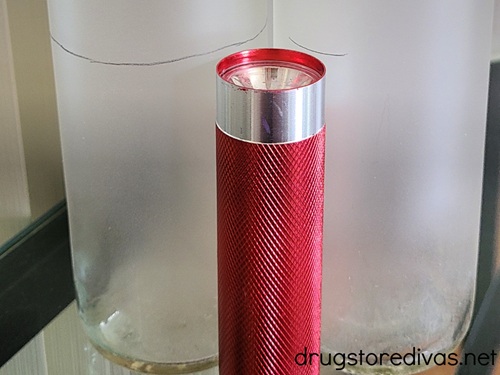
Place the flashlight next to the candle.
Measure where it lands and add a light pencil mark there.
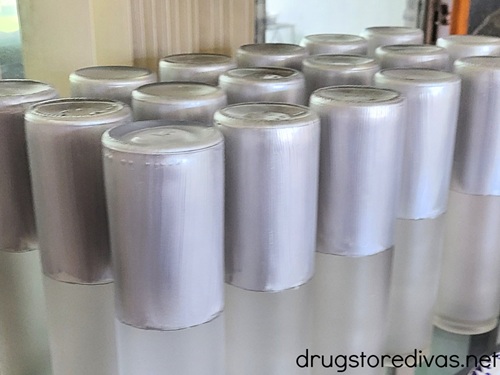
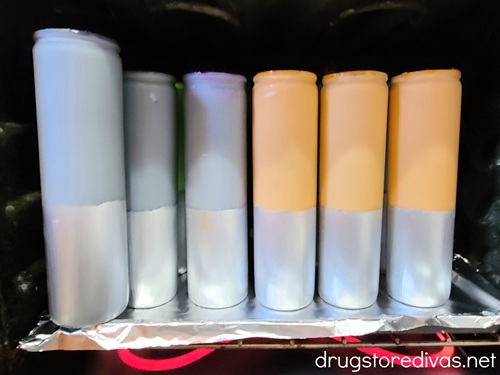
Apply the silver paint from the bottom of the glass candle to the line you just drew.
You want this to be completely opaque to hide the flashlight, so you may need to paint multiple layers.
Don’t worry about making the line completely straight. You’re going to cover this when you’re decorating.
Let the paint dry completely.
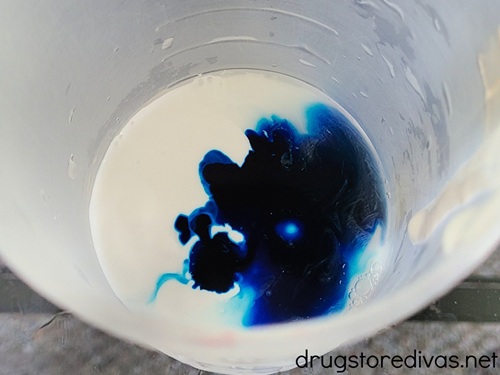
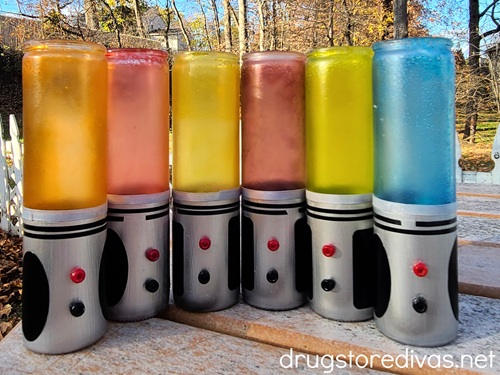
In a small cup, mix together Mod Podge with some water and food coloring.
There’s no real measurements to this. You just have to eyeball it based on how opaque or transparent you want your lightsabers.
In this post, we use mostly Mod Podge with only a couple drops of food coloring.
If I had to guesstimate, I’d say it’s about 1/4 cup of Mod Podge, 1 to 2 tablespoons of water and 10 drops of traditional food coloring (or about four drops of gel food coloring).
You’ll be swirling this around the candle and pouring most of it out to reuse for another candle, so don’t feel like you need to make a ton of it. A small amount goes a long way.
Stir with the back of the paintbrush until the color is evenly mixed and the Mod Podge is a consistency you can pour.
The water is used to thin out the Mod Podge so it spreads easily. If you don’t feel like it will pour, you can add more water. But, you don’t want the Mod Podge to be too thin because then the color will be too transparent.
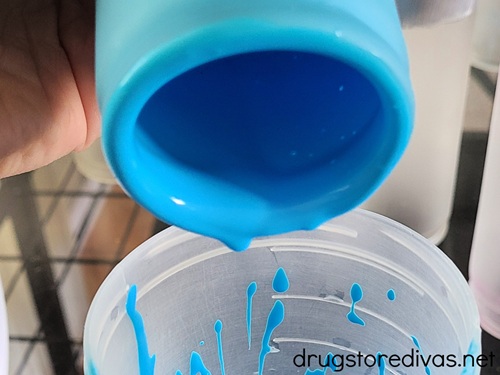
Pour the color into the candle, gently swirling it around until the entire inside of the candle is covered.
This is really difficult if you’re using just paint (I learned that from making our DIY No. 2 Pencil Holder), but it’s pretty easy with Mod Podge and water.
Pour the excess paint out into a reusable container (or back into the original plastic cup).
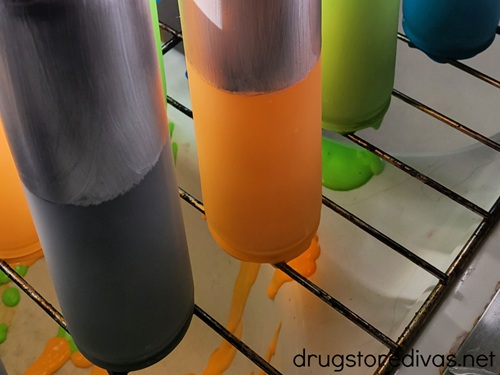
Place the candles upside down and allow them to dry for two hours.
If you craft a lot, we suggest getting a wire rack that’s strictly for craft projects (not food). You can place that on top of a foil-lined baking sheet.
Set the candles on top and let them drip that way. The aluminum foil will catch the excess paint and you can just ball it up and throw it out for easy clean up.
You could also set the candles on a piece of scrap paper as well. Just be careful of this because if you use thin paper, the excess paint could pool, saturate the paper, and rip it, getting paint all over whatever’s under the paper.
After two hours, place the candles on a foil-lined baking sheet in an oven preheated to 250 F for 30 minutes to seal the glue to the candles.
Make sure that the candles are completely empty and dry before putting them in the oven.
After 30 minutes, remove the candles from the oven and let the candles sit overnight on a counter to cool.
The next day, it’ll be time to decorate.
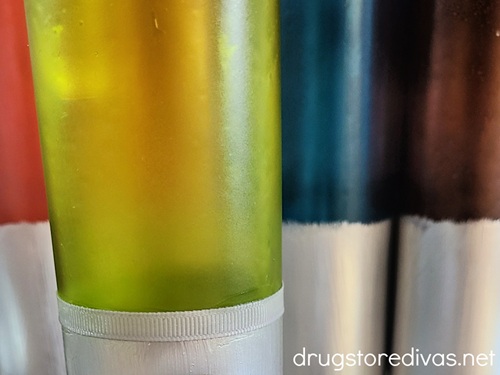
Wrap a piece of silver ribbon around the candle, where the silver paint ends.
You can either glue it down with a little white glue or Mod Podge. Either will work.

Take your chalkboard stickers and electrical tape and stick them on the silver paint to create the look of your lightsaber.
You can either copy your favorite lightsaber or decorate them however you feel is best.
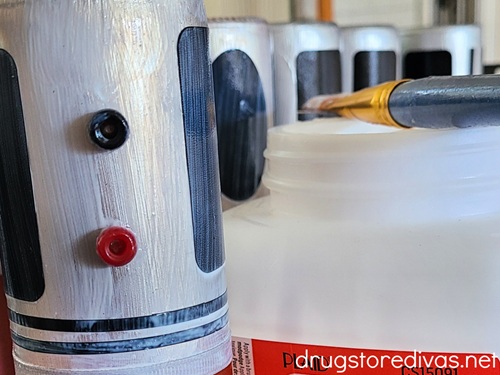
Glue a red and black bead onto the handle to make the lightsaber’s buttons.
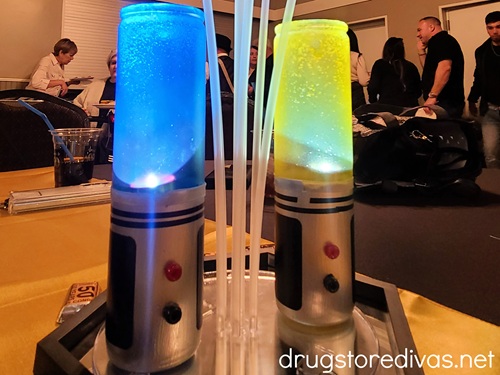
When you’re ready for your party, turn the flashlight on and carefully put it in the bottom of the lightsaber, then place them on top of decorative mirrors.
You don’t want to glue the flashlight to the bottom of the lightsaber because you won’t be able to get it out after that. Even if you don’t save the lightsaber centerpieces to reuse them, you still want to keep the flashlights.
DIY Star Wars Lightsaber Centerpieces: Frequently Asked Questions
We don’t suggest you use real candles because of the paint that’s inside of the candle. Battery-operated mini flashlights are much safer.
You can find mini LED flashlights at Walmart, Amazon, or the dollar store. If you can’t find any, you can use battery-operated tea lights, although they won’t give off as much light as you get from a flashlight.
Yes. Just combine different colors of food coloring to make different colors. We don’t suggest mixing too much because you could end up with a dull gray, but mixing two primary colors works well.

More DIY Centerpiece Tutorials:
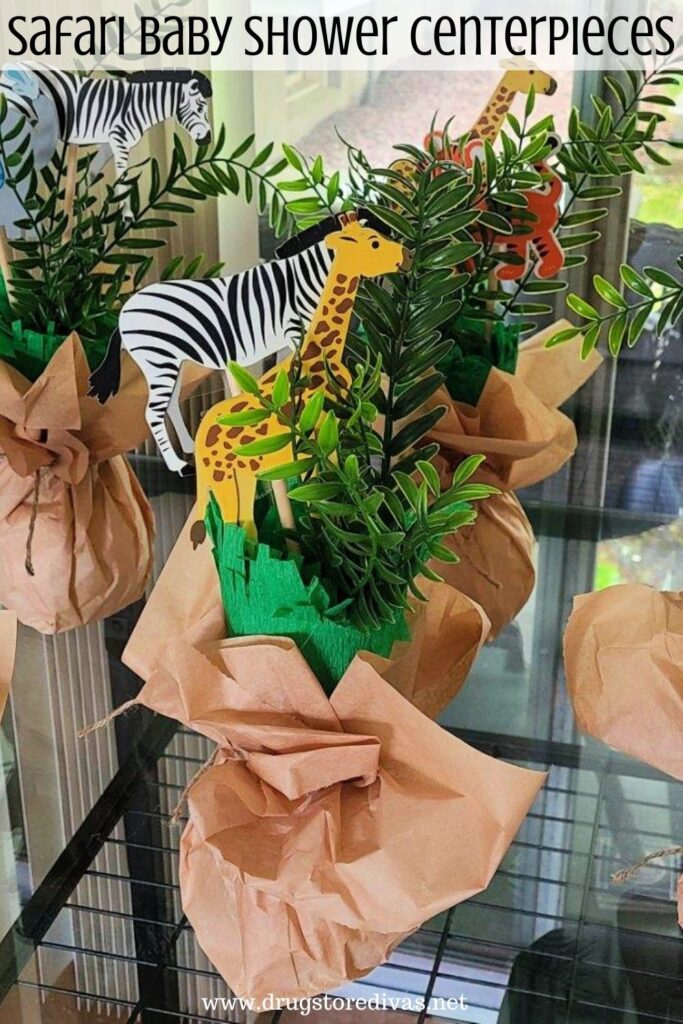
If you’re planning more themed parties and are looking for other centerpiece ideas, don’t forget about our Safari Baby Shower Centerpieces. We also have a The Cat in the Hat centerpiece tutorial and a The Lorax centerpiece tutorial that would be perfect for a Dr. Seuss-themed party.
DIY Star Wars Lightsaber Centerpieces
Find out how to make your own DIY lightsaber centerpieces for your next Star Wars party or themed event using simple supplies and the step-by-step directions in this post.
Materials
- 8-inch tall glass candles (1 per centerpiece)
- 1 can frosted glass spray paint
- Mini flashlights (1 per centerpiece)
- Silver acrylic paint
- Mod Podge (1/4 cup per centerpiece)
- Food coloring (4 to 10 drops)
- 1/4-inch silver ribbon
- Black chalkboard stickers (in oval)
- 1/4-inch electrical tape
- Beads (1 red and 1 black per centerpiece)
Tools
- Pencil
- Paintbrush
- Scissors
- Cup
Instructions
- Remove any stickers from the candles.
- Put all the candles into a large pot of water on the stove. Heat over medium heat until the water heats up enough to melt the wax in the candles.
- Carefully pour the wax into a different container so you can save it for future projects.
- Dry your candles.
- Spray paint the entire outside with the frosted glass spray paint. Let the paint dry completely.
- Place the flashlight next to the candle. Measure where it lands and add a light pencil mark there.
- Apply the silver paint from the bottom of the glass candle to the line you just drew. Let the paint dry completely.
- In a small cup, mix together Mod Podge with some water and food coloring (About 1/4 cup of Mod Podge, 1 to 2 tablespoons of water and 10 drops of traditional food coloring or about four drops of gel food coloring).
- Stir with the back of the paintbrush until the color is evenly mixed and the Mod Podge is a consistency you can pour.
- Pour the color into the candle, gently swirling it around until the entire inside of the candle is covered.
- Pour the excess paint out into a reusable container (or back into the original plastic cup).
- Place the candles upside down and allow them to dry for two hours.
- After two hours, place the candles in an oven preheated to 250 F for 30 minutes to seal the glue to the candles.
- Remove the candles from the oven and let the candles sit overnight on a counter to cool.
- Wrap a piece of silver ribbon around the candle, where the silver paint ends. You can either glue it down with a little white glue or Mod Podge.
- Take your chalkboard stickers and electrical tape and stick them on the silver paint to create the look of your lightsaber.
- Glue a red and black bead onto the handle to make the lightsaber’s buttons.
- When you’re ready for your party, turn the flashlight on and carefully put it in the bottom of the lightsaber, then place them on top of decorative mirrors.
Notes
Have you made these DIY Star Wars Lightsaber Centerpieces yet? Let us know your thoughts in the comments.