

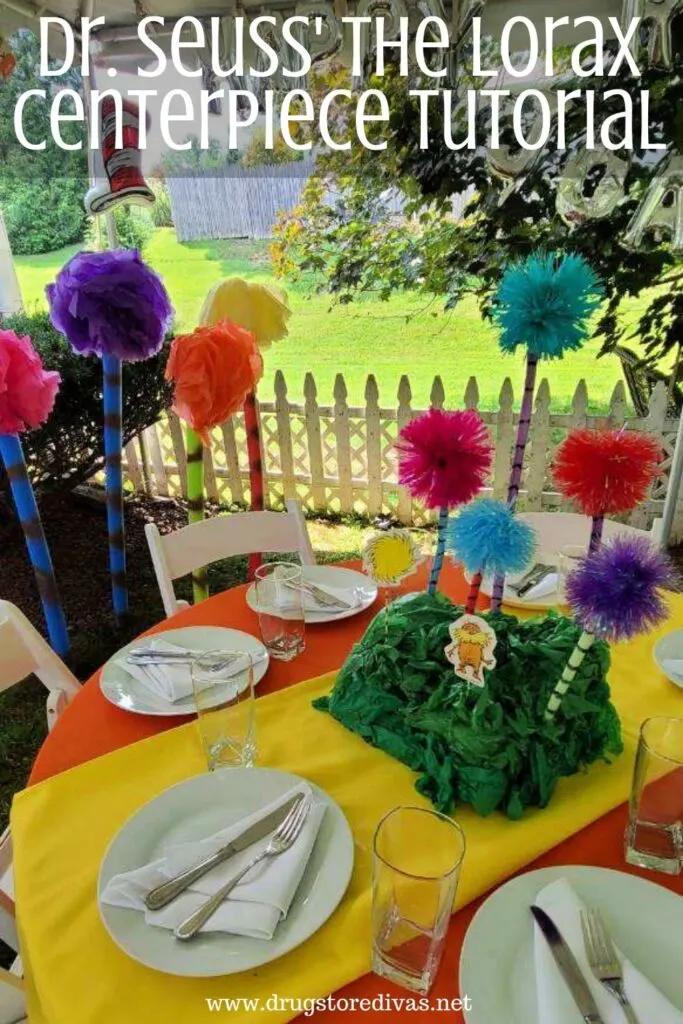
One of the best things about having a themed party is that you’re able to do as much or as little as you want. Personally, I think you should go all out. If you have a Dr. Seuss party, follow our Dr. Seuss’ The Lorax Centerpiece tutorial to make the cutest centerpiece for your party.
Keep in mind that you have a couple options for centerpieces at your party.
You can make just one of these centerpieces and put it at the main table or the table where the food will be. You can make multiples of this centerpiece and have one at each of your tables. Or you can make one of these centerpieces, one of other Dr. Seuss themed centerpieces (like our The Cat In The Hat centerpiece) and have each table’s centerpiece be based on a different Dr. Seuss book.
The latter is what my cousin did. She’s the one that made this The Lorax centerpiece for a retirement party she threw for her mom.
Dr. Seuss’ The Lorax Centerpiece Tutorial
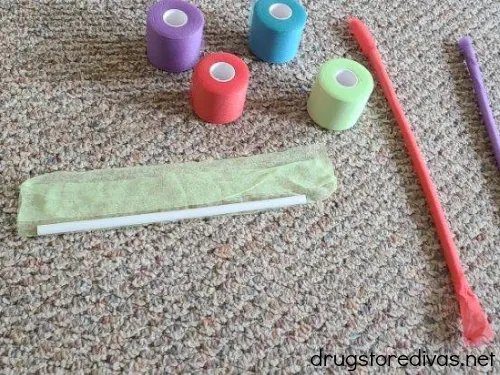
Dr. Seuss’ The Lorax Centerpiece Supplies:
- 2 3.8-inch foam half balls
- 1 2.8-inch foam half ball
- 1 piece rectangular foam board
- E6000 glue
- Green tissue paper
- School glue
- PVP pipe cutter
- 1/4 inch PVC pipe
- Scissors
- Lime green taping pre wrap
- Coral taping pre wrap
- Blue taping pre wrap
- Purple taping pre wrap
- Black paint
- Paint brush
- 4 metallic pom pom bows
- Lorax cut out
How To Make A Dr. Seuss’ The Lorax Centerpiece:
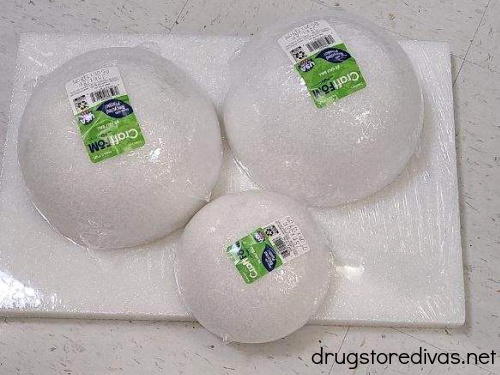

Arrange the foam half balls on the rectangular foam board to make them look like hills. Glue them in place using the E6000 glue.
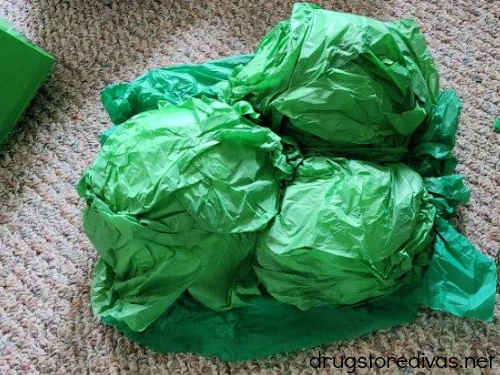

Take green tissue paper, crumple it, and glue it with school glue to the top of the foam to make a grassy field look. Make sure to cover the foam half balls and any exposed rectangular foam board, including the sides of the board.
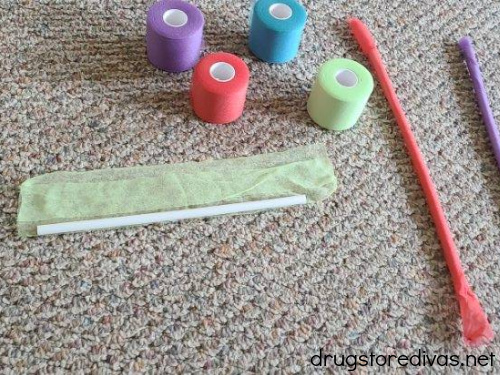
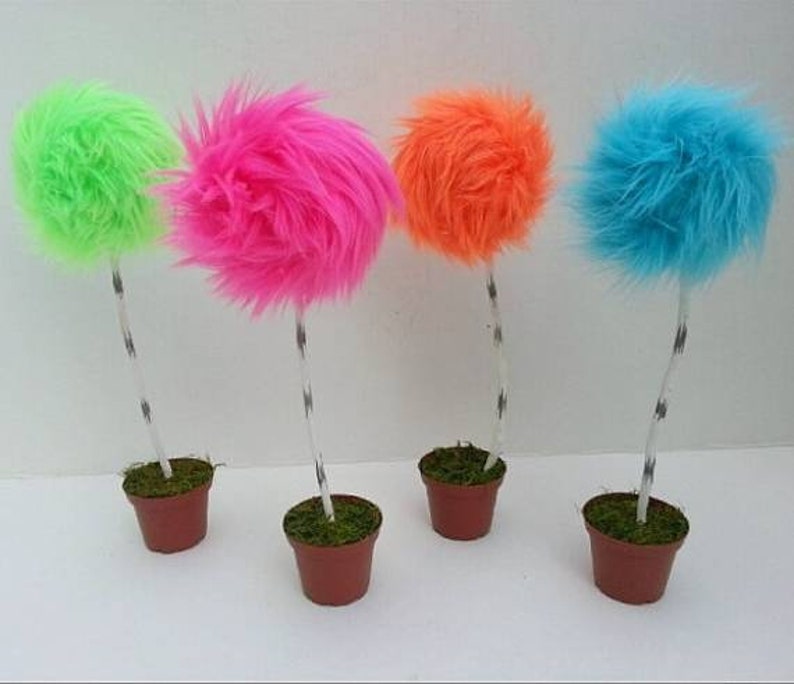
Use the PVC pipe cutter to cut the PVC pipe to the sizes you want the Truffula trees. This will vary based on how tall you want to make your centerpieces.
If you vary the length of the PVP pipe, you’ll vary the height of the Truffula trees, making your centerpiece more interesting to look at.
In this The Lorax centerpiece, we made five Truffula trees, which means you’d need to cut five pieces of PVP pipe. You can add more or less, depending on how full you want your centerpiece to be.
Small aside: A PVC pipe cutter is the easiest way to cut PVP pipe, since that’s what it’s designed for. If you don’t have one, you could use a hand saw to cut the PVP pipe.
Cut a piece of taping pre wrap that’s two inches longer than your PVP pipe.
Rolled each piece of PVP pipe in the taping pre wrap roll to create the trunks of each Truffula tree. Tightly twist the excess foam at each side to keep it in place. If your taping pre wrap won’t stay closed, you can add a dab of glue to the end of it to close it. Or, you could tie it closed with a little piece of string or a twist tie.
If your taping pre wrap is thin, you may want to layer multiple pre wrap sheets.
Painted uneven black lines around each Truffula tree.
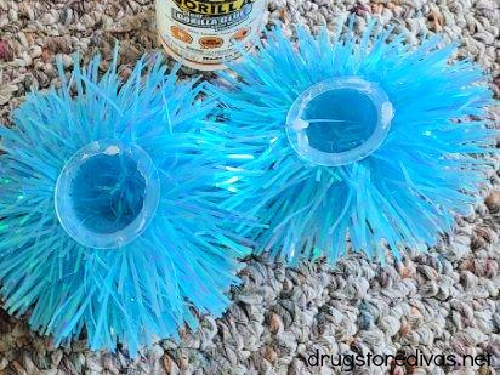
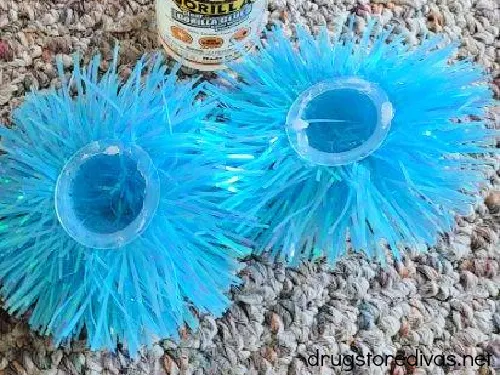
Glue together multiple metallic pom pom bows (depending on how fluffy you want the top of the tree).
Attach the pom pom bows to one end of the Truffula tree trunks.

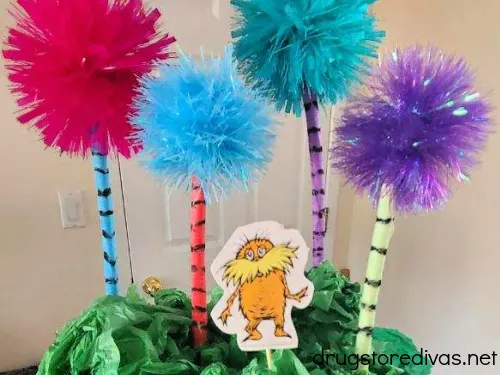
Stick your Truffula trees into the foam. Bend each tree over a little to achieve the Dr. Seuss whimsy feel.
Stick the Lorax cut out into the foam as well.
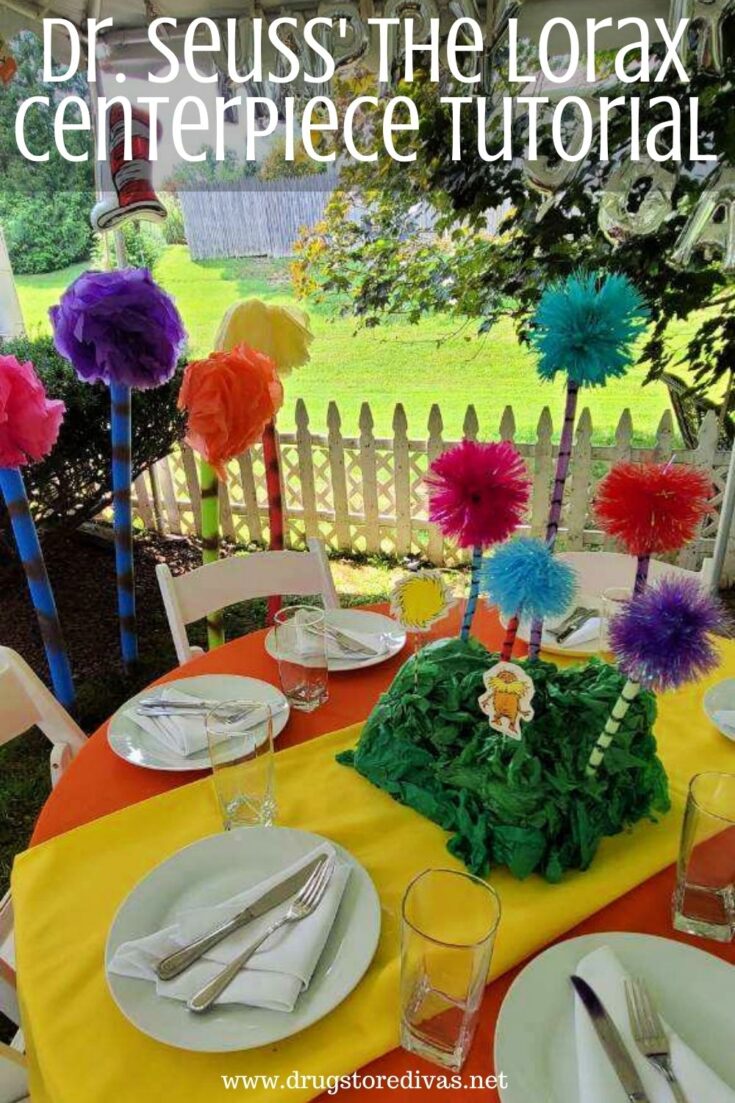
Viola! You have a Dr. Seuss The Lorax centerpiece.
Set it up on a table with orange and yellow tablecloths to match the colors in The Lorax.
![The Lorax (Classic Seuss) by [Dr. Seuss]](https://m.media-amazon.com/images/I/51cl8CESEvL.jpg)
What is The Lorax?
So there’s a chance that you’ve gotten through this post, but you have no idea what The Lorax is. Maybe we should have led with that.
The Lorax is a children’s book by Dr. Seuss. It is about the environment and the main character, The Lorax, speaks for the trees.
The story focuses on the Truffula trees, which are depicted as thin trunks, with black rings around them, and bushy, colorful tops. Those trees are the main focal point of this The Lorax centerpiece.
Dr. Seuss’ The Lorax Centerpiece Tutorial: Frequently Asked Questions
Of course. Remove the Lorax cut out and truffula trees from the base. Then, store the base somewhere where it won’t get damaged because it is pretty difficult to take it apart once it’s assembled.
The Truffula trees in our The Lorax centerpiece are made by wrapping PVP pipe in taping pre wrap.
If you ever played sports in high school and had to get something wrapped by the athletic trainer, taping pre wrap is really familiar to you.
And, even if you never went to the trainer, you may have seen it. I remember our girls soccer team using pre wrap to make headbands to hold back their hair. They also used pre wrap to keep their rolled up sleeves in place (which was a lot better than my tennis team, which used our bra straps to try and hold our sleeves up).
If you can’t find taping pre wrap, you can use tulle to wrap the PVP pipe. The tulle might be a little harder to paint the black lines on, but it’s possible
Purchase a Dr. Seuss The Lorax Centerpiece:
If you don’t want to make this The Lorax centerpiece, you can order something similar online at the following stores:


Planning a Dr. Seuss Party?
If this inspired you to throw a Dr. Seuss party, you’re in luck. We have a few other Dr. Seuss crafts that would go perfectly with your party.
- Dr. Seuss Seussville Sign Tutorial
- Dr. Seuss’ The Lorax Centerpiece Tutorial
- The Best Dr. Seuss Party Ideas
Dr. Seuss' The Lorax Centerpiece Tutorial

Enhance your Dr. Seuss party and make the centerpiece from this Dr. Seuss' The Lorax Centerpiece tutorial.
Materials
- 2 3.8-inch foam half balls
- 1 2.8-inch foam half ball
- 1 piece rectangular foam board
- E6000 glue
- Green tissue paper
- School glue
- 1/4 inch PVC pipe
- Lime green taping pre wrap
- Coral taping pre wrap
- Blue taping pre wrap
- Purple taping pre wrap
- Black paint
- Paint brush
- 4 metallic pom pom bows
- Lorax cut out
Tools
- PVC pipe cutter
- Scissors
Instructions
 Arrange the foam half balls on the rectangular foam board to make them look like hills. Glue them in place using the E6000 glue.
- Take green tissue paper, crumple it, and glue it with school glue to the top of the foam to make a grassy field look.
- Use the PVC pipe cutter to cut the PVC pipe to the sizes you want the Truffula trees. Cut a piece of taping pre wrap that’s two inches longer than your PVP pipe. Roll each piece of PVP pipe in the taping pre wrap roll to create the trunks of each Truffula tree. Tightly twist the excess foam at each side to keep it in place. Painted uneven black lines around each Truffula tree.
- Glue together multiple metallic pom pom bows. Attach the pom pom bows to one end of the Truffula tree trunks.
- Stick your Truffla trees into the foam. Bend over a little to achieve the Dr. Seuss whimsy feel. Stick the Lorax cut out into the foam as well.
Notes
Did you follow this Dr. Seuss’ The Lorax Centerpiece Tutorial to make your own Dr. Seuss party decoration? Let us know about it in the comments.