
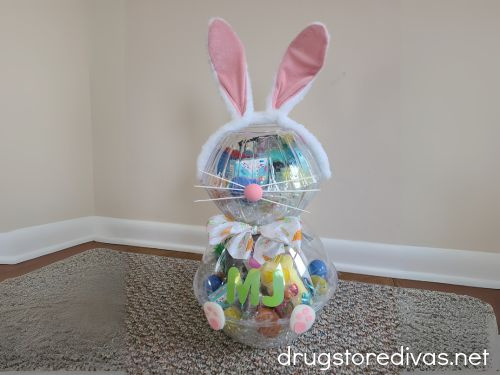
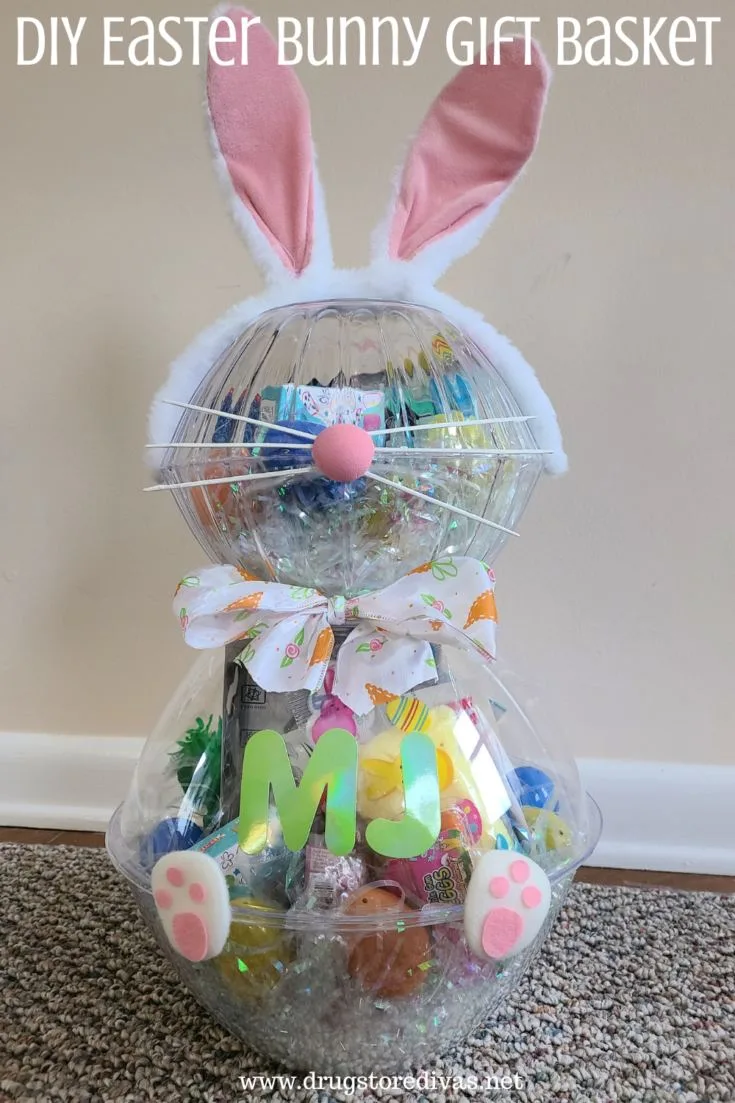
If you’re having guests for Easter this year and you want a cute way to give them Easter goodies, we’ve got the perfect way: Our DIY Easter Bunny Gift Basket. It’s made from clear bowls, Easter grass, tape, and love.
For more ways to make this the best holiday, check out all of our Easter posts.


For the first few years we lived in North Carolina, my cousin and her two kids would visit for spring break. So every year, I would make Easter baskets for them.
Now, my brother and his family come for spring break every year, so I make them baskets every year.
For the kids, I have small baskets that I reuse annually. They’re here every year, so that works out. They open their gifts, then give me back the baskets, and I refill them the next day.
But, my cousin was putting together Easter gift baskets for her coworkers’ kids this year and she couldn’t just use baskets. I mean, she could have, but the kids weren’t going to return them. So she wanted to make something super cute but also disposable (or reusable, if the adults chose that).
We brainstormed and came up with this really cute DIY Easter Bunny Gift Basket. They’re made from clear bowls, which can be reused. And they’re filled with candy and other treats.
Now, if you’re making these, use what we filled them with as a guide. You can choose any small toys and candies that the little kids you’re making these for will enjoy.

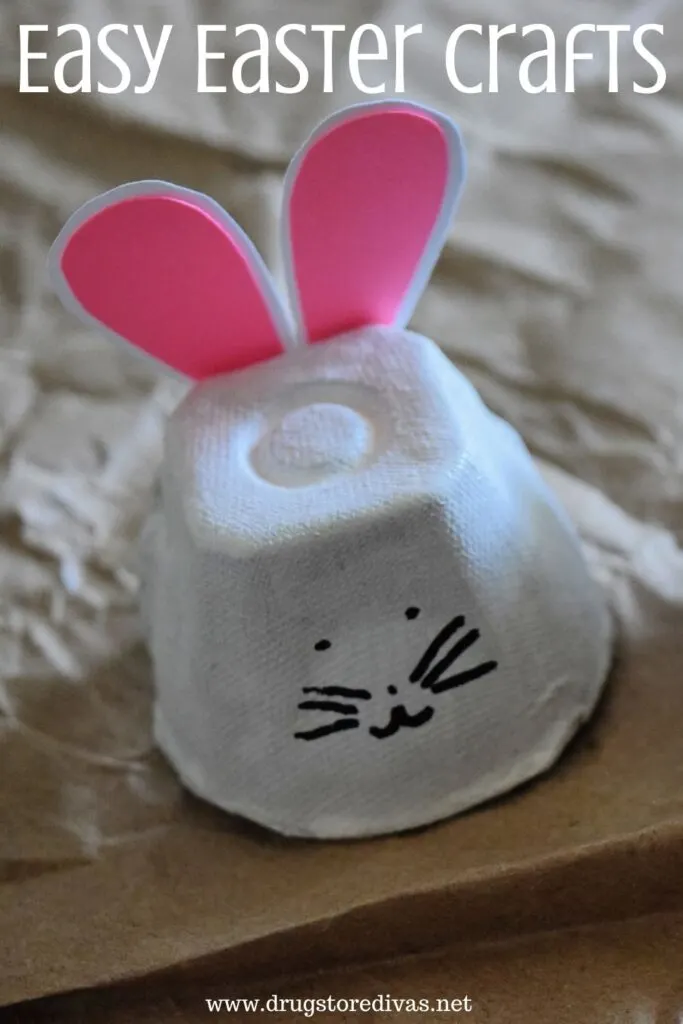
This isn’t the only fun idea we have for Easter. For more, check out our list of Easy Easter Crafts for inspiration.
DIY Easter Bunny Gift Basket
Affiliate links are included in this post and Drugstore Divas may make a small commission if you use them.
DIY Easter Bunny Gift Basket Supplies:
You can get the full list of supplies in the how to card below.
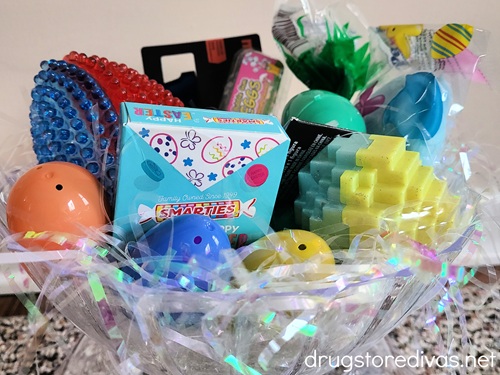
- Plastic Easter eggs – This is a cute way to hide some of the treats and to reuse the found eggs from last year’s Easter egg hunts.
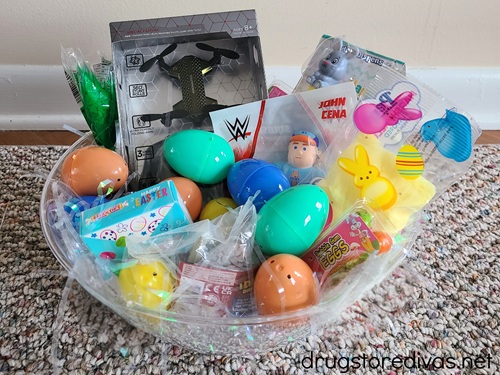
- Easter candy and small toys – Vary the sizes of what you buy. You want smaller items that can fit inside Easter eggs and larger items that will go unwrapped into the bunny. We have a huge list of Easter basket fillers to give you some more ideas.
- White paper shred – If you can find the white with iridescent mix, that’s the best. If not, the plain white works.
- Clear bowls – You’ll need four bowls in two different sizes. Two will be the body and two will be the head.
- Packing tape – You need a clear tape so you don’t see it when you’re looking at the Easter bunny basket.
- Scissors – To cut both the tape and the ribbon.
- Glue – A hot glue gun and glue works best.
- Bunny ear headband – This will go on top to look like ears.
- Pink foam ball – This is for the nose, so you want to choose one that will be appropriately sized.
- Zip ties – White zip ties are best. If you can’t find white, you can paint some white.
- Bunny feet – You can either make these or buy them already made.
- Sticker letters – These will go on the front of the larger bowl, so check the sizing of that before you buy these.
- Ribbon – Any type of festive ribbon works.
How To Make A DIY Easter Bunny Gift Basket:
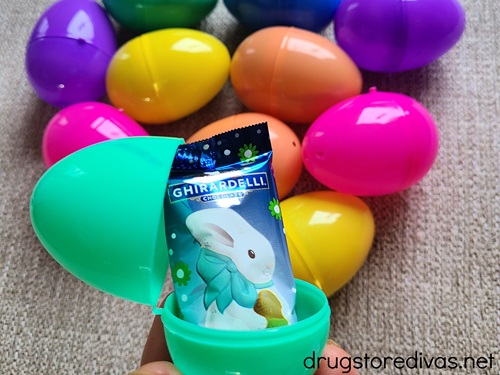
Start by filling your Easter eggs with small Easter candies.
We suggest using wrapped candy only because not all plastic Easter eggs are food grade. So, you don’t want to put something like an open marshmallow Peep into a plastic egg. Instead, choose the individually wrapped Peeps.
Put your paper shred in the bottom of one of the bigger plastic bowls.
You want to put enough to make the bowl look full, but not too much that your Easter treats won’t fit.
Fill the bigger bottom bowl with some of the candies, small gifts, and plastic Easter eggs.
Make sure to save some of the candies and gifts for the smaller bowls.
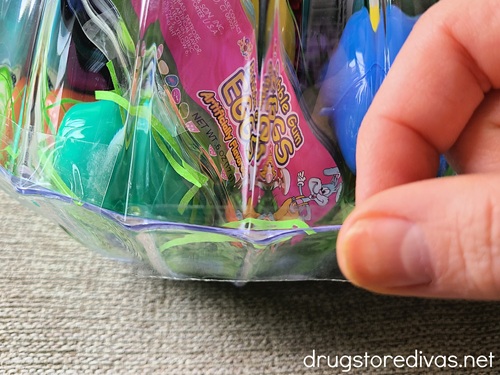
Place the other larger bowl onto the top of the filled bowl. Tape the two bowls together.
If you place the tape horizontally, it will give the tape a better grip on the two bowls and will hold them together better.
Also, you don’t have to tape the entirety of the bowls. A couple strategically placed pieces of tape will work and will also make it easier for the gift recipient to open.
Set the bowls aside.
Fill one of the small bowls with the white paper shred.
Add the remaining plastic Easter eggs, candy, and small toys.
Place the other one of the smaller bowls on top. Tape the two bowls together.
Take your smaller bowl and stick it to the top of the bigger bowls.
Now, you have two options for this. You can either hot glue them together or you can use packing tape to stick them together.
Of course, the hot glue is going to be more stable. But the packing tape means your recipient can reuse the bowls.

Now it’s time to start decorating and turning these bowls into a bunny.
Use hot glue to stick your bunny ears to the top of the basket.
The easiest way to do this is to line the inside of the headband with glue, then just stretch it over the top of the top bowls.
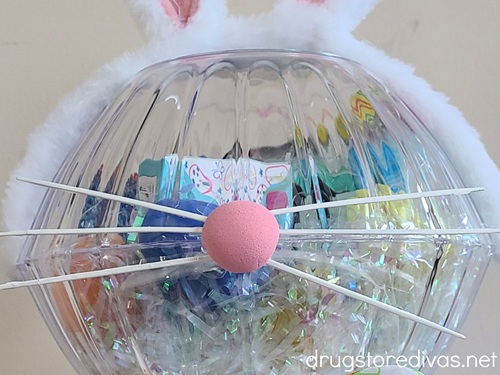
Take your pink foam ball and glue it, using hot glue, to the center of where the two small bowls are touching.
Quick note: If you can’t find a foam ball, you could use a pink pom pom instead.
Cut off the end of your zip ties and use the hot glue to glue them under the foam ball to create whiskers to complete the bunny face.
If you can’t find white zip ties, you can paint some white. Alternatively, you could use white pipe cleaners.
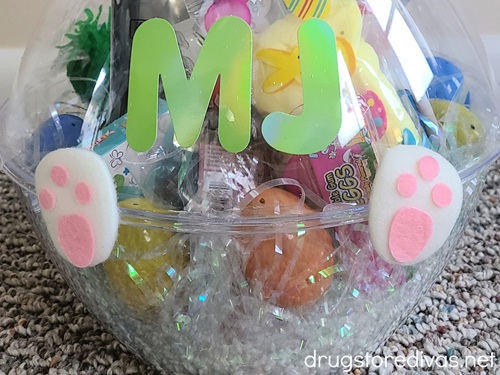
Hot glue the bunny feet to the front of the bottom bucket.
Quick note: The bunny feet in this post are from a bunny decoration. You can use whatever you find. If you’re feeling creative, you can make bunny feet out of construction paper.
Use the sticker letters to spell out the child’s name on the front of the bigger basket.
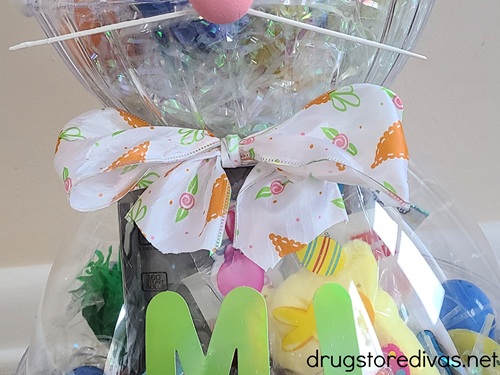
Finally, take your Easter ribbon and place it around the neck of the bunny to create a bowtie between the top and bottom bowls.
DIY Easter Bunny Gift Basket: Frequently Asked Questions
We used 11.25-inch bowls for the bottom and 8-inch fluted bowls. Why these sizes? Because that’s what was available at Dollar Tree. You can use whatever size bowls you can find.
We experimented with green Easter grass since that’s the most common, but I hated it. It felt like there was grass in the bunny’s face.
So, we took apart the bunnies and swapped the green grass for white paper shred and that looks amazing because it just looks like the white of the bunny’s fur. So, if you want to look like this one, look in the gift wrap section of the dollar store, not the Easter section, and you’ll find the paper shred we used.

More DIY Easter Baskets:
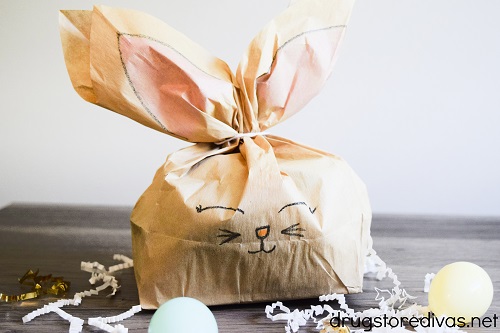
If you want to put together a fun Easter basket but this is above your skill level, that’s okay. Just grab a bag and make our Paper Bag Bunny Craft instead. And, if you love upcycling, our DIY Cereal Box Easter Basket is for you.
DIY Easter Bunny Gift Basket

If you’re having guests for Easter this year and you want a cute way to give them Easter goodies, we’ve got the perfect way: Our DIY Easter Bunny Gift Basket. It’s made from clear bowls, Easter grass, tape, and love.
Materials
- Plastic Easter eggs
- Easter candy and small toys
- White gift shred
- 2 big clear bowls
- Tape
- 2 smaller clear bowls
- Bunny ear headband
- Bunny feet
- Zip ties
- Pink foam ball
- Ribbon
Tools
- Scissors
- Glue
Instructions
- Start by filling your Easter eggs with small Easter candies.
- Put your paper shred in the bottom of one of the bigger plastic bowls.
- Fill the bigger bottom bowl with some of the candies, small gifts, and plastic Easter eggs. (Make sure to save some of the candies and gifts for the smaller bowls.)
- Place the other larger bowl onto the top of the filled bowl. Tape the two bowls together. Set the bowls aside.
- Fill one of the small bowls with the white paper shred.
- Add the remaining plastic Easter eggs, candy, and small toys.
- Place the other one of the smaller bowls on top. Tape the two bowls together.
- Take your smaller bowl and stick it to the top of the bigger bowls (either with glue or tape).
- Use hot glue to stick your bunny ears to the top of the basket.
- Take your pink foam ball and glue it, using hot glue, to the center of where the two small bowls are touching.
- Cut off the end of your zip ties and use the hot glue to glue them under the foam ball to create whiskers.
- Hot glue the bunny feet to the front of the bottom bucket.
- Finally, take your Easter ribbon and place it around the neck of the bunny to create a bowtie between the top and bottom bowls.
Notes
Did you make this DIY Easter Bunny Gift Basket? Let us know how it went in the comments.