
Throwing away our Christmas cards is always so sad. So, instead of tossing them, turn them into a DIY Christmas Card Tree Craft.
For more ideas of things to make, check out all of our DIY posts.


I love sending Christmas cards. I mean, I love sending cards in general and will do that every chance it get. But Christmas cards are such a lost tradition. With technology as it is, people don’t want to handwrite cards and mail them. They’d rather just design a card online, take a screen shot, and post it on social media.
We send out about 60 cards a year and get back the majority of those. We hang them up on our staircase all Christmas season long.
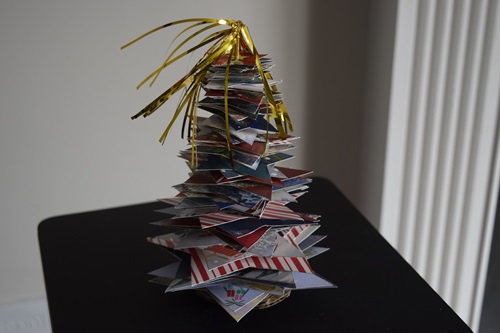
But then, when the holiday season is over, what are you supposed to do with those Christmas cards? Throwing them in the trash feels like such a sad conclusion for those beautiful cards. So instead, make this DIY Christmas Card Tree Craft. You cut your Christmas cards into pieces, then reassemble them as a tree. It’s so cool and the perfect way to upcycle those cards.
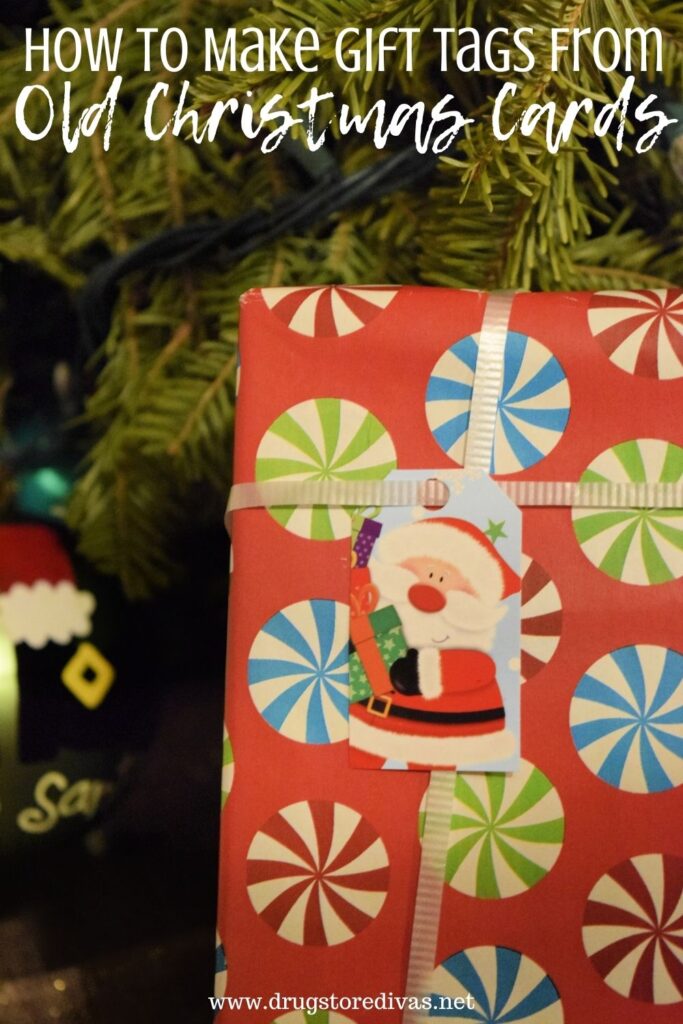

This isn’t the only way to upcycle your old cards. Another easy Christmas card upcycle idea is DIY Gift Tags.
DIY Christmas Card Tree Craft
Affiliate links are included in this post and Drugstore Divas may make a small commission if you use them.

DIY Christmas Card Tree Craft Supplies:
You can get the full list of supplies in the how to card below.
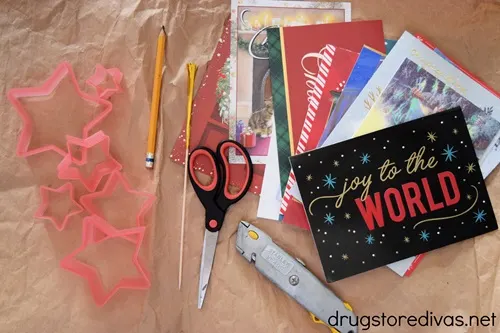
- Old Christmas cards – This is a great way to upcycle your cards from this year. Photo cards don’t work well, but traditional paper cards do.
- Set of nesting stars cookie cutters – If you can freehand stars, you can make your own templates, but that’s harder.
- Pencil
- Scissors
- X-Acto knife
- Foil Frill Pick – This forms the tower, plus acts as a star on the top.
- Cardboard box – This is to make the base. You need something sturdy or it will constantly fall over.
How To Make A DIY Christmas Card Tree:

Gather your old Christmas cards.
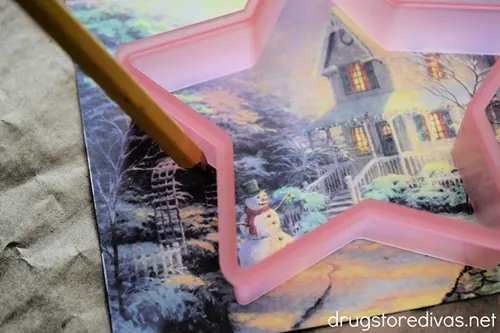
Place one of the cookies cutters on top.
Quick side note: You want to position it in a way that it’s encompassing the design of the card properly. So, if there’s a deer on it, you want to make sure the whole deer (or the very least, its head) is within the cookie cutter. You don’t want to cut at the neck.
I also avoid any holiday message that was on the card because unless you can fit all of the words into the star shape, it sort of feels a little off. But, this is your craft. So if you want to keep those holiday greetings, go right ahead.
And if there’s a large block of plain color, you want to move the cookie cutter over as well. You won’t see the entirety of the star you’re cutting when you assemble the tree, but it does make it more interesting to look at if you pay attention to the designs.
I also made sure that there wasn’t any writing on the inside of the card, behind where I was cutting. That doesn’t really matter that much, since that side will be facing the bottom of the tree, but I do just think it looks a little neater without writing underneath.

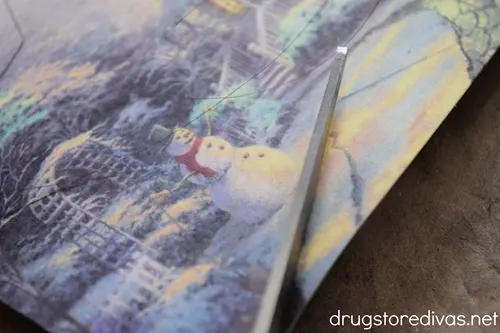
Trace the cookie cutter.
Use various sized cookie cutters to make multiple stars from one Christmas card.
Cut them out and set them aside.
Continue doing this until you’re out of cards.
Try and cut an even number of each sized star. That will give your tree a more symmetrical shape.

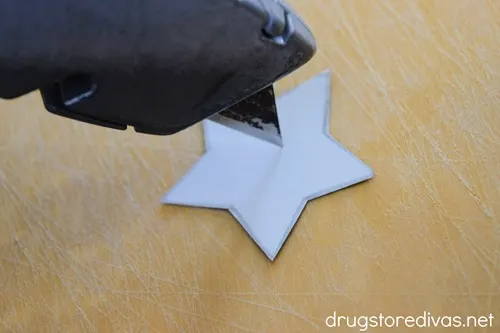
When you’re done with the stars, use an X-Acto knife to cut a small X in the center of each star.


Stick the Foil Frill Pick through each star, starting with the smallest piece and ending with the largest piece.


When you’re done, be sure to stagger the stars so that the points on each star aren’t right on top of each other. You want to give it a little bit of movement.

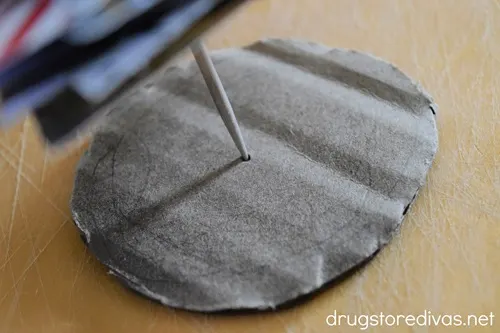
If your tree can stand up now on its own, great. Mine couldn’t. So I cut two circles from a cardboard box and poked the bottom of the Foil Frill Pick through it to help it stand. The cardboard gets hidden by the bottom of the card stack, so you can’t see it when the tree is on display, but it does give it some stability.
If you do that, you can write the year at the bottom so you know what year these Christmas cards were from.
Then, you can make a new one every year with that year’s cards and set them up with the rest of your Christmas decorations.
DIY Christmas Card Tree: Frequently Asked Questions
If you don’t get enough cards to make a full tree, you can use a piece of cardstock (or a couple pieces) to supplement your tree. Red or green paper would work best because that would match the Christmas theme, but a lot of holiday cards have snowy scenes of them, so blue would work too.
I wouldn’t suggest using scrapbook paper because it’s a little thin and the pieces wouldn’t hold up well over time.
Worst case scenario, you can run to the dollar store the day after Christmas and purchase a pack of blank cards to fill your tree.
You don’t need any glue for this. As long as you make a very thin X, then stick the Foil Frill Pick through the center to make a small hole, gravity will actually just hold the star shape exactly where you leave them.
I ordered a pack of Foil Frill Picks online. I like these as a tree topper because the foil at the top of the tree adds a bit of drama. Plus, that means you don’t have to use something like a gold star sticker at the top of your tree.
A nested star shaped cookie cutter set really gives the tree a festive shape, since it’s like a star on top of a Christmas tree. Plus, when you draw a Christmas tree shape, you give it points that get larger as you get to the bottom, so this mimics that.
If you would rather more of a cone shape, you could use a nested circle shaped cookie cutter set instead.
And, if you don’t want to buy either, I’m sure you could find free printable templates for multiple sizes of stars or circles online. Print those out onto card stock, then use them as stencils for your tree.
And, if you think the foil is too long (I don’t, obviously), you could trim it until it fits your aesthetic.

More Christmas Craft Ideas:
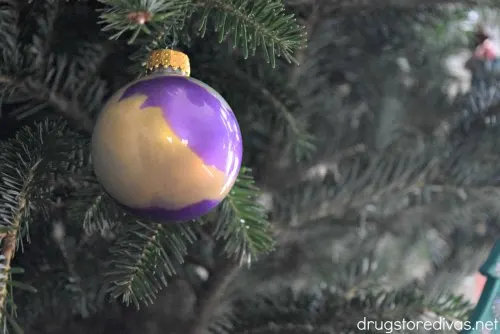
If you’re in the holiday spirit and want to make some more fun Christmas crafts, check out our DIY Paint Swirl Ornament and our DIY Snow Globe Mason Jar Toppers For Candy Holders. Those are both really easy crafts, they just take a little bit of time.
And if you want something to do with any leftover cards you have after making this craft, make our DIY Christmas Card Magnets.
DIY Christmas Card Tree Craft
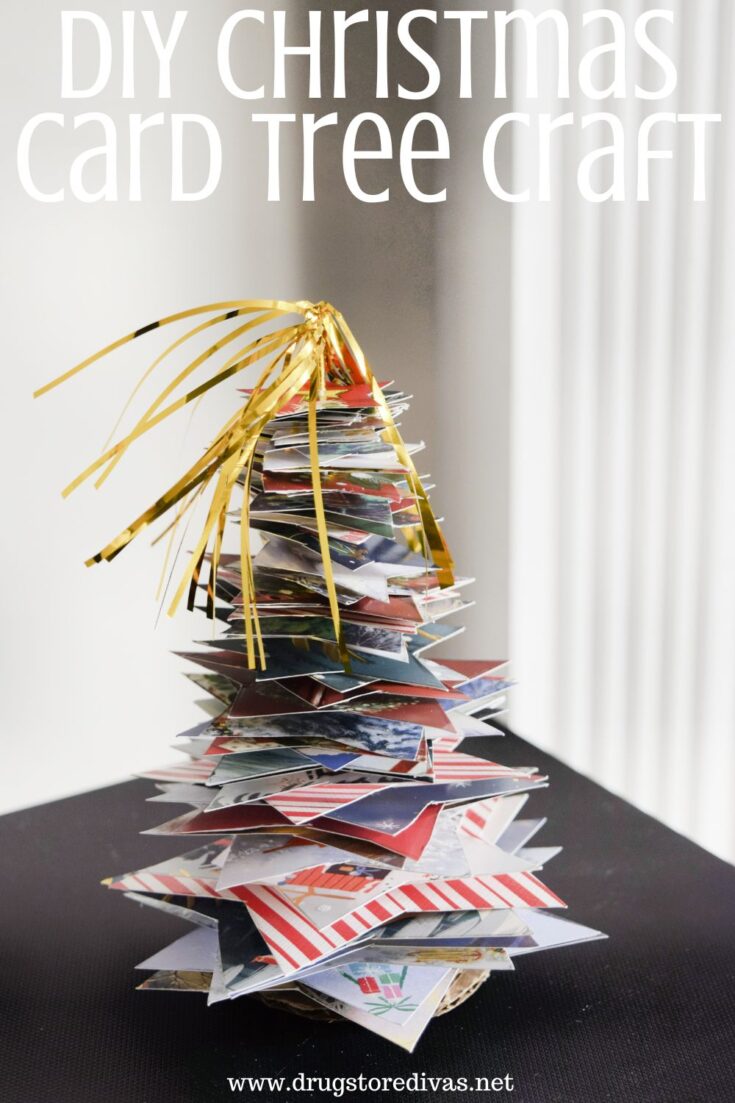

Throwing away our Christmas cards is always so sad. So, instead of tossing them, turn them into a DIY Christmas Card Tree Craft.
Materials
- Old Christmas cards
- Foil Frill Pick
- Cardboard box (optional)
Tools
- Set of nesting stars cookie cutters
- Pencil
- Scissors
- X-Acto knife
Instructions
- Gather your old Christmas cards.
- Place one of the cookies cutters on top.
- Trace the cookie cutter.
- Use various sized cookie cutters to make multiple stars from one Christmas card.
- Cut them out and set them aside.
- Continue doing this until you’re out of cards.
- Try and cut an even number of each sized star. That will give your tree a more symmetrical shape.
- When you’re done with the stars, use an X-Acto knife to cut a small X in the center of each star.
- Stick the Foil Frill Pick through each star, starting with the smallest piece and ending with the largest piece.
- When you’re done, be sure to stagger the stars so that the points on each star aren’t right on top of each other. You want to give it a little bit of movement.
- Cut two circles from a cardboard box and poke the bottom of the Foil Frill Pick through it to help it stand.
Notes
Have you made this DIY Christmas Card Tree Craft with your old cards? Let us know how it went in the comments.
Donna @ Modern on Monticello
Monday 29th of January 2024
I always struggle with throwing out cards so this is a really good idea.
Joanne
Saturday 27th of January 2024
That is such a great idea; much better than just throwing all those beautiful cards away! I'm impressed that you get so many cards back. I mail out 50 or so each year but we're lucky if we even get 20 or 25 cards since so many of our friends and family don't exchange cards at all.
Jennifer Wise
Friday 26th of January 2024
This is a brilliant idea! I love this! Pinning! Thanks for sharing this post at the Will Blog for Comments #22 linkup. Hope to see you there next week, too.