
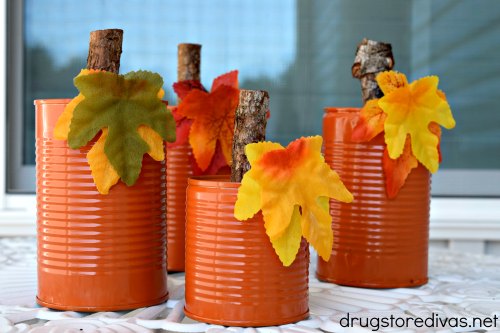
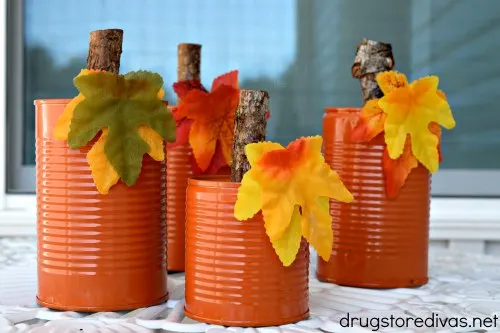
These DIY Upcycled Tin Can Pumpkins are easy to make. And there’s a good chance you already have the basic supplies for these rustic pumpkins at home.
For more crafts, check out all of our DIY posts.


It’s never my intention to make so many upcycled holiday decorations. Or maybe it is. See, I love making holiday decorations that you can keep forever. But if you make them from upcycled materials, like these Easy Upcycled Tin Can Pumpkins, and something happens to them, you won’t worry.
These rustic tin can pumpkins are just like that.
They’re cute and adorable, but not irreplaceable.
Actually, when I was making these, I set them on our screened in porch to dry. And a gust of wind came and knocked one of them onto the concrete floor. Of course, the top edge of the tin can is what hit, and the impact took a little of the paint off.
But, these tin cans were rescued from the recycle bin. So they’re okay with a few bumps and bruises. Plus, now they’re rustic pumpkins that way.
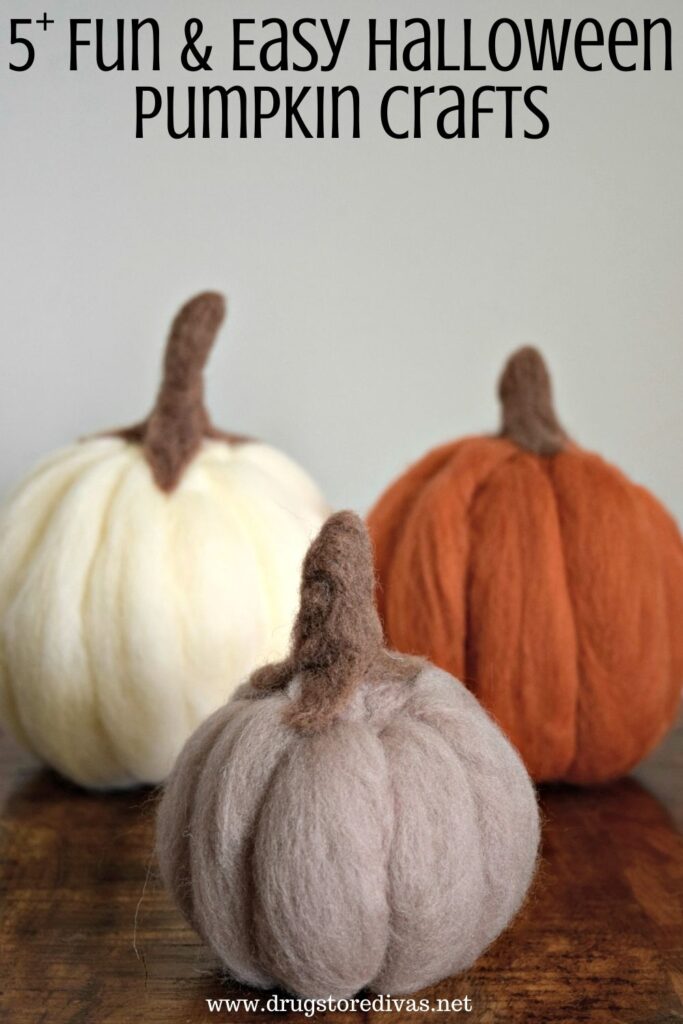

Speaking of pumpkin crafts, if you like these, be sure to check out our list of Halloween pumpkin crafts for other fun ideas.
Easy Upcycled Tin Can Pumpkins Tutorial
Affiliate links are included in this post and Drugstore Divas may make a small commission if you use them.

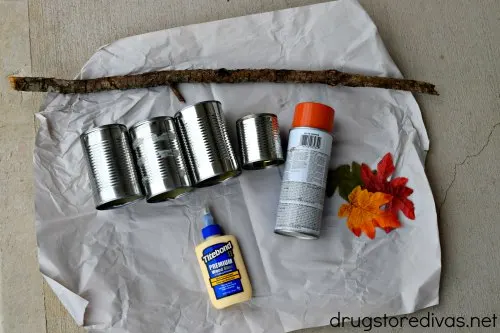
Easy Upcycled Tin Can Pumpkins Supplies:
You can get the full list of supplies in the how to card below.
- Scrap paper – This is so you can spray and not stain your house.
- Empty tin cans – Soup, vegetable, or bean cans that have been clean work best. If you can get varying sizes, even better.
- Spray paint – You want bright orange for the pumpkins.
- A large stick – Any stick you find in your backyard will work.
- Miter saw – Using a miter saw is much easier than trying to saw this with a non-electric saw.
- Wood glue – You can substitute a hot glue gun and glue sticks if you have to.
- Artificial maple leaves – The green ones look more like pumpkin leaves; the orange ones go with a fall aesthetic.
- Sticky dots – If you can’t find sticky dots, Glue Dots would work well also.
How To Make Easy Upcycled Tin Can Pumpkins:

Wash the inside of the cans.
Be really careful because if you used a can opener to open the can originally, the rough edges around the inside of the can are going to be a lot sharper than you expect. (Trust me. I learned that the hard way when I made our Homemade Football Flatware Holder from a tin can).
Pull any labels off the tin cans. Try and remove any adhesive left behind on the outside of the can.
If you can’t remove all the adhesion, that’s okay. Just make that side the back of the can pumpkin and have it face the wall. No one will know. If you’re determined to, Goo Gone is really good at removing it.
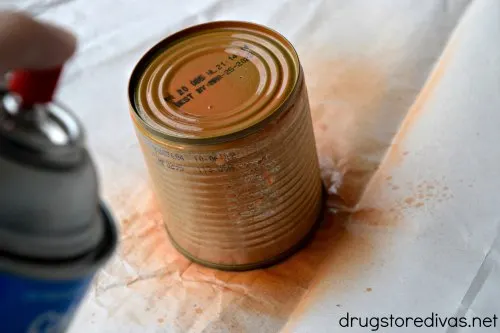
Put the tin cans open side down on a piece of scrap paper and lightly spray the first coat of spray paint on them.
I stress the word lightly.
You can do many coats of light spray paint to get the desired color and thickness. But if you start with a heavy coat, it will drip and form droplets and paint lines down your tin cans that you can’t remedy. Thin coats don’t drip like this.
Let the thin spray paint layer dry about 15 minutes. Spray a second coat of orange paint and let it dry about 15 minutes.

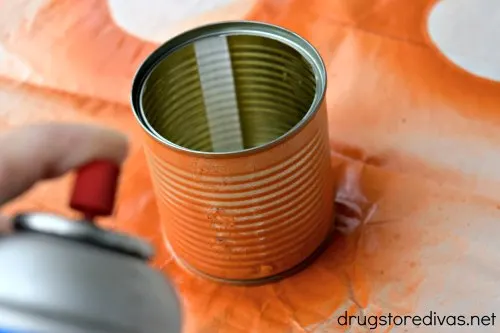
Flip the cans over so the open side is up.
Spray a layer of spray paint and let it dry 15 minutes.
Flip the cans back so the open side is the bottom of the can pumpkin.
Let the cans dry overnight.
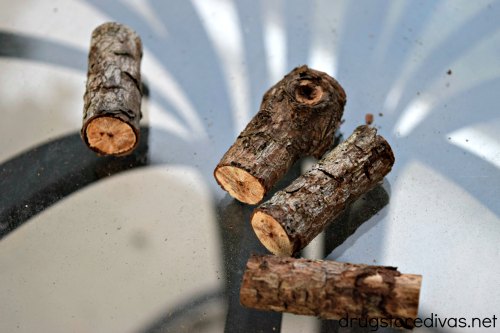
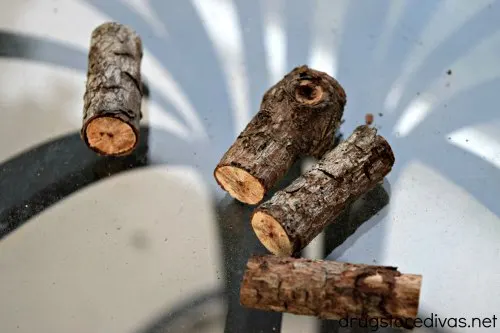
Take a stick — just a regular old stick you found in the backyard. Use a miter saw to cut off the edge of the stick so you start with a flat, straight end.
Cut off a two-inch chunk of stick for each of your spray painted tin cans.

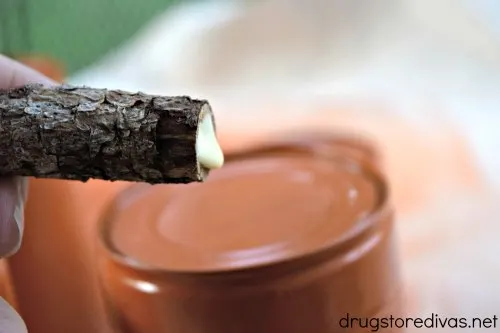
Add a dab of wood glue to one of the ends of the stick chunk and affix it in the center of the top of the cans.
If you don’t have wood glue, E6000 glue will also work.
Side note: If you don’t want to use a stick for this, you could use a wine cork for the pumpkin stem instead.
Let it dry.
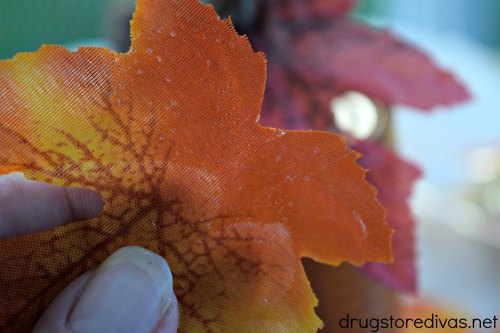

Pick two artificial maple leaves per pumpkin. Rub sticky dots to the leaves, then affix the leaves to the pumpkin.
Set them up wherever you need some decorations.
If you wanted to make these more of a fun Halloween craft and less like generic fall decorations,
If you make a bunch of different pumpkin faces on different sized tin cans, you can make a whole pumpkin family, which would just be adorable.
Tin Can Pumpkins: Frequently Asked Questions
If you don’t have orange spray paint, but you have orange acrylic paint handy, you can use that to paint the pumpkins instead.
Use a foam brush, as opposed to a bristled brush, so you don’t end up with streaks.
You’ll need the paint to dry completely before moving on to the next step, and that might take longer than the 15 minutes required to wait for spray paint. So just keep that in mind.
Luckily, these tin can pumpkins don’t need any weights inside of the tin cans to keep them in place.
I set them on an outside table as is, and even through hurricane winds (literally, I had them out through a hurricane last year to test my theory), they stayed put on the table.
My original plan was to use wood glue to glue the leaves onto the stick. It doesn’t work at all when you’re trying to glue fabric leaves onto a stick. I held them together for a long time and still, the leaves fell off almost instantly.
So then I went with super glue, which is a misnomer. Because it’s not that super. The leaves still wouldn’t stick.
So I happened to have sticky dots, which are small die cut adhesives. You place the back of the leaf directly into the sticky dots, then rub the plastic backing and the small sticky dots “permanently” affix to the leaf. Using those and sticking the leaves onto the side of the tin can, then turning the can on an angle, is perfect.
I didn’t try a hot glue gun because I thought that might be too rough on the leaves, but if you try that, let me know.

More upcycled Halloween crafts:
Upcycled Halloween crafts are a really fun way to make some frugal decorations. Plus, it’s so much fun to spend the day crafting.
Some of our favorite upcycled Halloween crafts are our DIY Egg Carton Eyeballs (made from an egg carton) or our Frankenstein Mason Jar Craft Tutorial (made from an old glass jar). We also have a fun Candy Corn Pine Cone craft, which may or may not be upcycle, depending on how you look at it.
Don’t forget to check out all of our Halloween Toilet Paper Roll Crafts. We use those as candy holders during the holiday season (and, yes, you can purchase craft tubes online if you’re making these for Halloween parties and you don’t want to upcycle them).
Easy Upcycled Tin Can Pumpkins

These DIY Upcycled Tin Can Pumpkins are super easy to make. And there's a good chance you have everything to make these rustic pumpkins at home already.
Materials
- Scrap paper
- Empty tin cans
- Orange spray paint
- A large stick
- Wood glue
- Artificial maple leaves
- Sticky dots
Tools
- Miter saw
Instructions
- Wash the inside of your tin cans. Pull any labels off your tin cans. Try and remove any adhesive left behind. Put the tin cans open side down on a piece of scrap paper and lightly spray a coat of orange spray paint on them. Let the thin spray paint layer dry about 15 minutes. Spray a second thin coat and let it dry about 15 minutes.
- Flip the cans over so the open side is up. Spray a layer of spray paint and let it dry 15 minutes. Flip the cans back so the open side is down. Let the cans dry overnight.
- Take a stick. Use a miter saw to cut off the edge of the stick so you start with a flat, straight end. Cut off a two-inch chunk of stick for each of your spray painted tin cans.
- Add a dab of wood glue to one of the ends of the stick chunk and affix it to the middle of the closed side of your pumpkin. (If you don’t have wood glue, E6000 glue will also work.) Let it dry.
- Pick two artificial maple leaves per pumpkin. Rub sticky dots to the leaves, then affix the leaves to the pumpkin. Set them up wherever you need some decorations.
Notes
Did you use this Easy Upcycled Tin Can Pumpkins Tutorial to upcycle tin cans into Halloween decorations? Let us know in the comments.
sandy Brasington
Friday 30th of October 2020
I can't wait to join
NINA LEWIS
Tuesday 20th of October 2020
What a terrific idea! Thanks so much for sharing this!
kristie
Sunday 18th of October 2020
Your upcycled pumpkins are the cutest ones I've seen this year.
April J Harris
Sunday 18th of October 2020
What a fun, frugal and very pretty decoration! Thank you for sharing.
Linda S
Friday 16th of October 2020
how fun and festive! A great craft idea that will last all the way until December!