
 >Yes, this is a DIY Foam Finger tutorial, but I have a story to tell you first.
We’re from New York, but moved to Wilmington, North Carolina seven years ago. All our friends and family were in New York, the stores I loved were in New York, and we would go back all the time.
So, for a long time, North Carolina felt like our home away from home and New York still felt like home.
After we were here for three years, my parents decided to retire and move down to North Carolina (part time) with my grandma. They built a house in our town and I was able to see them every day. And then, finally, North Carolina felt like home.
A few months later, we started going to Fayetteville, North Carolina on a semi-regular basis. We almost instantly felt like we were home when we were there. So, we have adopted Fayetteville as our home away from home.
The Houston Astros have also adopted the town, but as a home for its Class A Minor League team: The Fayetteville Woodpeckers. This is the inaugural season for the Fayetteville Woodpeckers, and, wouldn’t you know, they’re in the Mills Cup Championship series.
The Fayetteville Woodpeckers are the Southern Champions of the Carolina League and are facing the Wilmington Blue Rocks (the Northern Champions).
But, that’s #NotMyWilmington. No. Really. It’s the Carolina League, but the Blue Rocks are from Wilmington, Delaware. So of course, I’m rooting on the Woodpeckers. But from afar. Because I’m here working today as the team gears up for game four of a best of five series. The Woodpeckers are ahead 2-1 in the series, which means they can win the 2019 Mills Cup Championship series today.
I should have called off work.
Instead, though, I made a DIY Foam Finger so I can cheer them on from home (Oh, now you see the tie in).
DIY Foam Finger
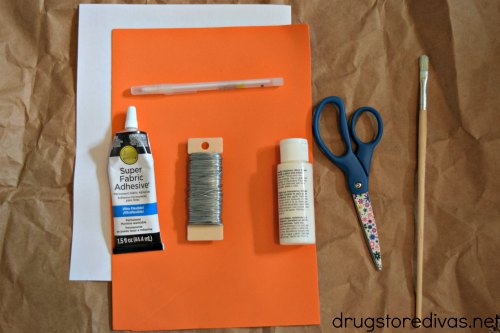

What You’ll Need:
- 8×12 foam sheet
- 1 sheet printer paper
- Pen
- Paint brush
- White paint
- Floral wire
- Super fabric adhesive
- Scissors
What You’ll Do:

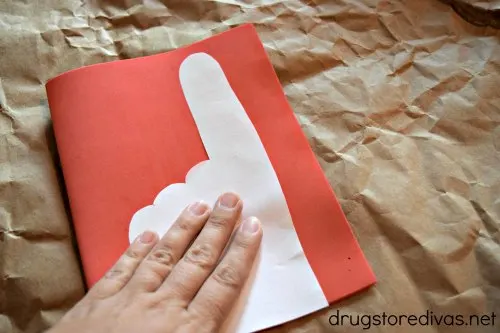
Fold the sheet of white paper in half, then draw out your pattern. Cut it out.
Fold your foam sheet in half. Hold the pattern against it and cut it out. You’ll end up with two identically-shaped foam patterns.
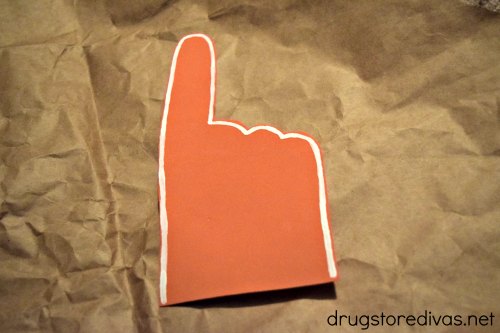
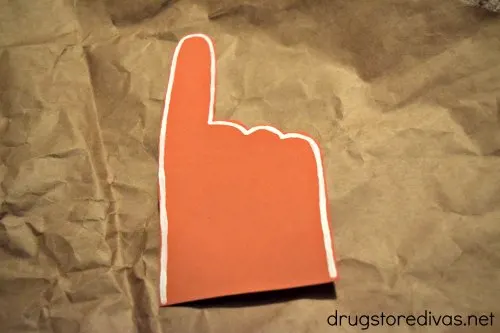
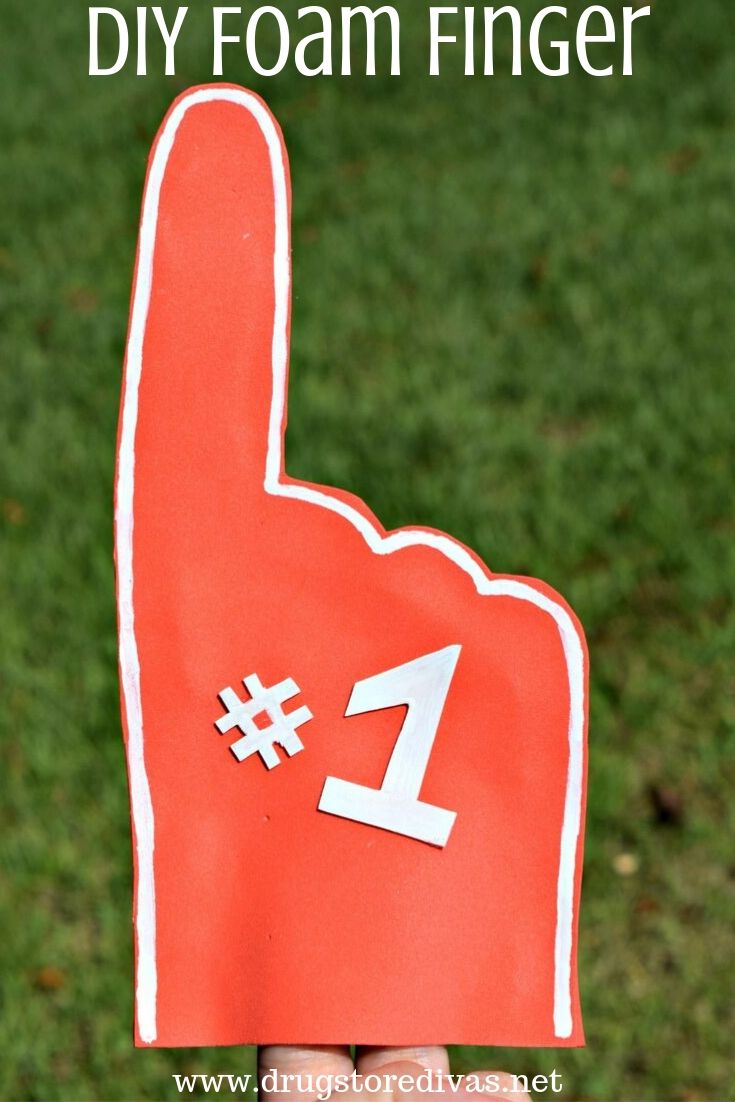
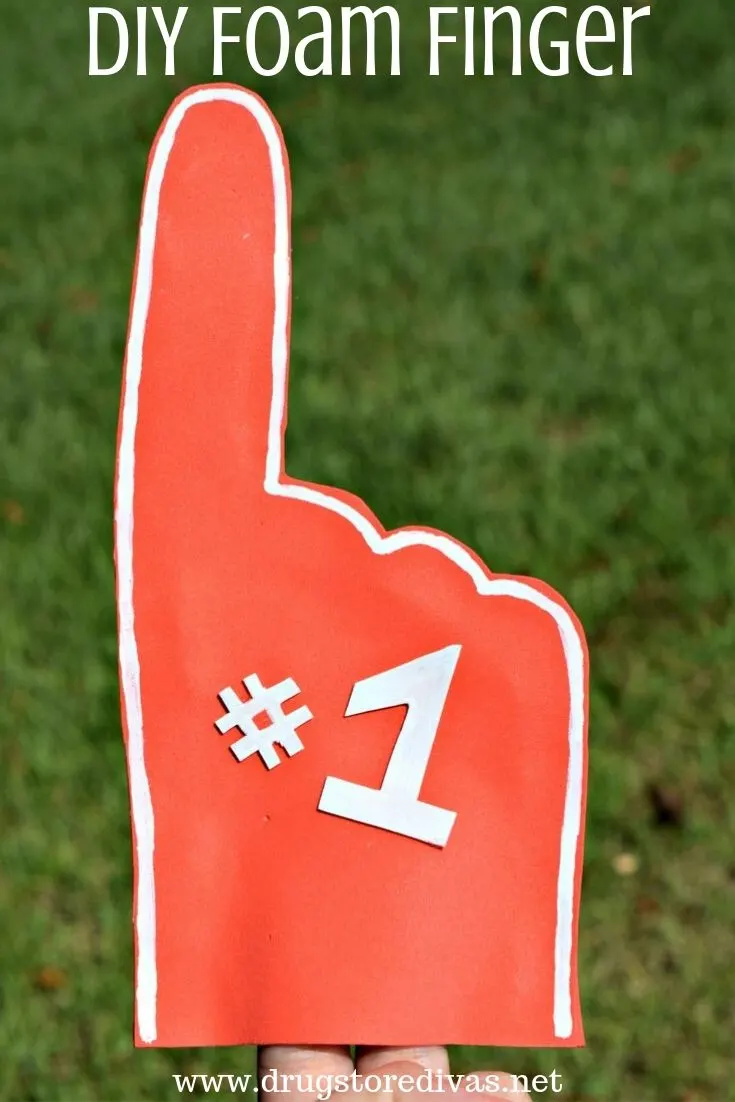
Start painting a pattern on one of the two foam cutouts. I simply painted a white border around mine. A lot of the foam fingers go into a lot of details by painting all five fingers onto the front. Since this is a mini foam finger, I thought that would take up way too much space. But you paint whatever you like.
Let that dry.
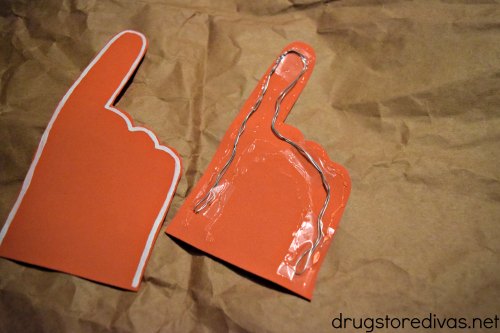
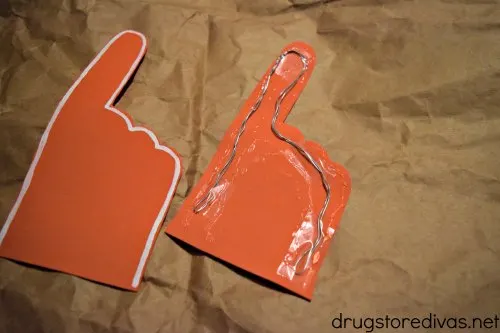
After it’s dry, cut a piece of floral wire that’s double the size of the foam finger. Double it, then place it along the inner edge of your finger. This will give it more stability and will assure your finger won’t fall down as you cheer on your team.
If you’re worried about it staying in place, you can tape it down to one of your foam cut outs, but that’s optional.
Glue all around the edge of the foam cut out and the wire, plus the majority of the “hand” portion. You only wan to leave a gap that’s about two-fingers wide.
Place the painted foam finger cut out on top, push down to glue them together, then set them aside to dry overnight.
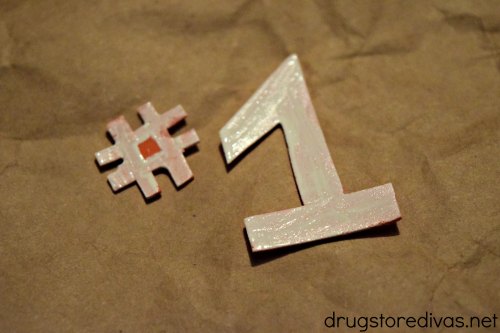
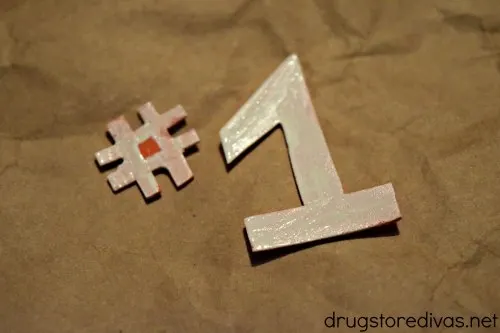
While it’s drying, cut out any embellishments you want and paint them. I cut out a number sign and the number one from a scrap of the foam sheet. You can go with your team’s logo, if you’re making it for a specific team. Paint the embellishments white, then set them to the side to dry. You may need a couple layers of white paint, depending on how thick you paint and how dark your foam sheets are.

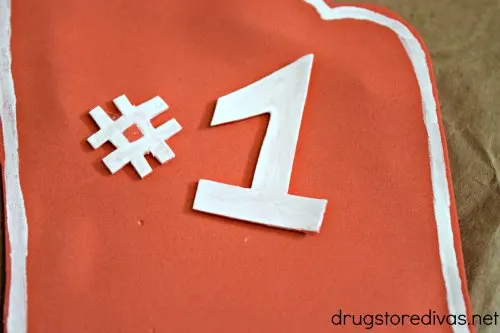
When everything is dry, affix your embellishments to the front of your foam finger.
Now you’re ready to root on the home team. Or the home away from home team.
Swathi
Thursday 19th of September 2019
This looks really nice and fun tutorial I will try to make with my kids. They will have fun.
Lavanda Michelle
Monday 16th of September 2019
Wow, amazing and creative. Awesome way to save money!
Echo
Monday 16th of September 2019
This is such a fun tutorial! I may have to make a couple of these with my kids.
Sophia
Monday 16th of September 2019
This really looks amazing. I just love the idea and I'm going to try it soon.
Candace Hampton
Sunday 15th of September 2019
I love DIY!! This one looks fun and pretty easy. Great way to save a couple of bucks. Thanks for the idea.