
If you’re looking for something fun and unique to fill Easter baskets this year, these DIY Chocolate Easter Smash Eggs are perfect. They take a little time, but they’re so worth it.
Make this the best holiday yet with inspiration from these other Easter posts.


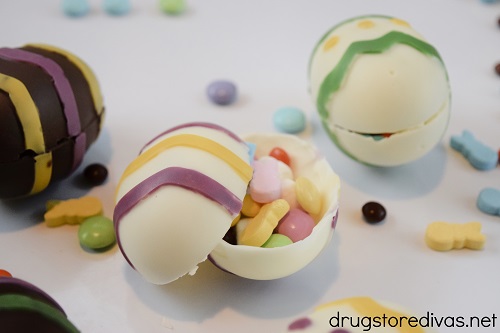
Smash eggs have become really popular in the last year or so. I’m not sure if they went viral on social media or if people just needed something to resolve a little aggression after the recent state of the word. But either way, they’re a big hit (literally and figuratively).
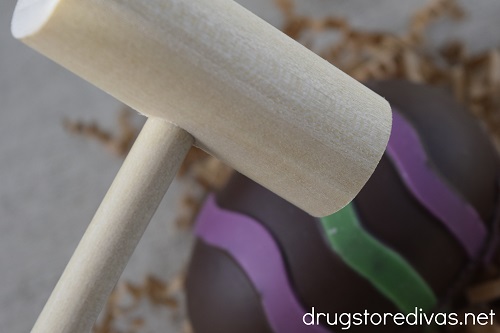
Basically, smash eggs are a chocolate egg-shaped piñata. You hit the chocolate egg with a wooden mallet and it cracks, revealing treats that flow over the table.
They’re inexpensive if you need to buy one, but once you start needing a few of them, the cost really adds up. I needed six this year and just didn’t want to pay that much for them. So I decided to make my own.
Smash eggs take a while to make, but it’s so, so worth it.
We also made the wooden mallets to go with them, but you could just purchase a pack of those online. Either way, don’t forget them. Your gift recipient needs them in order to smash the chocolate eggs.

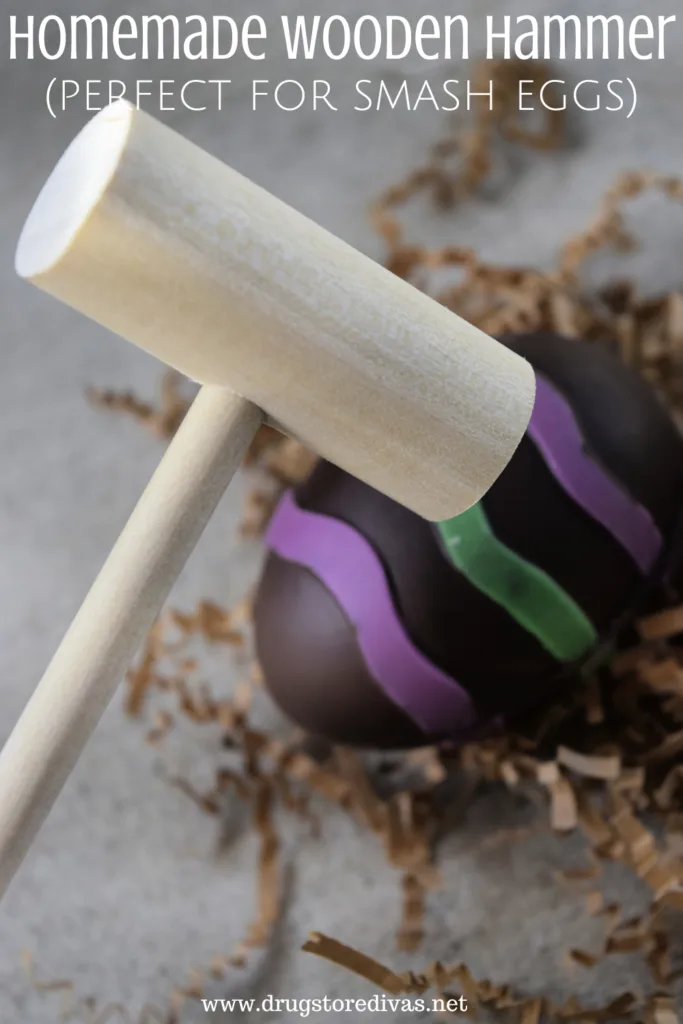
We gifted our homemade smash eggs with a wooden hammer.
If you want to also, check out our Homemade Wooden Hammers tutorial.
DIY Chocolate Easter Smash Eggs Recipe
Affiliate links are included in this post and Drugstore Divas may make a small commission if you use them.
This Smash Eggs recipe using this silicone egg mold, which comes as a set of two molds with six egg halves in each, making six full-sized smash eggs.
We also use that mold to make peanut butter eggs and chocolate covered brownie eggs, so if you buy it, you’ll have a few ways to use it.
DIY Chocolate Easter Smash Eggs Ingredients:
You can get the full list of ingredients with measurements in the recipe card below.
- Candy melts – You need purple, green, and yellow candy melts.
- Almond bark – You want both vanilla and chocolate almond bark.
- Various Easter candy – Any candy that you like works. We used mini marshmallows, pastel M&M’s, mini Reese’s pieces, and Peeps hard candy.
How To Make Chocolate Easter Smash Eggs:
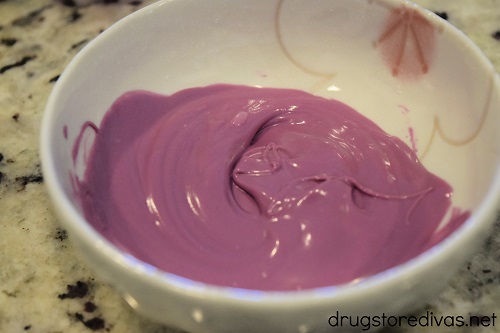
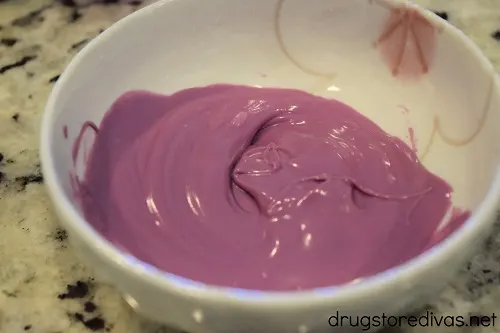
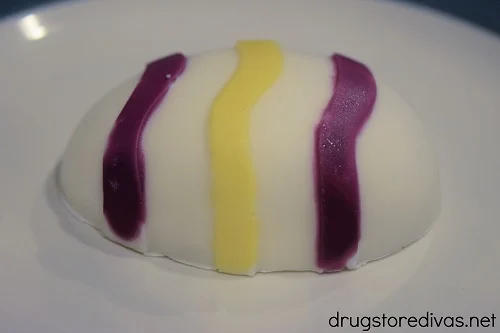
Melt the purple candy melts according to the package.
Quick tip if you’ve never used candy melts before: Microwave them for one minute, then stir. If they’re not melted, microwave them for an additional 30 seconds, then stir again. Continue at 30 second intervals until the candy melts are completely melted.
Since you’re only using a couple for this, you should be fine after the first 30 seconds.
Another quick note: You won’t need as much purple as 15 candy melts makes. Same with the green and yellow. However, if you don’t use enough candy melts, they’ll harden very quickly because there’s not enough residual heat to keep them warm.
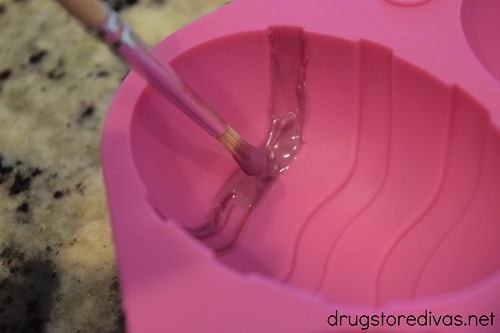
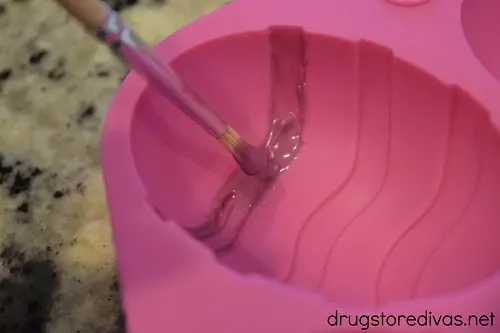
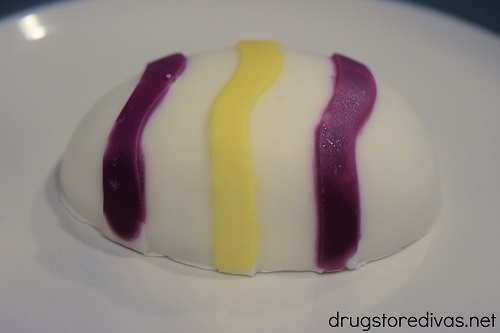
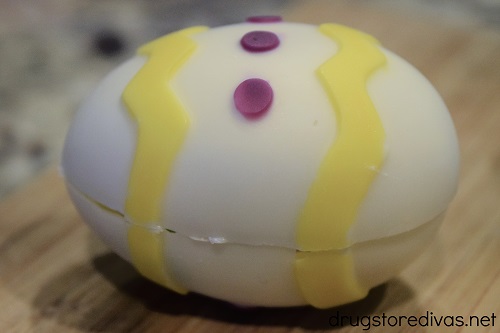
Use a (brand new) paint brush to paint some of the lines and dots in the silicone egg mold purple.
While you’re painting, keep in mind the lines or dots that you’re painting purple. Paint coordinating lines or dots in the second mold the sample color.
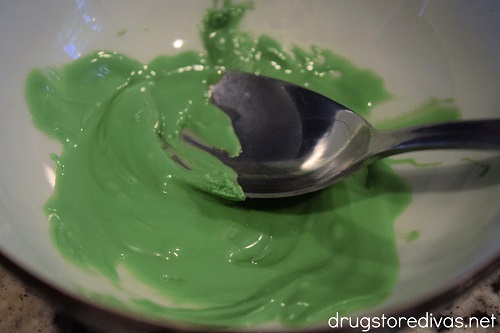

Melt the green candy melts according to the package. Use the paint brush to paint some of the lines and dots in the mold green.

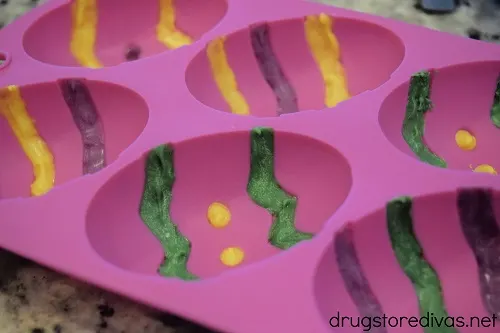
And, finally, melt the yellow candy melts according to the package and paint the remaining lines and dots yellow.
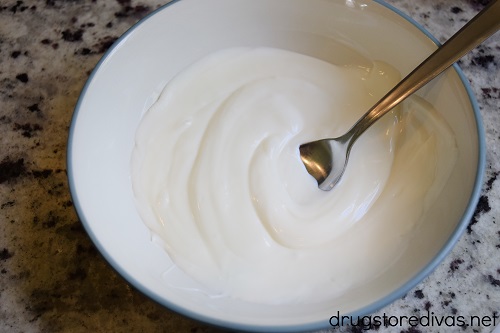

Melt one square of the vanilla almond bark.
Quick note: Chocolate chips don’t melt as well as almond bark does. With chocolate chips, you run the risk of the chocolate hardening too quickly (and then you can’t remelt it) or burning (because you heated it for too long).
Almond bark is very forgiving. If it hardens before you’re done with it, you can just microwave it again. And it’s very, very difficult to overheat it or burn it, so it’s easy to work with.
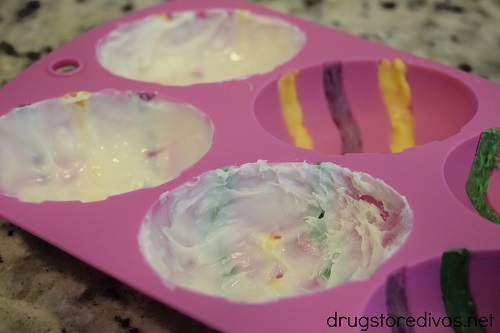
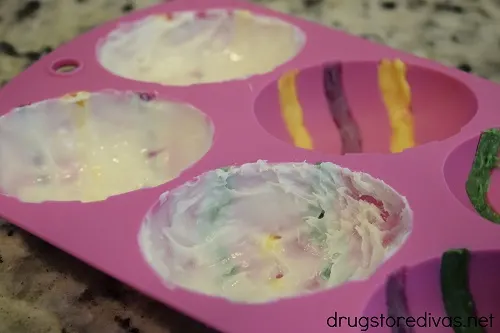
Spoon some of the melted almond bark into three of the six cavities in the silicone egg mold. Use the back of the spoon to spread the melted almond bark over the entirety of the cavity.
Do this will the coordinating cavities in the second mold.
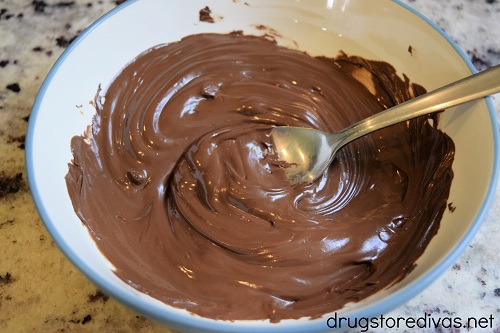
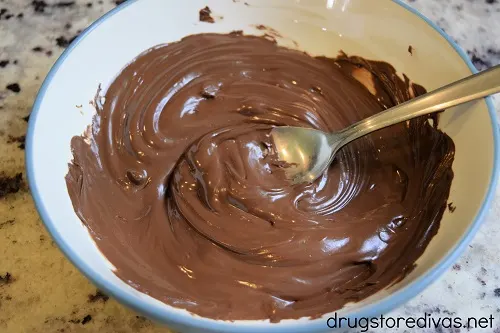
Melt one square of the chocolate almond bark.
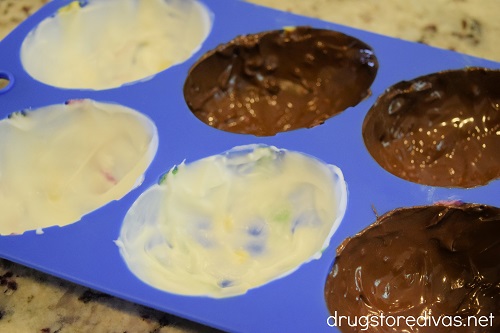
Divide it between the six remaining cavities in the molds.
Put the molds in the freezer for 20 minutes.

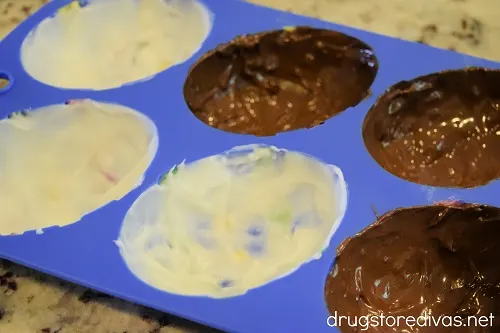
Melt one square of the vanilla almond bark. Split it between the six vanilla eggs, making sure to spread it out using the back of a spoon.
Melt one square of the chocolate almond bark. Split it between the six chocolate eggs, spreading it out with the back of the spoon.
Put the molds back in the freezer for an additional 20 minutes.


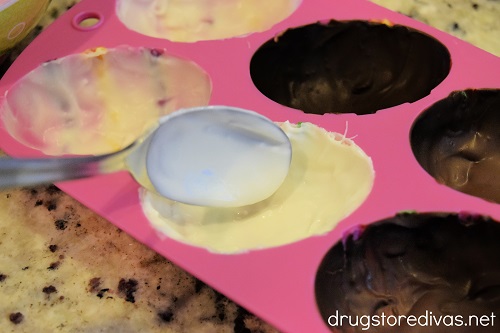
Remove the molds from the freezer and the homemade chocolate eggs should pop right out.
If they don’t, that means your layers were too thin. Don’t force them out. Add a third layer of almond bark and freeze them an additional 20 minutes. You shouldn’t have to do this, but just in case.
Heat a plate in a microwave for one minute.
Put one half of the chocolate egg on the plate for three to five seconds to slightly melt it.
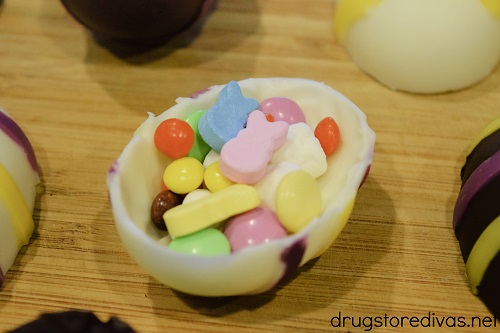

Fill it with various Easter candy.
You can use any candy as long as it’s not exposed chocolate. So candy-coated chocolate, marshmallows, and anything gummy will work really well. A chocolate bar chopped into pieces will not work.

Put the coordinating half on the hot plate to melt it a little as well.
Place the egg halves together, holding until the two halves are molded together.
Store these in the fridge until you’re ready to package them.
To package them, add a bit of green paper shred, plus white paper shred for the vanilla eggs and brown paper shred for the chocolate eggs, to the bottom of a treat bag.
Carefully place one smash egg in each treat bag.

Add a wooden mallet (you can purchase them online. We made ours and there will be a tutorial for those soon).
Tie with a piece of green tulle.
Depending on where you live, and how hot the weather is, we would recommend keeping these in the fridge until you’re ready to gift them.

DIY Chocolate Easter Smash Eggs: Frequently Asked Questions
If you want to justify buying the silicone egg mold, you can also use it to make homemade peanut butter eggs. Follow this recipe, just apply it to the egg mold instead of the owl mold that’s in that post.
If you don’t want to, you can skip the steps of melting the candy melts and painting the eggs with them. This recipe goes a lot quicker if you omit that step.
But, the smash eggs look so much more festive if you paint them. So I don’t think it’s a step you should skip, but you might disagree.
Chocolate Easter Smash Eggs


If you’re looking for something fun and unique to fill Easter baskets this year, these DIY Chocolate Easter Smash Eggs are perfect. They take a little time, but they’re so worth it.
Ingredients
- 15 purple candy melts
- 15 green candy melts
- 15 yellow candy melts
- 2 squares (4 oz.) vanilla almond bark
- 2 squares (4 oz.) chocolate almond bark
- Various Easter candy
Instructions
- Melt the purple candy melts according to the package. Use a (brand new) paint brush to paint some of the lines and dots in the silicone egg mold purple. While you’re painting, keep in mind the lines or dots that you’re painting purple. Paint coordinating lines or dots in the second mold the sample color.
- Melt the green candy melts according to the package. Use the paint brush to paint some of the lines and dots in the mold green.
- And, finally, melt the yellow candy melts according to the package and paint the remaining lines and dots yellow.
- Melt one square of the vanilla almond bark. Spoon some of the melted almond bark into three of the six cavities in the silicone egg mold. Use the back of the spoon to spread the melted almond bark over the entirety of the cavity.
- Do this will the coordinating cavities in the second mold.
- Melt one square of the chocolate almond bark. Divide it between the six remaining cavities in the molds.
- Put the molds in the freezer for 20 minutes.
- Melt one square of the vanilla almond bark. Split it between the six vanilla eggs, making sure to spread it out using the back of a spoon.
- Melt one square of the chocolate almond bark. Split it between the six chocolate eggs, spreading it out with the back of the spoon.
- Put the molds back in the freezer for an additional 20 minutes.
- Remove the molds from the freezer and the homemade chocolate eggs should pop right out. Fill one half of the eggs with various Easter candy.
- Heat a plate in a microwave for one minute.
- Put one half of the chocolate egg on the plate for three to five seconds to slightly melt it.
- Place it on top of its coordinating half, holding until the two halves are molded together. Store these in the fridge until you’re ready to package them.
Notes
If the eggs don't easily pop out of the silicone mold, that means your layers were too thin. Don’t force them out. Add a third layer of almond bark and freeze them an additional 20 minutes. You shouldn’t have to do this, but just in case.
Nutrition Information
Yield
6Serving Size
1Amount Per Serving Calories 186Total Fat 1gSaturated Fat 0gTrans Fat 0gUnsaturated Fat 0gCholesterol 0mgSodium 22mgCarbohydrates 45gFiber 0gSugar 29gProtein 0g
Have you tried this DIY Chocolate Easter Smash Eggs recipe yet? Let us know how it went in the comments.
Jhuls
Wednesday 23rd of April 2025
These DIY chocolate smash eggs are so unique! They would make the perfect Easter activity and dessert.
Nancy
Friday 10th of June 2022
This was the funnest thing to make with my kid ! She enjoyed smashing it a lot!! Kids and breaking things you know ;)