
Thumbprint cookies are such a classic cookie made with simple ingredients you’re sure to have at home right now. But, for a twist, make this Thumbprint Cookies with Icing recipe (instead of filling the cookies with jam).
For more ideas of what to make, check out all of our desserts.


Classic thumbprint cookies are basically sugar cookies with a dollop of jam in the center of each cookie. People change them up by changing the type of jam — some have apricot, some have raspberry jam — but that’s about it.
But, of course, I had to change that up and instead of jam, add some icing to the center of each cookie instead.
Now, when I make Thumbprint Cookies, I’ll make a full batch of dough (which makes three dozen cookies) and do half traditionally with jam and the other half with icing. I do strawberry jam and pink icing, just to they look coordinated on the tray, but you can do any combination you want.
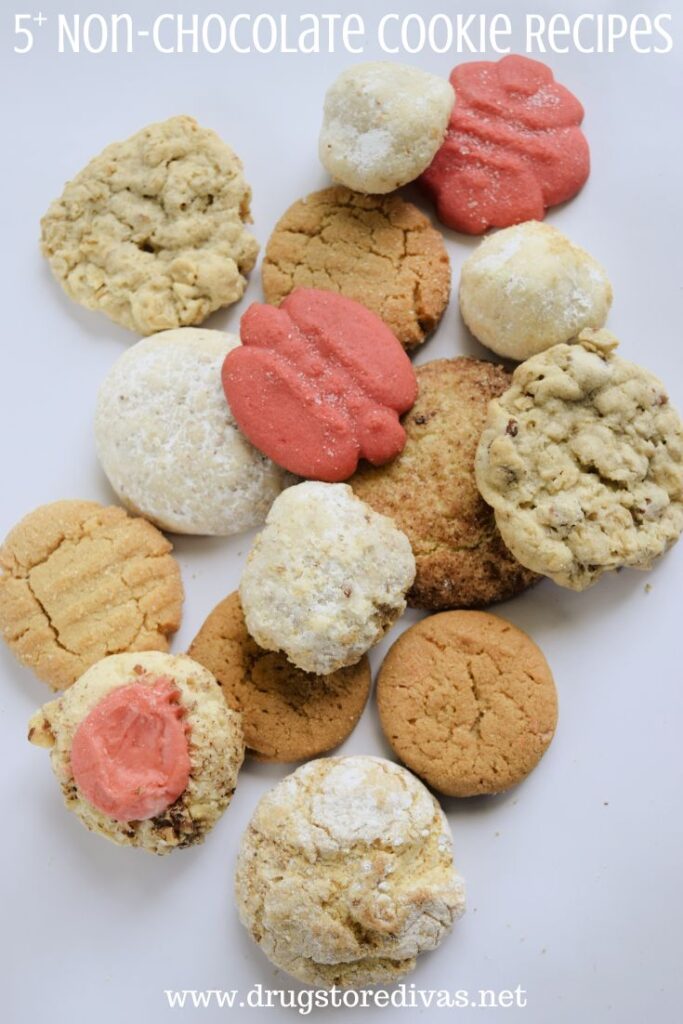

These Thumbprint Cookies don’t have any chocolate in them. If you’re looking for more chocolate-free cookies, check out our list of Non-Chocolate Cookie Recipes.
Thumbprint Cookies With Icing Recipe
Affiliate links are included in this post and Drugstore Divas may make a small commission if you use them.
Thumbprint Cookies With Icing Ingredients:
You can get the full list of ingredients with measurements in the recipe card below.
- Unsalted butter – Use unsalted butter because you’re adding salt later.
- White sugar – White sugar melts into cookie dough better than brown sugar does.
- Salt
- Eggs
- Vanilla extract – This adds a little sweetness to the dough.
- All-purpose flour
- Cream cheese frosting – Any white frosting works, but not cookie icing (aka Royal icing). That’s more for decorating and doesn’t make sense in these thumbprint cookies.
- Food coloring – Any color works.
How To Make Thumbprint Cookies With Icing:
Pre-heat the oven to 350 F.
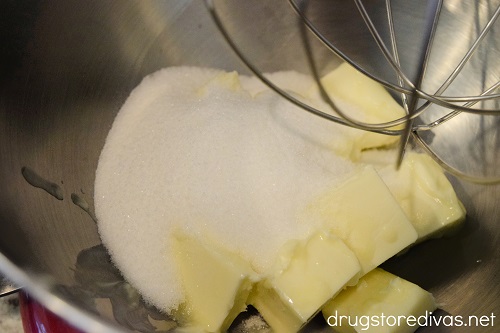
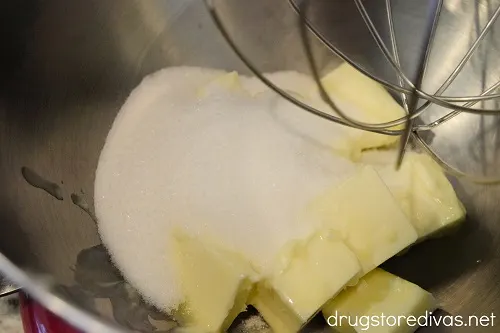
Cut the butter into chunks, then microwave them for 20 seconds. You want the butter to be softened, but not melted.
Alternatively, you could use room temperature butter (but really, that would require you to prepare ahead of time and no one has time for that).
Add the butter to the bowl of a stand mixer. Add the sugar and salt. Cream them together, on medium speed, about three minutes.

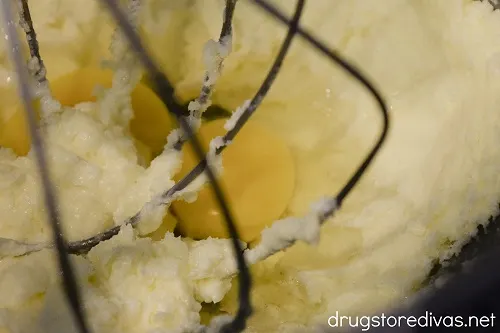
Add in the eggs and vanilla. Mix for about a minute.

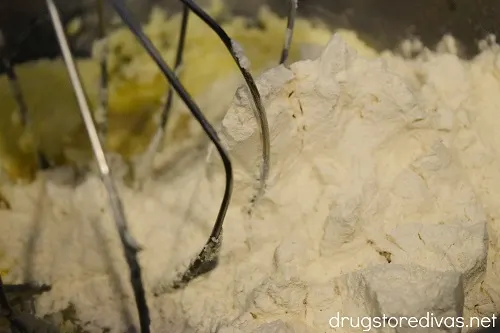
Add in the flour and mix until a dough forms.
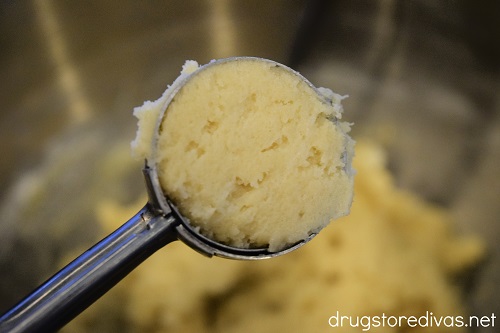

Use a small cookie scoop to scoop dough balls.

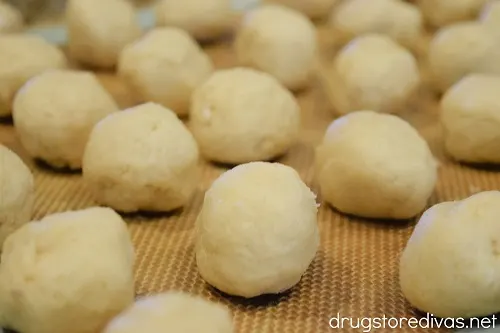
Roll them between your hands to get a perfect circle, then put them on a silicone baking mat-lined cookie sheet. You’ll be able to make 36 1-inch balls from this batter.
Quick note: If you don’t have a silicone baking mat, you can use parchment paper on the bottom of the cookie sheet instead. I prefer silicone mats because it’s reusable, so it’s a lot more budget friendly to use that over and over again instead of constantly buying parchment paper. But, the cookies will bake the same no matter which you use.
Put the entire tray in the fridge for 30 minutes. Take the tray out of the fridge and remove half the cookie balls. You can put them back in the fridge.

Arrange the remaining 18 cookie balls evenly on the cookie sheet.
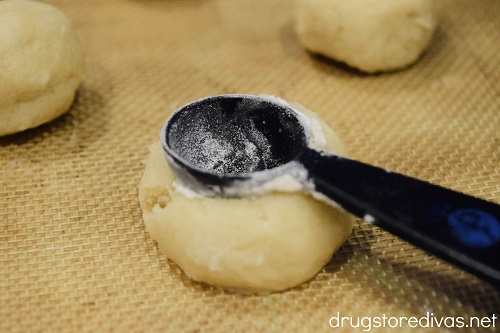
Use the back of a measuring spoon to form a well in the center of the cookie.
Quick tip: A good idea is to spoon out some flour and put it into a small bowl. Stick the measuring spoon into the flour before the cookie so it doesn’t get stuck. You’ll want to repeat this between each cookie.
Another quick note: These are pretty delicate cookies. So, the slower you push, the less of a chance that your cookies will crack from the pressure.
Bake for 12 minutes until the bottom of the cookie starts getting golden brown. You don’t really want the edges to brown at all. But, remember, cooking times can vary based on your oven, so your cookies might take a little longer to be done.
Let them cool on the cookie sheet for 10 minutes. After then, you can move them to a wire rack.
Continue this process with the second batch of cookies.
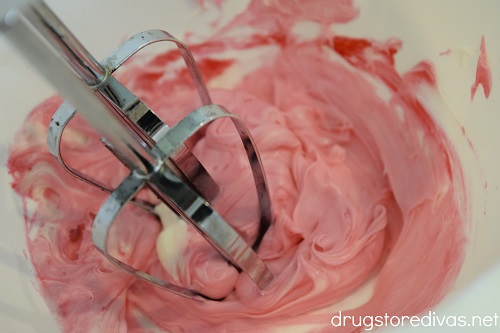

Scoop the icing into a small bowl. Add the food coloring and stir until just combined.
Use a hand mixer to gently whip the icing for about five minutes.
Doing this adds more air into the store-bought icing and makes it taste more homemade. It also expands the frosting, which means you won’t needs as much to fill all the cookies.
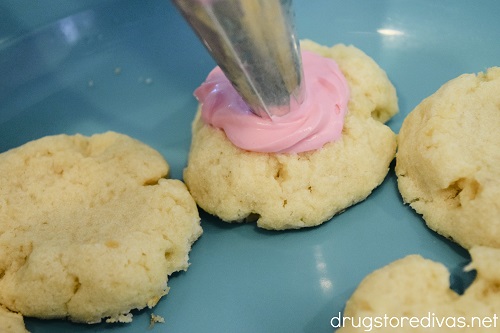

Spoon the icing in a prepared piping bag.
Gently pipe the icing into the well of the cookie.
Quick note: Piping the icing into the well of the cookies is so much easier than trying to scoop it with a spoon and trying to move that dollop of icing from the spoon into the cookie. Trust me.
If you don’t have a piping bag, I highly recommend you purchase reusable piping bags and have them handy anytime you’re using icing. But, in a pinch, you can cut off the corner of a ziptop plastic bag and use that as a piping bag.
For the best results, let the cookies chill overnight in the fridge. That will allow the icing to crust (which is a fancy way of saying it sets and gets a little harder). But, if you don’t have that kind of time, just keep them in the fridge until you’re ready to serve them.


Thumbprint Cookies With Icing: Frequently Asked Questions
If you have a homemade frosting recipe that you love, you can absolutely use it in these cookies. I just use store-bought frosting because it’s easier.
Also, we use cream cheese frosting because it’s a sweet icing, but it’s not as sweet as some other store-bought icing flavors. You can use whatever flavor you like best, including chocolate icing (you just can’t use food coloring to dye chocolate icing).
Some thumbprint cookie recipes separate the egg yolk from the egg whites. I’ve never done that in my recipe, and I’m not quite sure why people do that.
I found this really interesting cookie science article that goes really in depth about what happens when you vary the number of eggs, yolks, and whites. It’s a really good read if you have time.
Store thumbprint cookies with icing in an airtight container in the fridge. They’ll last about a week that way. It’s best to store these in a single layer so that the cookies don’t get crushed by the weight of another cookie.
If you want to, you can make the dough balls and put them on a cookie sheet in the fridge for about 30 minutes. They’ll be hard enough then for you to pack them in a freezer safe bag. You can keep them in the freezer for about three months.
When you’re ready to bake them, transfer the cookie dough balls to a prepared baking sheet and let them thaw before trying to create a well and baking.
Thumbprint Cookies with Icing


Thumbprint cookies are such a classic cookie made with simple ingredients you're sure to have at home right now. But, for a twist, make this Thumbprint Cookies with Icing recipe (instead of filling the cookies with jam).
Ingredients
- 2 sticks of unsalted butter
- 1/2 cup white sugar
- 1/4 teaspoon salt
- 2 eggs
- 1 teaspoon vanilla extract
- 2 cups all-purpose flour
- 1/4 container cream cheese frosting
- 2 drops food coloring
Instructions
- Pre-heat the oven to 350 F.
- Cut the butter into chunks, then microwave them for 20 seconds. You want the butter to be softened, but not melted.
- Add the butter to the bowl of a stand mixer. Add the sugar and salt and cream them together, on medium speed, about three minutes.
- Add in the eggs and vanilla. Mix for about a minute.
- Add in the flour and mix until a dough forms.
- Use a small cookie scoop to scoop dough balls. Roll them between your hands to get a perfect circle, then put them on a silicone baking mat-lined cookie sheet.
- Put the entire tray in the fridge for 30 minutes. Take the tray out of the fridge and remove half the cookie balls.
- Arrange the remaining 18 cookie balls evenly on the cookie sheet. Use the back of a measuring spoon to form a well in the center of the cookie.
- Bake for 12 minutes until the bottom of the cookie starts getting golden brown.
- Let them cool on the cookie sheet for 10 minutes. After then, you can move them to a wire rack.
- Continue this process with the second batch of cookies.
- Scoop the icing into a small bowl. Add the food coloring and stir until just combined.
- Use a hand mixer to gently whip the icing for about five minutes.
- Spoon the icing in a prepared piping bag.
- Gently pipe the icing into the well of the cookie.
Notes
Spoon out some flour and put it into a small bowl. Stick the measuring spoon into the flour before the cookie so it doesn’t get stuck. You’ll want to repeat this between each cookie.
For the best results, let the cookies chill overnight in the fridge.
Nutrition Information
Yield
36Serving Size
1Amount Per Serving Calories 86Total Fat 5gSaturated Fat 3gTrans Fat 0gUnsaturated Fat 2gCholesterol 24mgSodium 20mgCarbohydrates 8gFiber 0gSugar 3gProtein 1g
Have you made these Thumbprint Cookies with Icing? Let us know how it went in the comments.
Joy
Thursday 9th of January 2025
Oooh yummy! Great idea to use icing instead of jam!
Steph@CrazyLittleLovebirds
Thursday 26th of December 2024
I will bake these soon!
Paula Short
Thursday 19th of December 2024
Oh my these sound fantastic. And I like the tip of using icing. Thanks bunches for sharing with Sweet Tea & friends this month dear friend. Merry Christmas to you and your family.
EsmeSalon
Wednesday 18th of December 2024
Thank you for sharing and participating at SSPS 341 Lisa and Pete. See you at #342, Jan 6. Merry Christmas/Happy Festive Season.
Cindy Rybaczyk
Tuesday 17th of December 2024
These look good! Looking forward to making these later this week.