
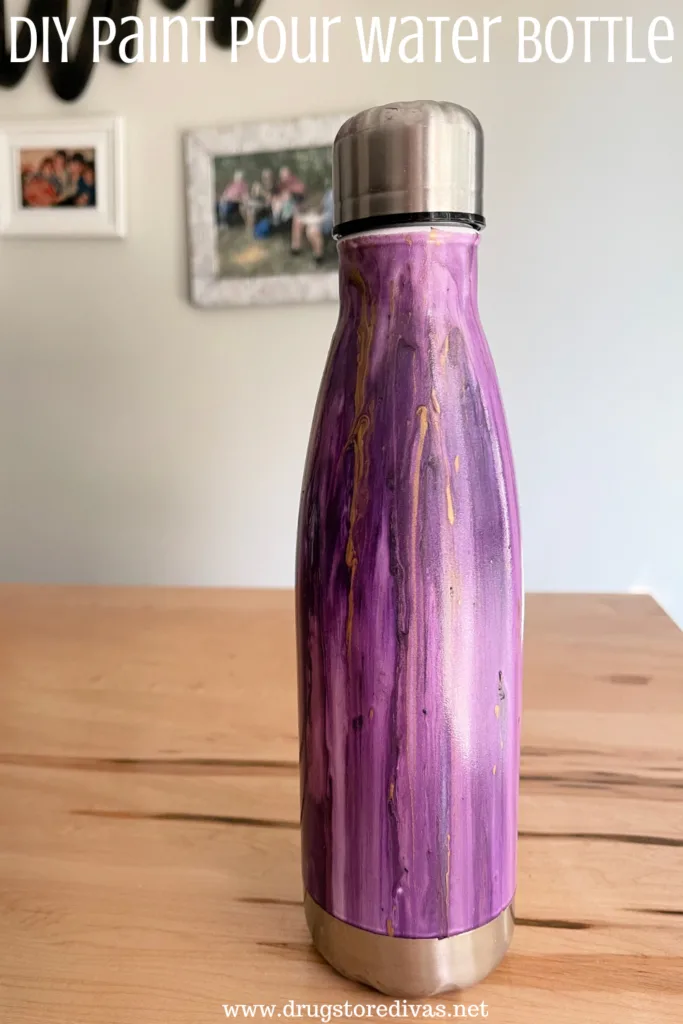
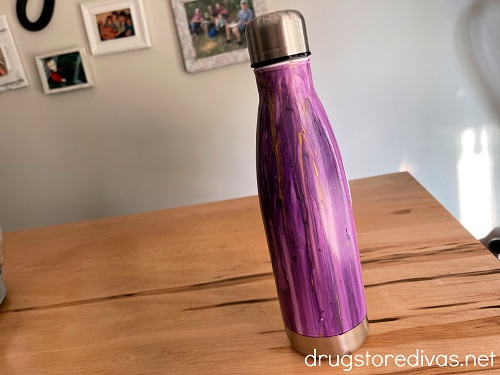
If you’re looking for a way to decorate your water bottle, this Paint Pour Water Bottle Tutorial is for you. Once you get the technique down, you can make these for all your friends.
For more crafting ideas, check out all our DIY posts.

Thanks to people being environmentally conscious, everyone is carrying around reusable water bottles, especially this time of year.
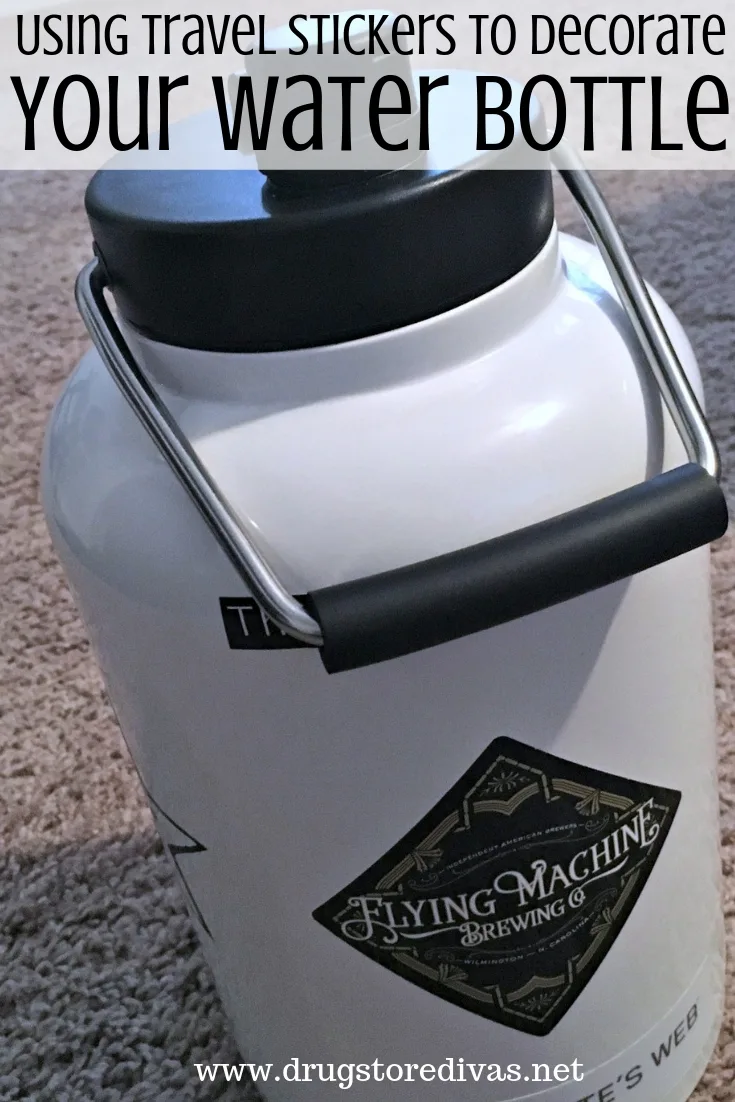
Water bottles are boring, though, so that’s why people decorate water bottles with stickers, charms, or straw toppers.
If you want to be different, though, follow this paint pour tutorial to give you water bottle a one of a kind paint job.

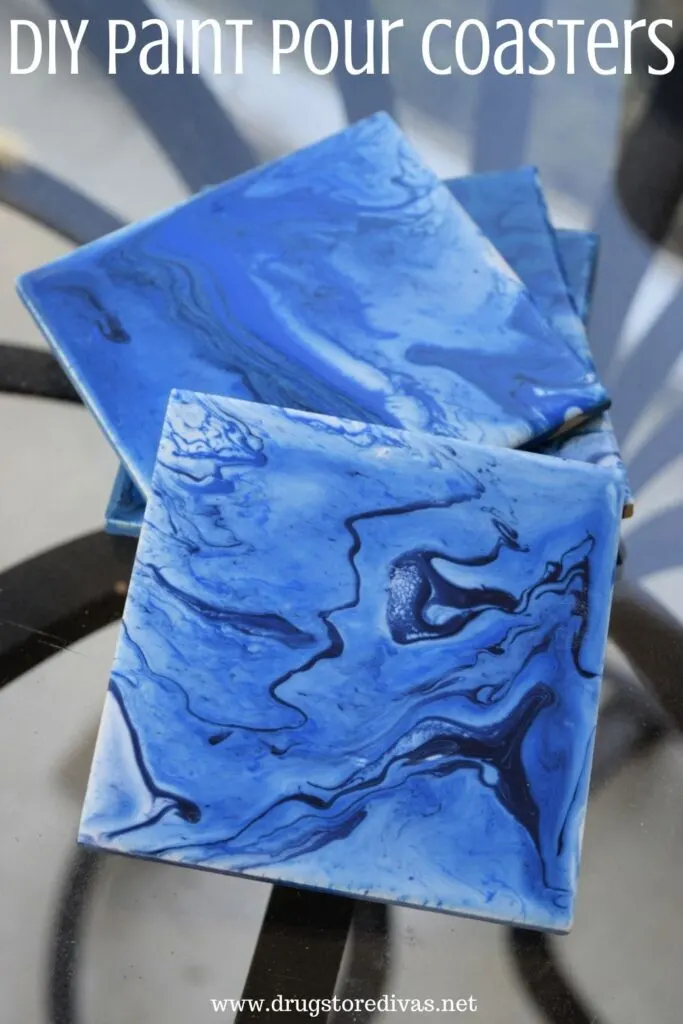
Once you master this paint pouring technique, you can use it to make other fun items, like our Paint Pour Coasters.
Paint Pour Water Bottle Tutorial
Affiliate links are included in this post and Drugstore Divas may make a small commission if you use them.
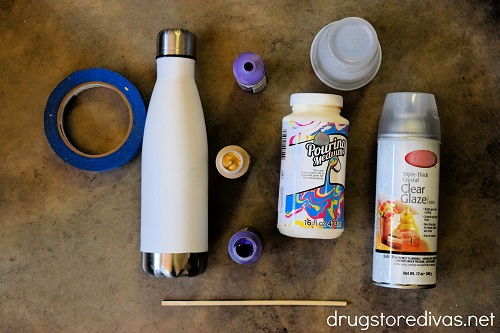
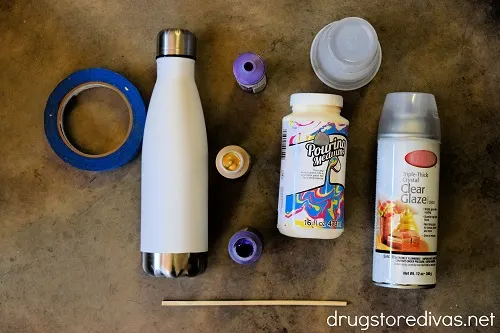
Paint Pour Water Bottle Supplies:
You can get the full list of supplies in the how to card below.
- Stainless steel water bottle – This is a great way to upcycle an old water bottle.
- Painter’s tape – You need this to cover any metal parts of your bottle.
- Plastic cup – This is for the paint and pouring medium and will be disposed of after.
- Pouring medium – This is used to thin the acrylic paint
- Acrylic paint – Any color(s) paint work.
- Disposable chopstick – This is to swirl the paint. You can use anything similar.
- Cardboard box – This is to catch the paint as it swirls/dries.
- Triple clear glaze – This will seal the paint so it doesn’t peel.
How To Make A Paint Pour Water Bottle:
We start with a white water bottle, but you don’t have to. Any solid colored water bottle will work great. Even bottles with designs on them should work because you’ll be covering them completely in paint, so it will hide the design.
If the bottle has any sort of stickers or vinyl on them, you’ll want to remove those. Be sure to wipe them down with Goo Gone to remove any adhesive left behind.
Wash and dry your water bottle.
You don’t have to, but you can rub an alcohol wipe across it too just to assure that you’ve removed any dust particles.
Remove the top.
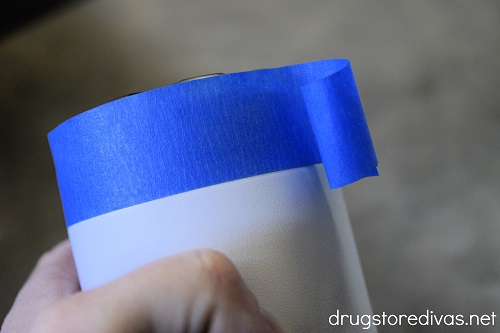
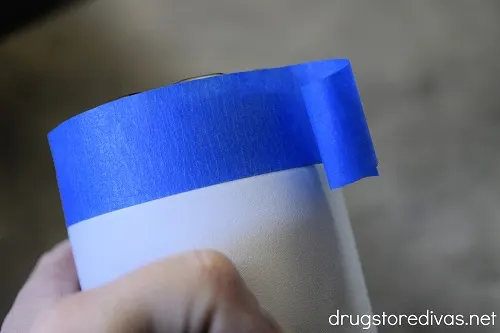
Wrap the silver parts at the top and bottom with painter’s tape. Be sure to really push down the edges so that no paint can sneak under the tape.
Put the top back on.

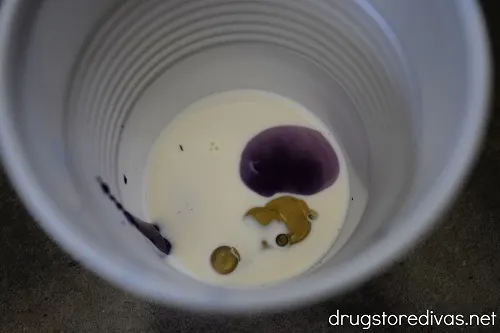
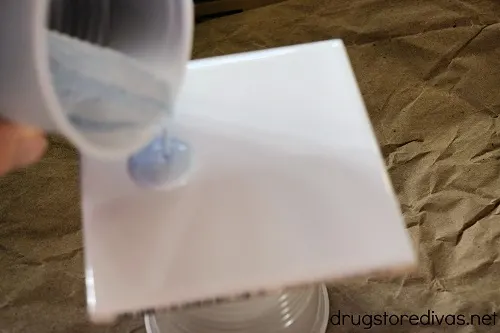
Pour the painting medium into the plastic cup. If you’re using a 9 oz. plastic cup, fill it to the first line from the bottom.
Begin adding the acrylic paint to the cup with the pouring medium.
You can choose as many colors as you want, but we don’t recommend more than three. You can add more of one color than another. That’s fine. What matters is that you have equal parts paint to pouring medium.
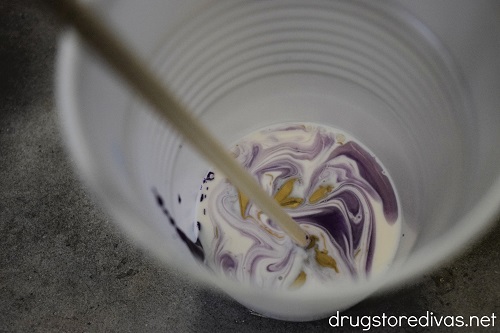
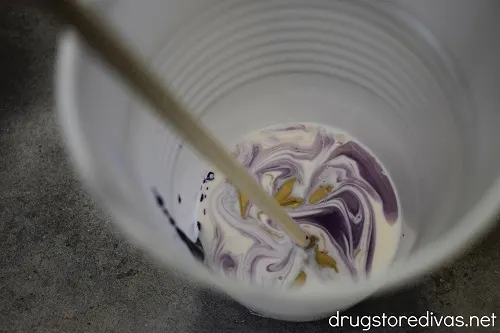
When you’re done adding paint, use the chopstick to gently swirl the pouring medium and paint together.

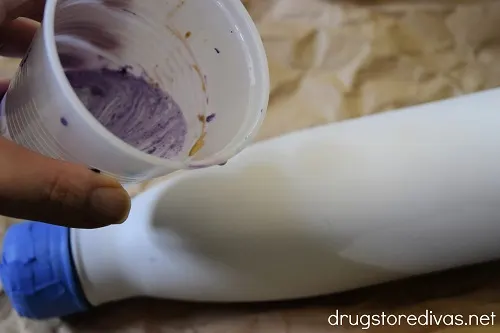
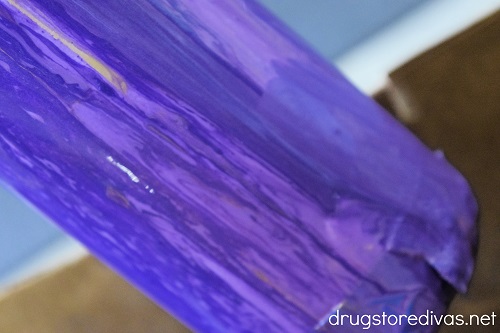
Hold the water bottle by the painter’s tape, above a cardboard box. With your other hand, gently pour some of the paint/pouring medium mixture onto the side of the bottle.
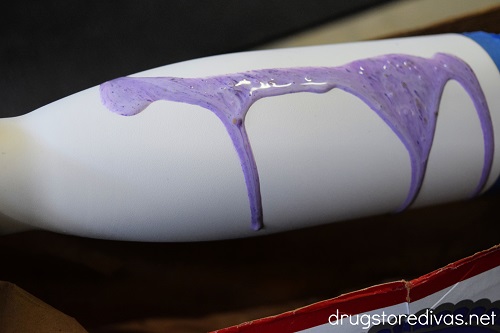

Slowly twist the bottle to cover it in paint. When the paint has stopped moving around, pour more from the cup in a different area and twist again. Continue until the entire bottle is covered.
You may need to mix up more of the paint/pouring medium mixture to cover your entire bottle, depending on what size bottle you’re making.
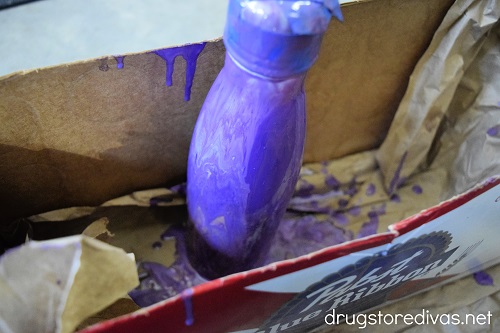

Set the bottle, drinking side up, in the cardboard box. The paint will drip down and create its own design.
Allow it to dry for 48 hours.

Remove the painter’s tape.
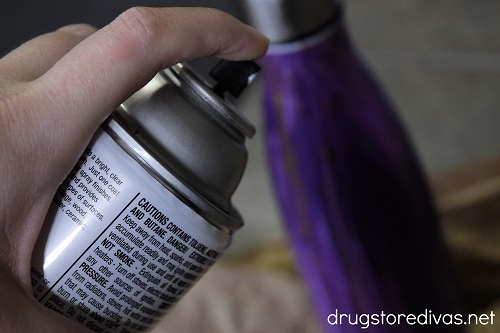

Pick up the bottle and spray it with a triple clear glaze.
Double check the directions on the pouring medium to see how long you need to let it set before using the bottle. Some mediums can take up to 30 days to completely set.

Paint Pouring Tips:
Be deliberate:
Be really deliberate about where you’re pouring your paint. It won’t run as thick as you think. So you do end up with thin streams more than thick pools of paint. So start by pouring your paint exactly where you want it to go and then guide it.
Don’t use water:
Some people want to be super frugal and not purchase the pouring medium. Don’t be one of those people.
Water changes the consistency and the adhesion of the acrylic paint, so it won’t stick to the bottle properly. It also dilutes the color of the paint, so your bottle won’t look the way you want it to.
Mix a little at a time:
Instead of making up a huge batch of the paint/pouring medium, and running the risk of throwing away a ton of excess, mix small batches. You’ll probably have to make a couple batches, but that will make your bottle more interesting to look at. It also means you’ll throw away less, making this craft less expensive.

DIY Paint Pour Water Bottle: Frequently Asked Questions
Once the pouring medium has set completely and you’re starting to use the bottle, hand wash it only. If you put it in the dishwasher, the heat might start to melt the paint, ruining your water bottle design and potentially ruining your dishwasher.
If you’re fancy, you can use a cup turner to make this. If you’re not fancy, a cup turner is a machine that, quite literally, turns cups. Many crafters use this to make those pretty glitter tumblers you’ve seen on Etsy.
Most home crafters don’t have a need for a cup turner, so turning the cup yourself is a frugal alternative to that.
Adding vinyl stickers to water bottles is still really popular. So you might want to do that to this.
If you do, make sure you’re affixing the sticker to the exact spot you want it to go. When you’re adding vinyl stickers to a store-bought bottle, you can easily remove it and move it if the sticker is crooked or you want it somewhere else. You can’t do this with a paint poured water bottle because you run the risk of pulling off the paint.
That shouldn’t happen (the glaze should secure the paint), but that is a risk.
More Ways To Decorate Your Water Bottle:
If you’re looking for other ways to decorate your water bottle, check out our post about Using Stickers To Decorate Your Water Bottle.
Paint Pour Water Bottle
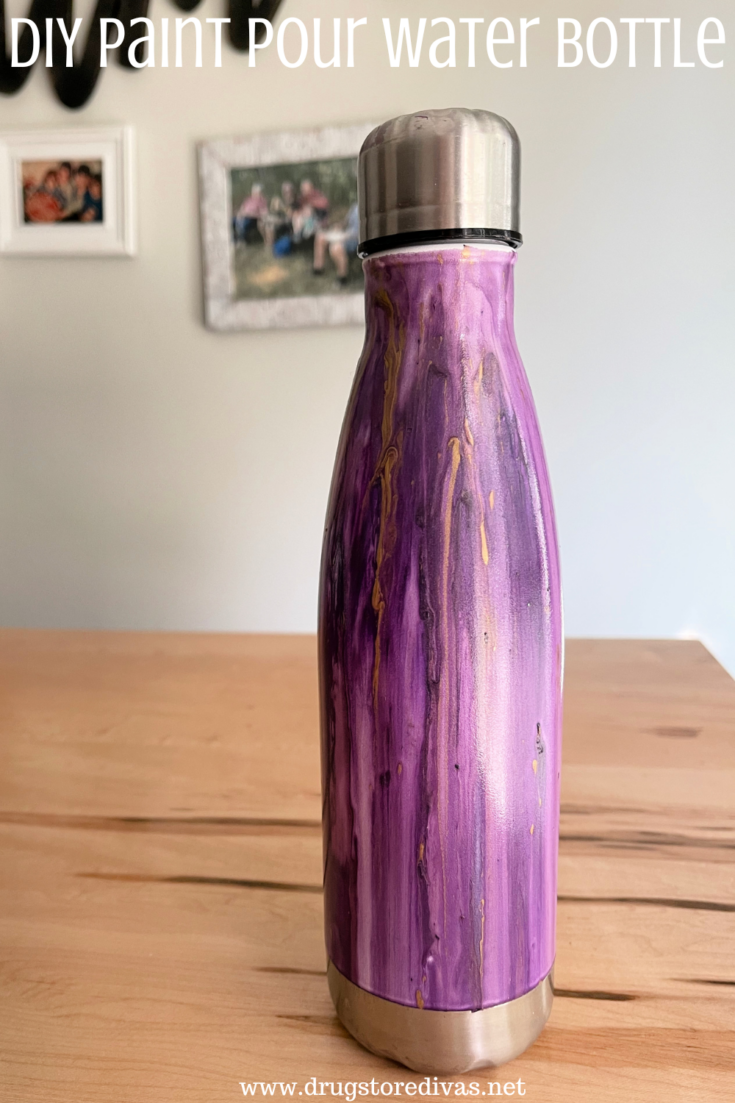

If you're looking for a way to jazz up your plain water bottle, our Paint Pour Water Bottle Tutorial is the way to go.
Materials
- Stainless steel water bottle
- Pouring medium
- Acrylic paint
- Cardboard box
- Triple clear glaze
Tools
- Painter’s tape
- Plastic cup
- Disposable chopstick
Instructions
 Wrap the silver parts at the top and bottom of a water bottle with painter’s tape. Be sure to really push down the edges so that no paint can sneak under the tape. Put the top back on.
- Pour the painting medium into the plastic cup. If you’re using a 9 oz. plastic cup, fill it to the first line from the bottom. Begin adding the acrylic paint to the cup with the pouring medium.
- When you’re done adding paint, use the chopstick to gently swirl the pouring medium and paint together.
- Hold the water bottle by the painter’s tape, above a cardboard box. With your other hand, gently pour some of the paint/pouring medium mixture onto the side of the bottle.
- Slowly twist the bottle to cover it in paint. When the paint has stopped moving around, pour more from the cup in a different area and twist again. Continue until the entire bottle is covered.
- Set the bottle, drinking side up, in the cardboard box. The paint will drip down and create its own design. Allow it to dry for 48 hours.
- Remove the painter's tape.
- Spray the bottle with a triple clear glaze. Double check the directions on the pouring medium to see how long you need to let it set before using the bottle. Some mediums can take up to 30 days to completely set.
Notes
You can choose as many colors as you want, but we don’t recommend more than three. You can add more of one color than another. That’s fine. What matters is that you have equal parts paint to pouring medium.
You may need to mix up more of the paint/pouring medium mixture to cover your entire bottle.
Have you made this Paint Pour Water Bottle craft? Let us know how it went in the comments.