
These super simple Wine Cork Ghosts are easily made with items you have at home.
For more ways to make this the best holiday, check out all of our Halloween posts.

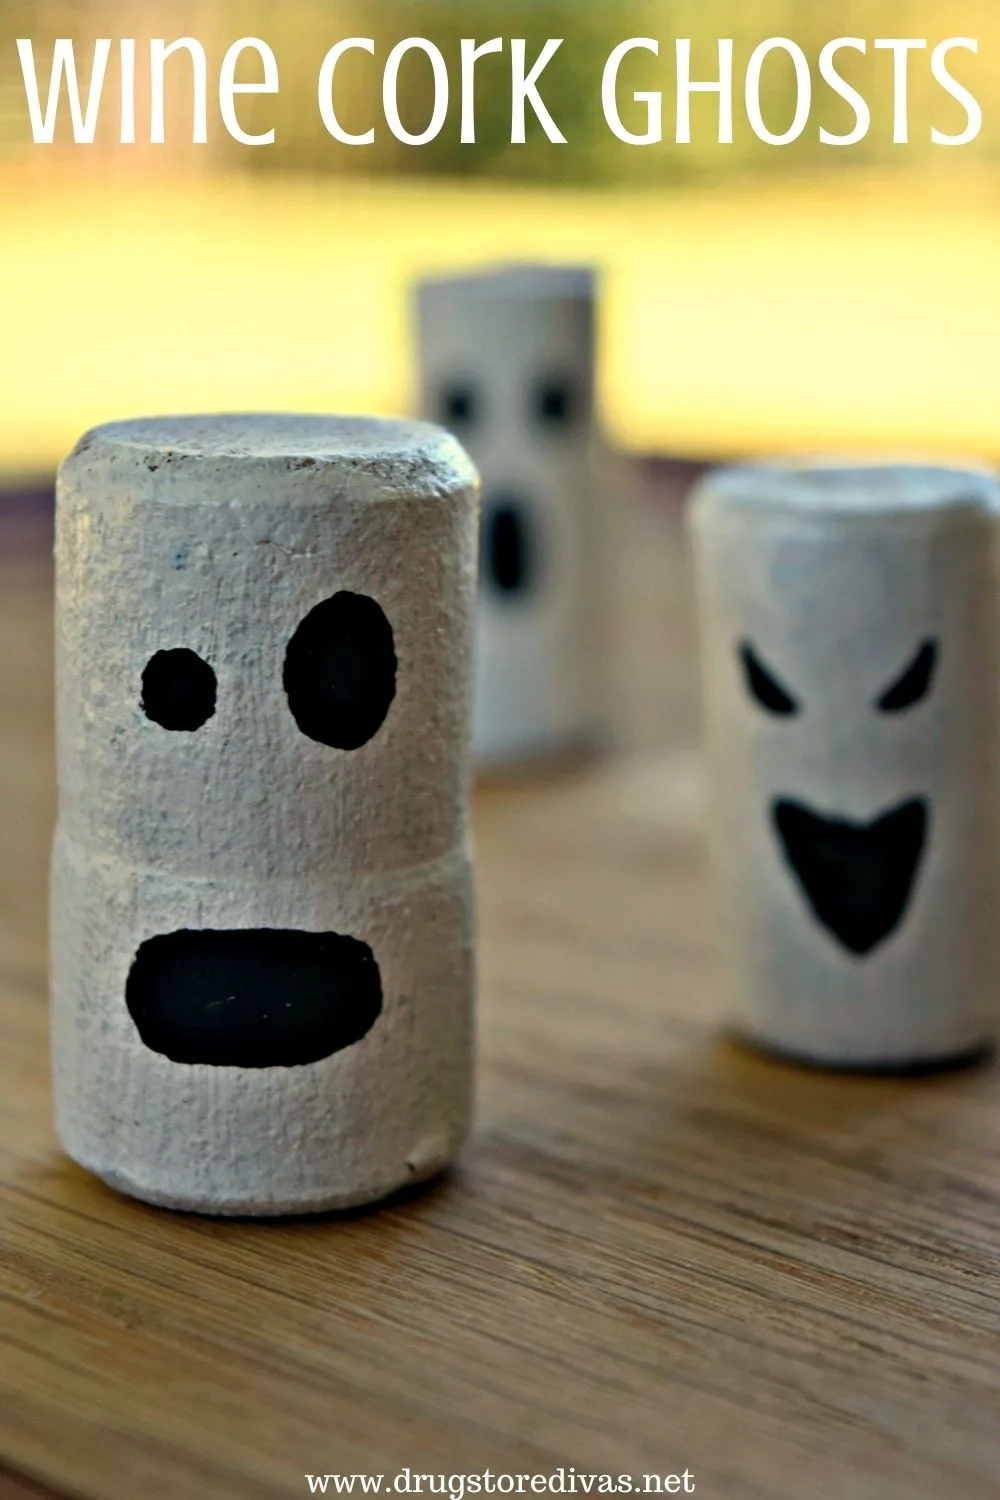
Halloween was last week. So sure, maybe we’re a little late for Halloween crafts right now. But today we’re making Wine Cork Ghosts.
And, technically these aren’t Halloween ghosts. Ghosts can be around us any time. And I actually did see a ghost once. But that’s another story for another time.
Anyway.
These Wine Cork Ghosts are really easy to make, and there’s a good chance you have everything you need to make them in your house right now. So they’re a fun craft to do on a cold day, post-Halloween or not.
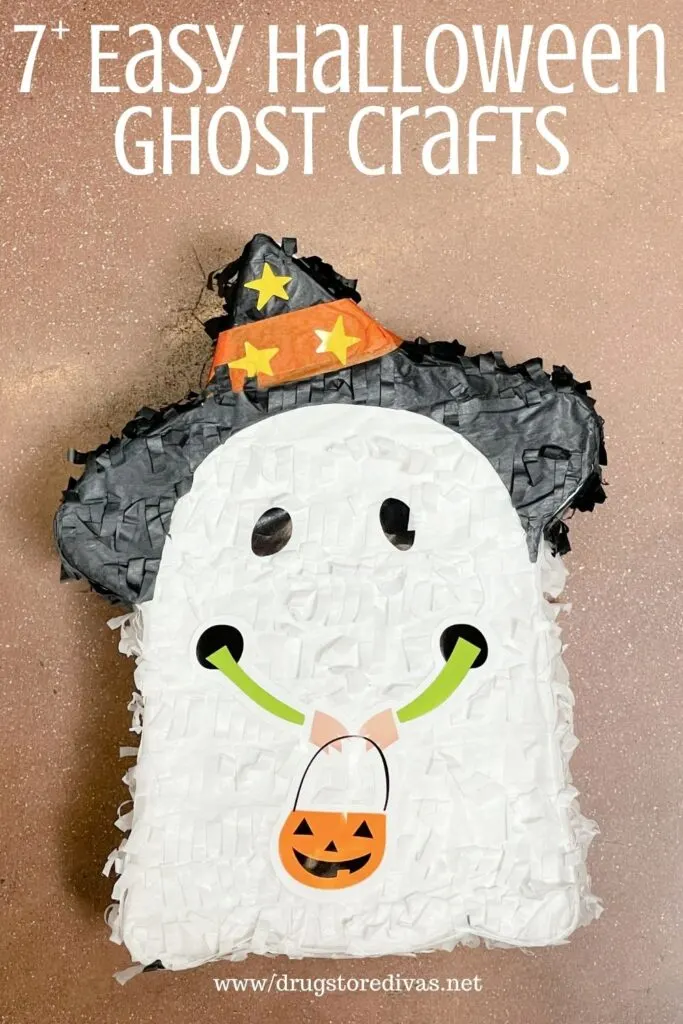
Want more Halloween ghost crafts?
If you’re looking for more Halloween ghost crafts, you’re in luck. Check out our list of Easy Halloween Ghost Craft Ideas.
Wine Cork Ghosts Tutorial
Affiliate links are included in this post and Drugstore Divas may make a small commission if you use them.
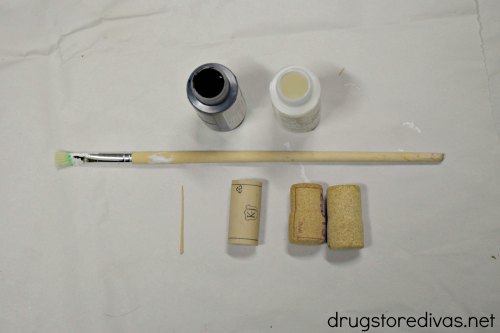
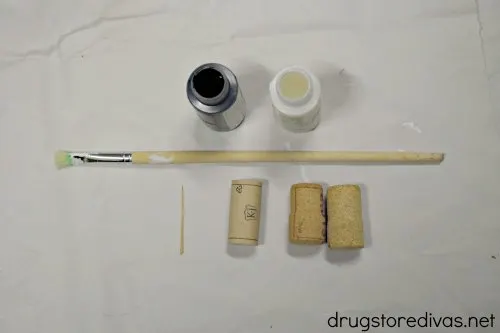
Wine Cork Ghosts Tutorial Supplies:
How To Make Wine Cork Ghosts:
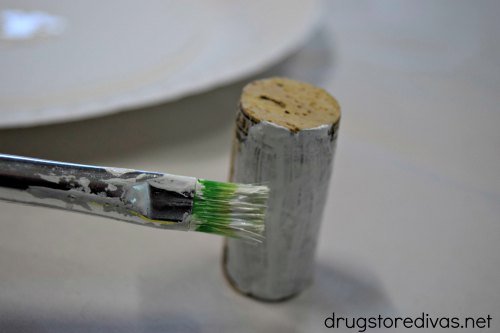
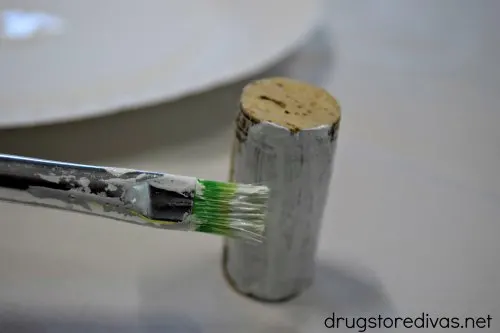
Paint the rounded portion of the wine corks with a thin layer of white acrylic paint.
Paint the top of the wine cork white and let it sit and dry.
When it has dried completely, paint another thin layer of white across the rounded portion.
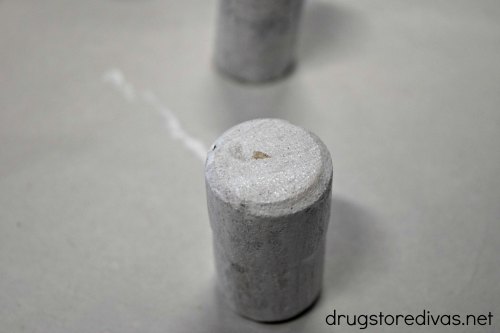
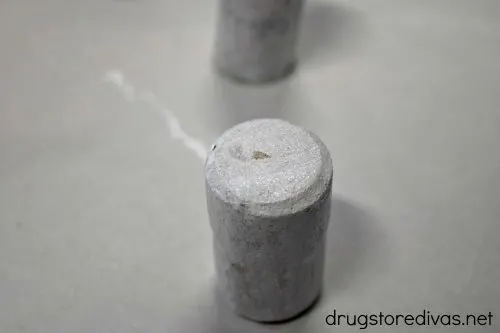
Set it aside to dry completely.
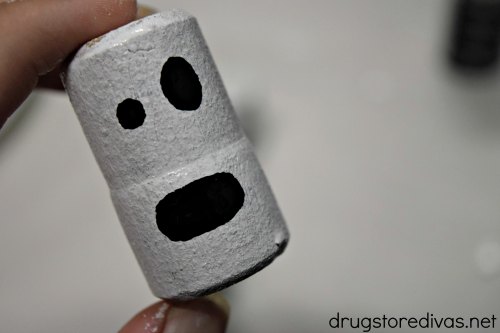
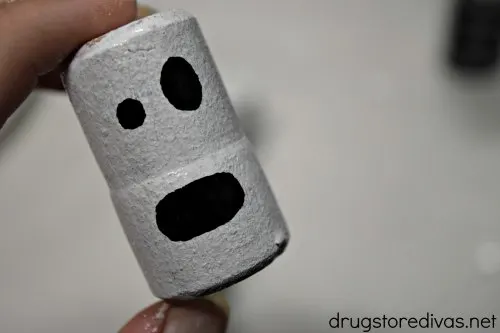
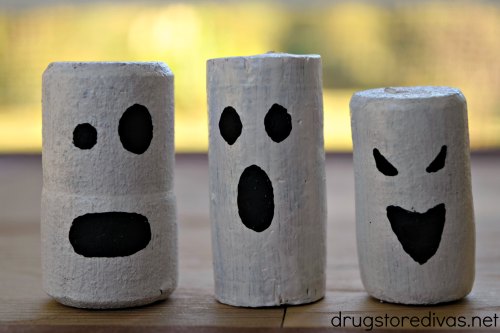
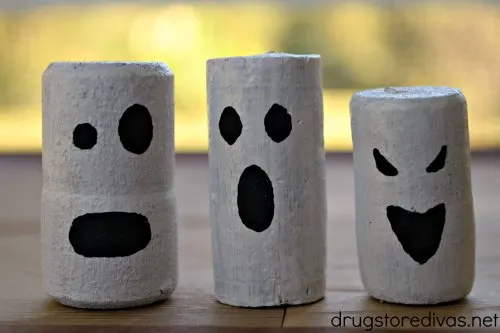
Dip a toothpick in the black acrylic paint and paint on ghost faces.
Painting the faces on with a toothpick takes steady hands and patience, but it’s a lot easier to paint the ghost faces with a toothpick than with paint brush. Even the smallest paint brush is too wide (for me, anyway) to paint faces on a wine cork.
Let the black paint dry completely, then display the ghost wine corks somewhere.
I only painted one face per wine cork ghost. If you wanted, you could paint one face on the front side and another on the back, and then you could flip them around from time to time.
Are Wine Cork Ghosts a kid-friendly craft?
I actually made these wine cork ghosts when I was hanging out with our friends’ 5 year old. I thought the craft would be easy enough for her and would hold her attention.
Little did I know, wine corks take a while to dry.
So we painted the corks white, played a board game, and then came back to the corks. I painted a second layer on mine, but her first layer was pretty thick so I let her skip a second coat.
Instead of using black paint and a toothpick to make the faces, I gave her a permanent ink marker and had her to draw the faces onto her wine cork ghosts.
That worked a lot better for her.
Wine Cork Ghost variations
Once I made the wine cork ghosts, I had so many other ideas for wine cork Halloween crafts. But since I had already told the 5 year old that we were making ghosts, I didn’t want to change our craft.
But, if you have an abundance of wine corks left over from your wine, you can make a whole series of Halloween wine cork crafts. And, if you want to make them but don’t have wine corks, you can actually buy wine corks online.
Now for the variations.
I haven’t actually made these wine cork ghost variations yet, so there aren’t any photos or full blog posts for these. Instead, it’s just the tutorials. When I do make them in the future, I’ll be sure to update with images. Or if you make them, send me a photo of yours and I’ll add it to the post.
As with the wine cork ghosts, if you’re making these variations with kids, you’ll want to adapt. If the kids are a little older and you feel okay with them using a toothpick to paint on the faces, go for it. If the kids are a little younger, take out various permanent ink markers and have the child draw the faces on instead.
Wine Cork Mummy
Paint the wine cork white, following the same instructions for the wine cork ghost. When the paint has dried, use the toothpick to paint two black eyes about one-third of the way down the cork. Use the other end of the toothpick to make white dots in the eyes.
Cut a piece of white streamer. Dab a little glue on it and affix it to the top of the cork. Wrap it around the cork, making sure to avoid the eyes, then glue the streamer to the bottom of the cork so it stays.
Wine Cork Pumpkin
Instead of painting the wine cork white, paint the wine cork orange around the rounded portion of the cork. Paint the top of the wine cork green.
Let it dry completely. Then, use a toothpick and black paint to paint a spooky pumpkin face onto the wine cork.
Just like I suggested with the wine cork ghosts, you could paint one face on the front of the wine cork pumpkin and paint a different face on the back. Then, you could turn it around from time to time.
Wine Cork Frankenstein
Instead of painting the rounded portion of the wine cork white, like you would for the wine cork ghost, paint it green.
When the green paint dries, paint the top of the wine cork black. Then, paint a small section of the upper portion of the wine cork black to make Frankenstein’s bangs.
Use a toothpick, and black and white paint, to paint Frankenstein’s face. Don’t forget about painting Frankenstein’s stitches. Let the paint dry completely.
Take two very small screws and twist them into the sides of Frankenstein’s head. Be really careful when you do this because you don’t want the wine cork to start to fall apart because of the force.
Wine Cork Bats
Instead of painting the wine cork white, like you do for the wine cork ghosts, paint the wine cork black. Let it dry.
Paint white circles for eyes, plus two white fangs. Be sure to put a black dot in the eyes for pupils. Set the wine cork aside to dry.
Get a piece of black card stock and cut out a small set of bat wings. Use a tiny dab of glue to affix the bat wings to the back of the wine cork.

More Wine Cork Halloween Crafts:
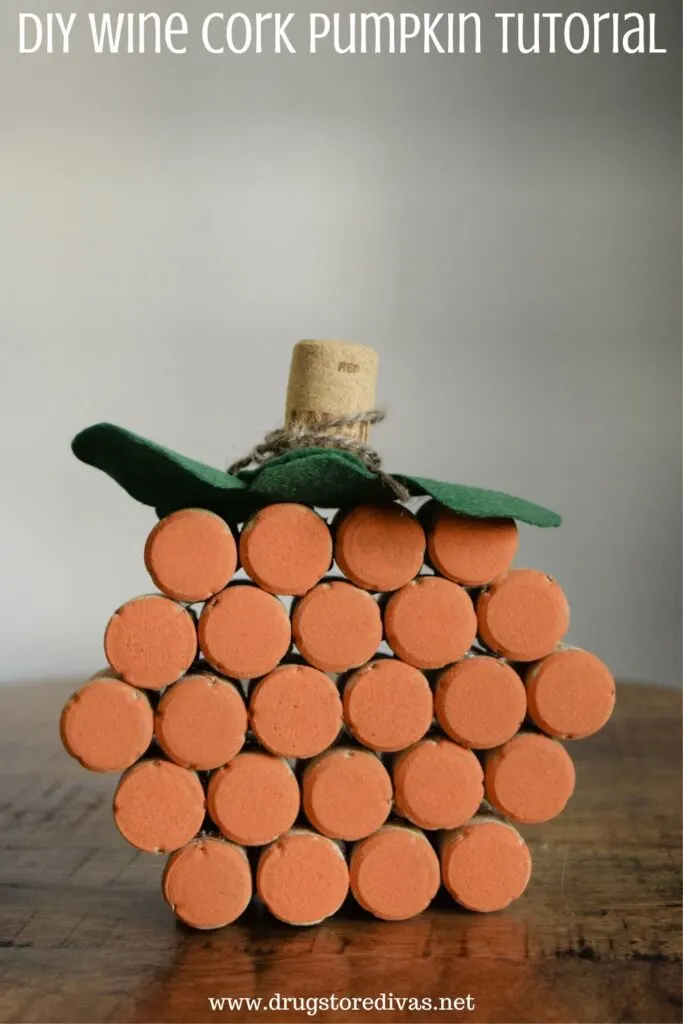
This pumpkin isn’t the only Halloween craft we made from wine corks. For another idea, check out our Wine Cork Pumpkin. Or our DIY Wine Cork Stamped Pumpkin T-Shirt.
Have you tried this Wine Cork Ghosts tutorial? Let us know how it went in the comments.