

When Pete went to New Orleans on a guys trip last year, he brought me back a hanging garden. It was really cool and very thoughtful, but I honestly had no idea how to hang a hanging garden.
So for months, it just sat in our garage.
Every so often, Pete would ask me if I was going to hang it, and I would always tell him that when I figured out a way I would. But no matter how hard I thought, I couldn’t figure it out.
I didn’t want to bang nails into our siding, and I didn’t think I could suspend it from the roof of our screen room. Pete had suggested hanging it inside, but there were even less ways I could think of to hang it that way.
I consulted Google because that’s what you do when you need answers in 2018, and I still came up empty.
Finally. Out of nowhere. It hit me.
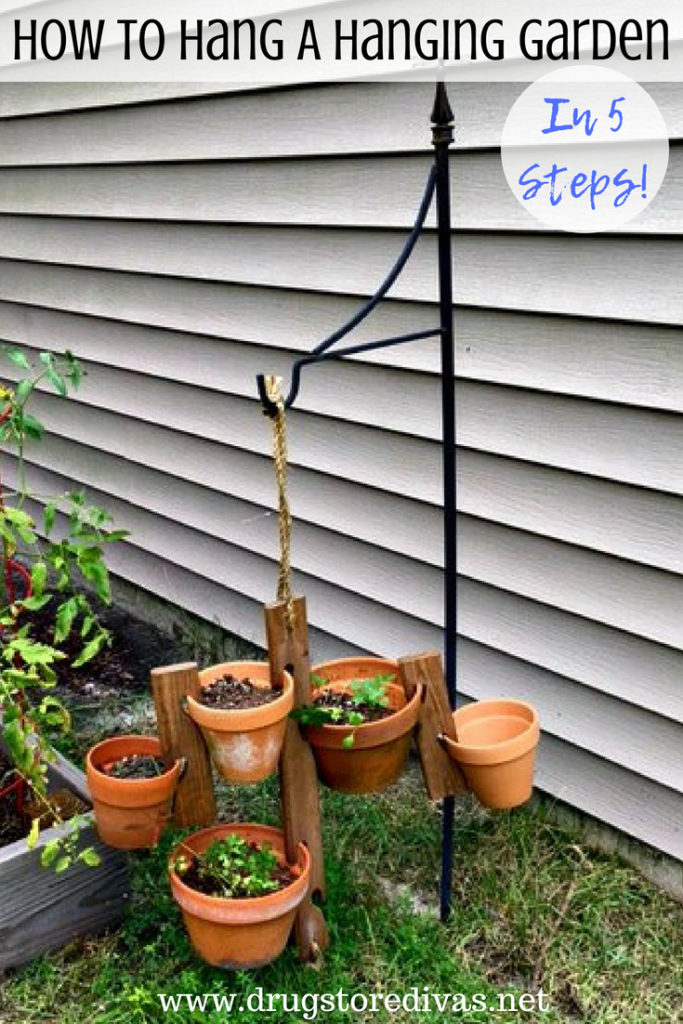
How To Hang A Hanging Garden (in 5 Steps!)
Step 1:
The first thing you need to do is purchase a hanging garden. Pete got one from a local vendor in New Orleans, but you can purchase a hanging garden online.
You can purchase just the main base by itself. You can also add attachments. Pete got me one base and two attachments.
Step 2:
The hanging garden is for hanging terra cotta pots. So, when you are hanging this, you really need to be conscious of the weight of them — with dirt. I originally just thought of the weight of the plants, but with dirt (especially wet dirt) this weighs a lot more than you anticipate.
If you don’t have the terra cotta pots, you need to buy them.

Step 3:
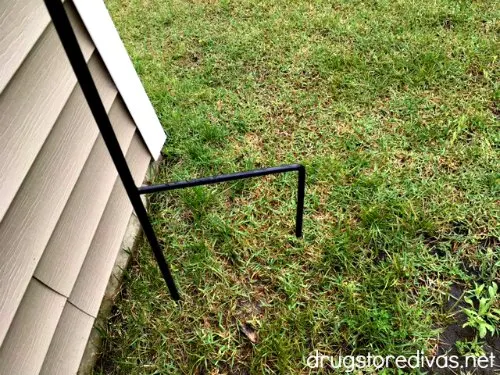
Purchase a Shepherd’s Hook. You can buy a cheap one, but that’s going to cost you in the long run. A cheap Shepherd’s Hook won’t hold too much weight. So once you put the hanging garden on it, it will bend forward. And one strong storm will knock it over, breaking your pots and ruining your garden.
I had originally purchased a Shepherd’s Hook that could hold 12 pounds (this is when I didn’t anticipate the weight of the dirt). That was way too weak. I exchanged it for a heavy duty wrought iron Shepherd’s Hook and that has been perfect.

Step 4:
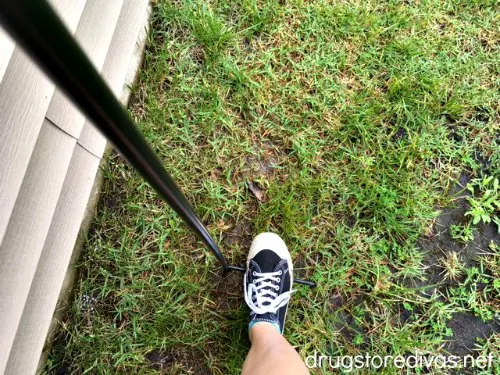
Use a small hoe to break up the ground where you want to place your Shepherd’s Hook. Despite what I had hoped, you can’t just stomp it in with your foot. You need to actually dig a nice spot for it, then insert it into the ground.
If it doesn’t go in all the way, that’s okay. You can try to step on it like I did, but that’s not gonna help.
Instead, grab a small block of wood, place it on the bottom of the Shepherd’s Hook, and pound it with a hammer. That will help the hook get into the ground and it won’t ruin the hook. If you have a rubber mallet, you can just bang on the hook itself. But if you only have a hammer, don’t do that. You will chip away at the coating and that will encourage rusting.
Now, if you are a little worried about the stability of the Shepherd’s Hook, you can purchase a U-shaped iron rod and put that over the base of the Shepherd’s Hook. My dad originally was going to get me one, but I think he forgot about it. This has been hanging for months now and it hasn’t moved a centimeter, so I’m not too worried.

Step 5:
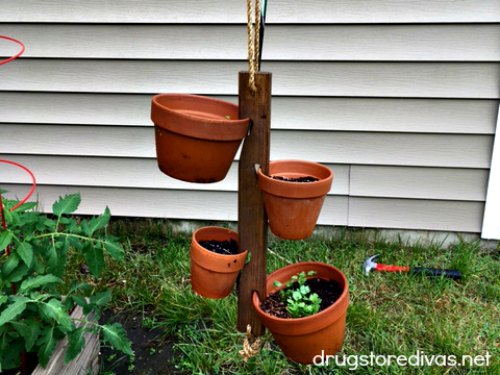
Hang the hanging planter from the Shepherd’s Hook. Then, hang the terra cotta pots from it. You don’t have to make them symmetrical, but you do have to distribute the weight evenly.
If you have the additional attachments, you can hang those from the terra cotta pots from the main hanging planter.
That’s it!
I hung mine with two terra cotta plants filled with herbs I was already growing (parsley and cilantro), and then other pots I had from last year that weren’t growing anything yet.
I mostly grow my herbs from seed each growing season. They don’t take too long to start sprouting.
For something like tomatoes, I wouldn’t start them from seed because that’s out of my skill set. So those I always start from sprouts. For mint, though, I can grow that from seed easily.
I don’t have our oregano or basil hanging because those plants are just too big for this. But small flowers and small herbs are perfect for your hanging garden.