
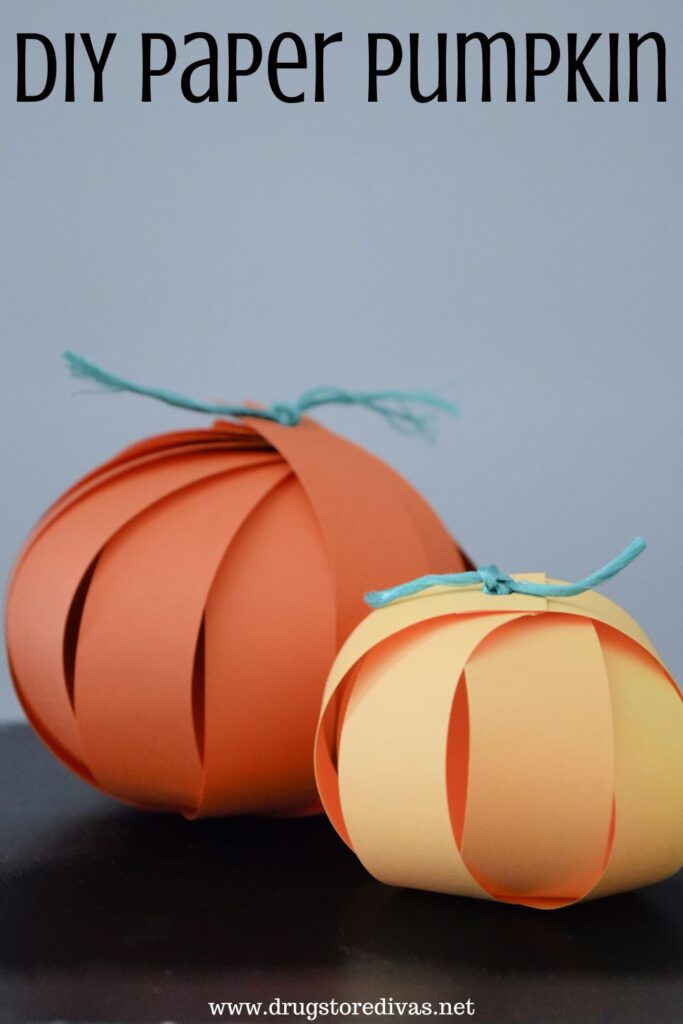
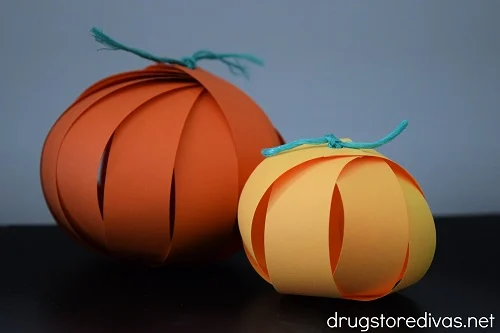
If you’re looking for an easy fall craft, this DIY Paper Pumpkin is it. You only need a few supplies and a little bit of time to make them.
For more ideas, check out all of our DIY posts.

It’s a little early for me to start thinking about Halloween decorations. That’s still six weeks away. But the first day of fall is next week (although, honestly, someone tell the weather). So that means all the pumpkin decorations can be set out.
If you want to start your fall decorating, but you don’t have any pumpkin décor, just make some, like these DIY Paper Pumpkins. They’re really cute and all they take to make are some items that you probably already have around your house. That makes them the perfect craft for a fall weekend.
What’s great too is you can start the craft and set up the supplies when the craft is about half done (when the paper pieces are cut and hole punches). Then, you can set them out and let your kids finish the rest of the craft so they have something to do besides sitting on their tablets all day.
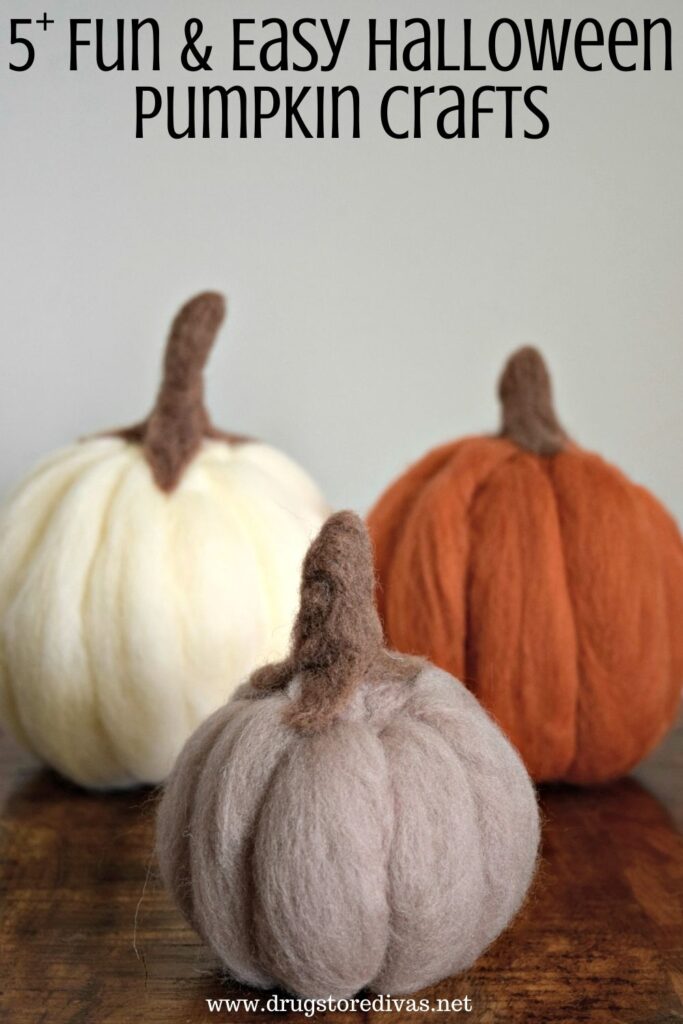

If you’re looking for other pumpkin tutorials to make crafts to go with this one, check out out list of Fun & Easy Halloween Pumpkin Crafts.
DIY Paper Pumpkin
Affiliate links are included in this post and Drugstore Divas may make a small commission if you use them.
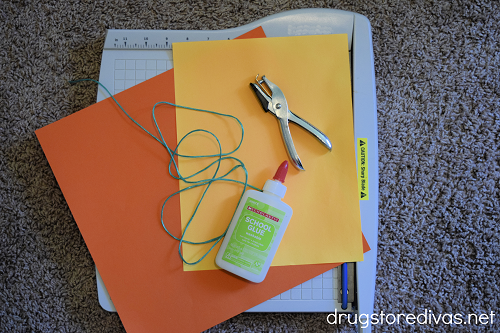
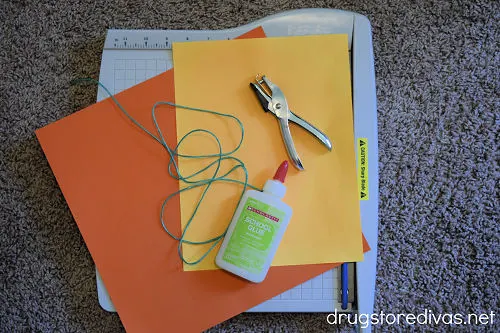
DIY Paper Pumpkin Supplies:
You can get the full list of supplies in the how to card below.
- Scrapbook paper – You want two shades of orange scrapbook paper.
- Paper trimmer – You could use scissors, but a paper trimmer is easier.
- Single hole punch – If you don’t have one, a three-hole punch would work too.
- Glue – White glue is fine.
- Green twine – Any shade of green works.
How To Make A Paper Pumpkin:
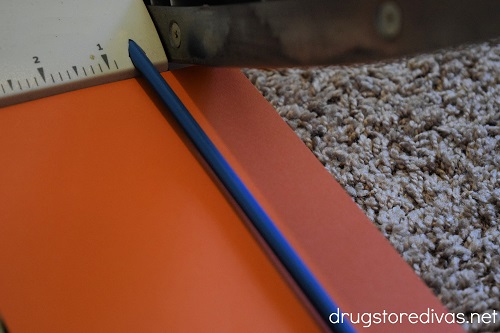

Start with a 12- x 12-inch piece of scrapbook paper.
Use a paper trimmer to cut it into 1- x 12-inch strips. You’ll need to cut six strips.

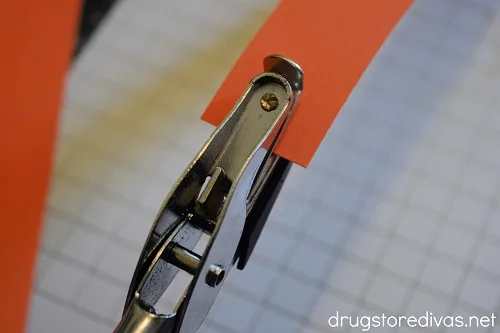
Punch a hole about a quarter-inch down from each end of the strip.
What I actually ended up doing was folding one of the strips in half (making sure not to crease it in the middle) and hole punching both sides at once. Then, I used that strip as a template to cut the rest of the strips so they were all even. You don’t have to be that serious about it, but I feel like it helped.

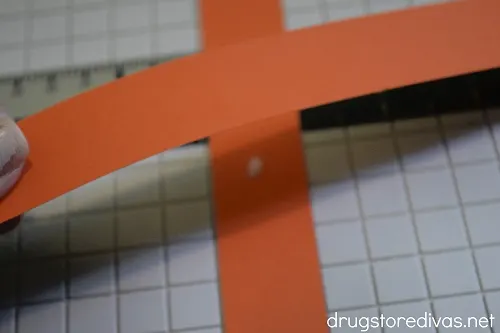
Lay down one strip of paper.
Put a dab of glue in the middle.
Lay another strip across it to make a plus sign.


In between each gap that the plug sign creates, you’ll be placing two strips of paper. So, add a dab of glue, then place the strip accordingly, leaving enough room for a second strip in that area.
Continue until you’ve glued together six strips. Set them aside to dry.
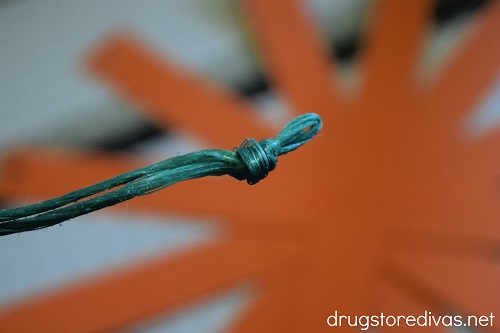

When the strips are dry, take a piece of twine, fold it in half, and knot it at the bottom.
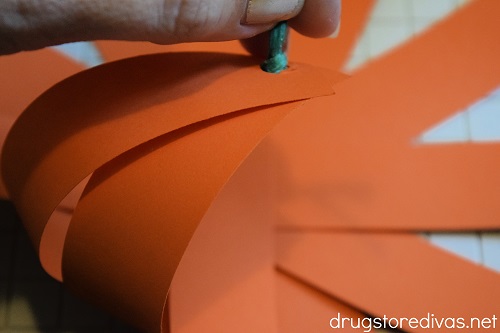

Grab one of the strips and bring it into the middle, making sure to curve it.
Take both untied ends of the twine and put them through the bottom of the hole punched hole on that strip.
Take the strip to the left and put the twine through the hole (again, coming from the bottom). Continue until you’ve gone around the entire pumpkin.
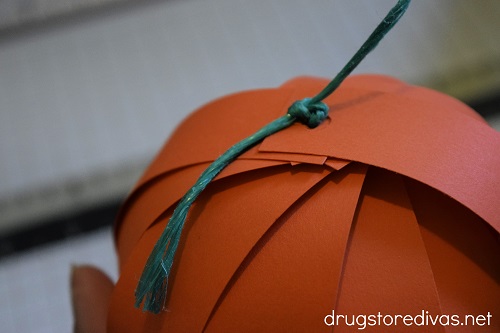

Tie the two ends of the twine together to make a knot. Tie a second knot. Display the pumpkin wherever your heart desires.

DIY Paper Pumpkins: Frequently Asked Questions
We used plain orange scrapbook paper to make these pumpkins. Scrapbook paper with a design on both sides would work as well. But, scrapbook paper with a design printed on just one side wouldn’t be as good. You would see so much white on the inside of the pumpkin and it would detract from it.
You absolutely can turn these paper pumpkins into jack-o-lanterns. Take a piece of black card stock, construction paper, or scrapbook paper. Cut out the pieces of a jack-o-lantern face. Use a tiny bit of glue or double sided tape to stick the face onto the paper pumpkin.
More Halloween Crafts:
If you’re making these pumpkins to go with your Halloween decorations, we have some more Halloween crafts that you might like:
DIY Paper Pumpkin


If you’re looking for an easy fall craft, this DIY Paper Pumpkin is it. You only need a few supplies and a little bit of time to make them.
Materials
- Scrapbook paper
- Glue
- Green twine
Tools
- Paper trimmer
- Single hole punch
Instructions
 Start with a 12- x 12-inch piece of scrapbook paper. Use a paper trimmer to cut it into 1- x 12-inch strips. You’ll need to cut six strips.
- Punch a hole about a quarter-inch down from each end of the strip.
- Lay down one strip of paper. Put a dab of glue in the middle. Lay another strip across it to make a plus sign.
- In between each gap that the plug sign creates, you’ll be placing two strips of paper. So, add a dab of glue, then place the strip accordingly, leaving enough room for a second strip in that area. Continue until you’ve glued together six strips. Set them aside to dry.
- When the strips are dry, take a piece of twine, fold it in half, and knot it at the bottom.
- Grab one of the strips and bring it into the middle, making sure to curve it. Take both untied ends of the twice and put them through the bottom of the hole punched hole on that strip. Take the strip to the left and put the twine through the hole (again, coming from the bottom). Continue until you’ve gone around the entire pumpkin.
- Tie the two ends of the twine together to make a knot. Tie a second knot.
Notes
Have you tried making these DIY Paper Pumpkins? Let us know what you thought in the comments.