
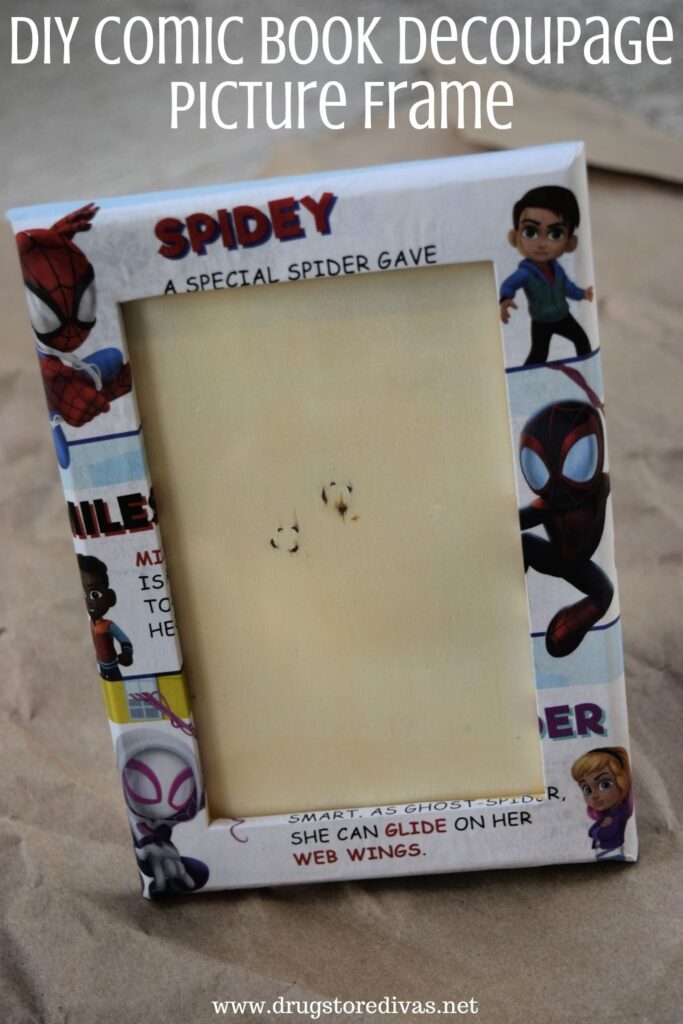
If you’re looking for a craft for a comic book lover, this DIY Comic Book Decoupage Picture Frame is perfect (as long as you don’t cut his or her favorite comic to make it).
For more crafts, check out all of our DIY posts.

Comic books are so popular right now. I mean, there’s a reason why there are eighty gazillion Marvel movie and streaming episodes that have been released this year alone.
So when you’re trying to think of a gift for a comic book fan, it seems easy. Just get them action figures. As easy as that is for kids, it doesn’t work for an adult comic book fan. I mean, it might. But this DIY Comic Book Decoupage Picture Frame works better.
Just please, promise me that if you continue reading, you won’t use your gift recipient’s favorite comic to make this. Because that could be a disaster.
Personally, I used a comic from Free Comic Book Day to make this tutorial.


If you have extra pages from the comic book, you can use them to make these cute DIY Comic Book Coasters.
DIY Comic Book Decoupage Picture Frame
Affiliate links are included in this post and Drugstore Divas may make a small commission if you use them.


DIY Comic Book Decoupage Picture Frame Supplies:
You can get the full list of supplies in the how to card below.
- Unfinished solid wood frame – A standard comic book is 6.625- x 10.25 inches. You need the frame to be a little bit smaller than the comic book in order for the page to fit properly. Keep in mind that the size of the frame is measuring the opening in the center, not the actual frame. So, a 5- x 7-inch frame will fit a 5- x 7-inch photo. We used a 4- x 6-inch sized unfinished wood frame for this project and that gave us enough space around the edges to see the comic.
- Printer paper – This is to create a stencil.
- Pencil
- Scissors
- Comic book – Any comic book or graphic novel works.
- Mod Podge – We use gloss, but matte Mod Podge works fine too.
- Paint brush – Any size paint brush works.
- Triple clear glaze – This seals the comic book and protects it in case it gets wet.
How To Make A DIY Comic Book Decoupage Picture Frame:
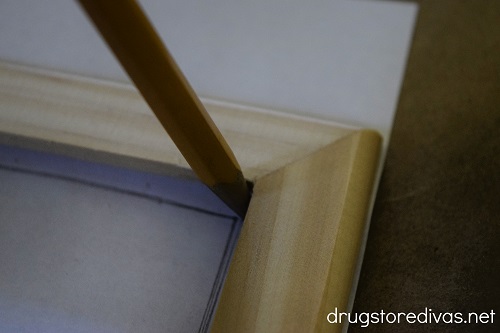

Trace the frame on paper, making sure to trace both the outside and the inside.
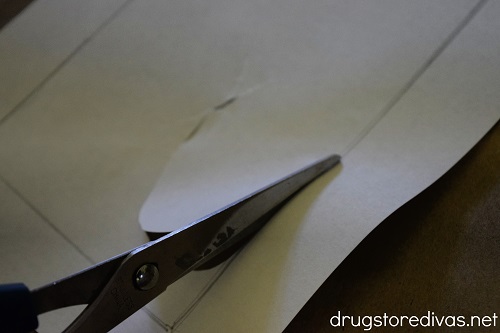
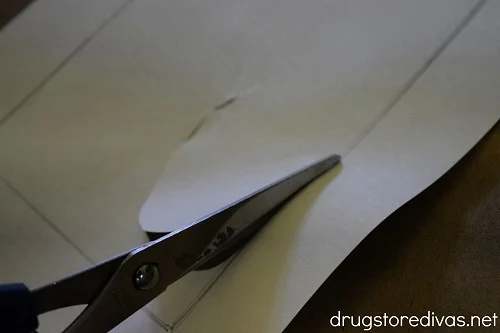
Cut the frame out of the paper, leaving a little bit of extra room around the edges.
Cut out the center, again, leaving a little extra room around the edges.
You actually want to cut this template out just a bit wider than your frame so you can pull the comic around the edges of the wood frame and slightly onto the back so that the wood frame is fully wrapped. This looks a lot more professional than if you stopped at the edges of the frame’s face.
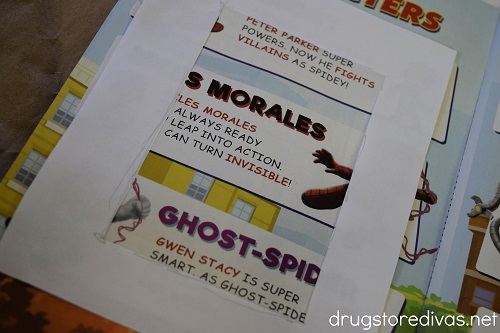

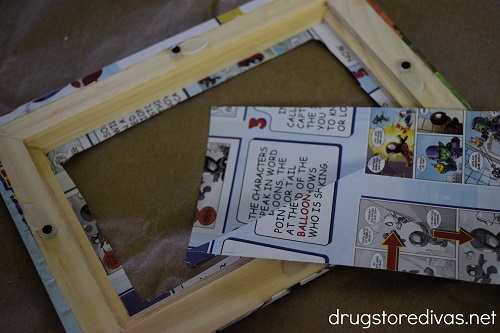
Place the template over the comic book’s pages. Once you find a page that lines up well, trace the template onto the page.
Cut out just the outer edge.
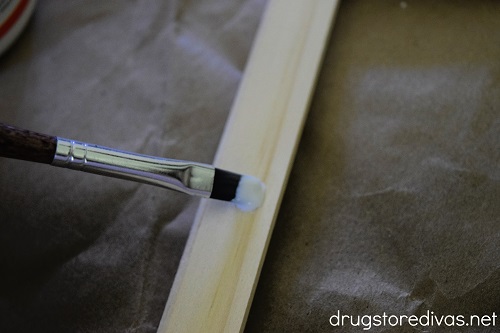
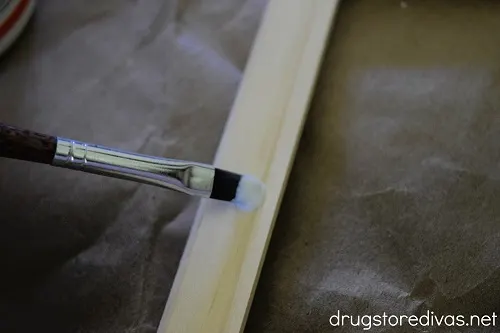
Paint a thin layer of Mod Podge onto the frame’s face, sides, and inside.
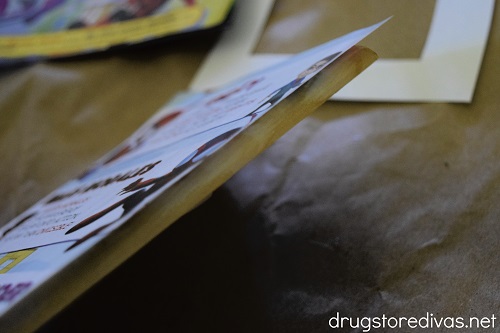

Put the comic book page, with the backside against the frame, onto the Mod Podge. Press down gently to affix the comic book to the frame’s front and sides.
You may have to fold the corners a little bit like you’re folding wrapping paper around a present in order to get it to stick down properly.

Flip the frame over.
Very carefully, cut out the excess comic book from the center of the frame, leaving a little bit of extra to fold over.

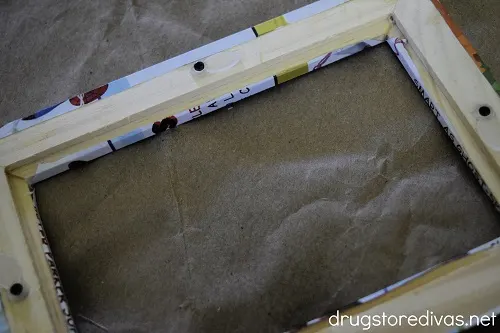
Add a little bit of Mod Podge around the edges of the frame (including the edges of the center) and affix the extra comic book page to the back of the frame.
Let it dry for about an hour.
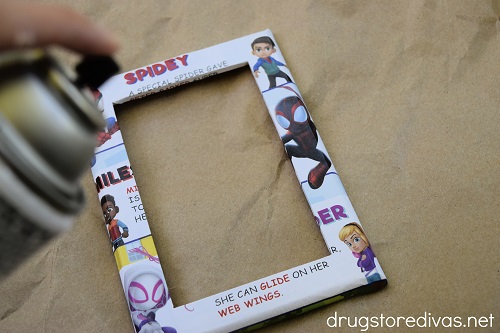

Spray the comic book page on the front of the frame with a very thin layer of triple clear glaze.
Be sure to spray from far away. If you spray too close to the paper, you’ll end up spraying too thick and it’ll wet the page and soak the back through so you’ll be able to see it and you won’t be able to see the images on the front as well.
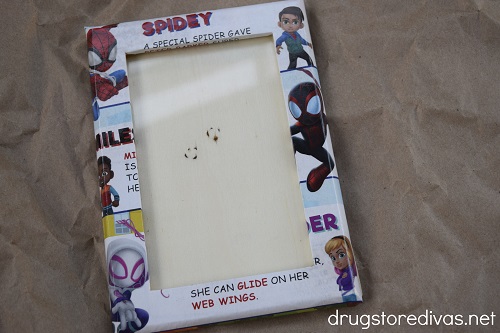
Let the entire frame dry overnight.

Comic Book Decoupage Picture Frame: Frequently Asked Questions
Of course you can decoupage comic books. This whole tutorial does just that.
What you want to keep in mind, though, is you want to use thin layers of everything: a thin layer of Mod Podge and a thin layer of glaze.
If you use too much Mod Podge, your comic book will wrinkle and won’t look great. If you use too much glaze, the images from the back of the page will show through.
If you really can’t bring yourself to cut up a comic book for this project, you might be thinking about printing comics on your home printer. That will only work if you have a laser printer. If you have an ink jet printer, the ink will smear when you use the Mod Podge and you’ll end up with a huge mess.
DIY Comic Book Decoupage Picture Frame


If you're looking for a craft for a comic book lover, this DIY Comic Book Decoupage Picture Frame is perfect (as long as you don't cut his or her favorite comic to make it).
Materials
- Unfinished solid wood frame
- Printer paper
- Comic book
- Mod Podge
- Triple clear glaze
Tools
- Pencil
- Scissors
- Paint brush
Instructions
 Trace the frame on paper, making sure to trace both the outside and the inside.
- Cut the frame out of the paper, leaving a little bit of extra room around the edges. Cut out the center, again, leaving a little extra room around the edges.
- Place the template over the comic book’s pages. Once you find a page that lines up well, trace the template onto the page. Cut out just the outer edge.
- Paint a thin layer of Mod Podge onto the frame’s face, sides, and inside.
- Put the comic book page, with the backside against the frame, onto the Mod Podge. Press down gently to affix the comic book to the frame’s front and sides.
- Flip the frame over. Very carefully, cut out the excess comic book from the center of the frame, leaving a little bit of extra to fold over.
- Add a little bit of Mod Podge around the edges of the frame (including the edges of the center) and affix the extra comic book page to the back of the frame. Let it dry for about an hour.
- Spray the comic book page on the front of the frame with a very thin layer of triple clear glaze.
Notes
You want to cut this template out just a bit wider than your frame so you can pull the comic around the edges of the wood frame and slightly onto the back so that the wood frame is fully wrapped.
Have you tried to make this DIY Comic Book Decoupage Picture Frame? Let us know how it went in the comics.