
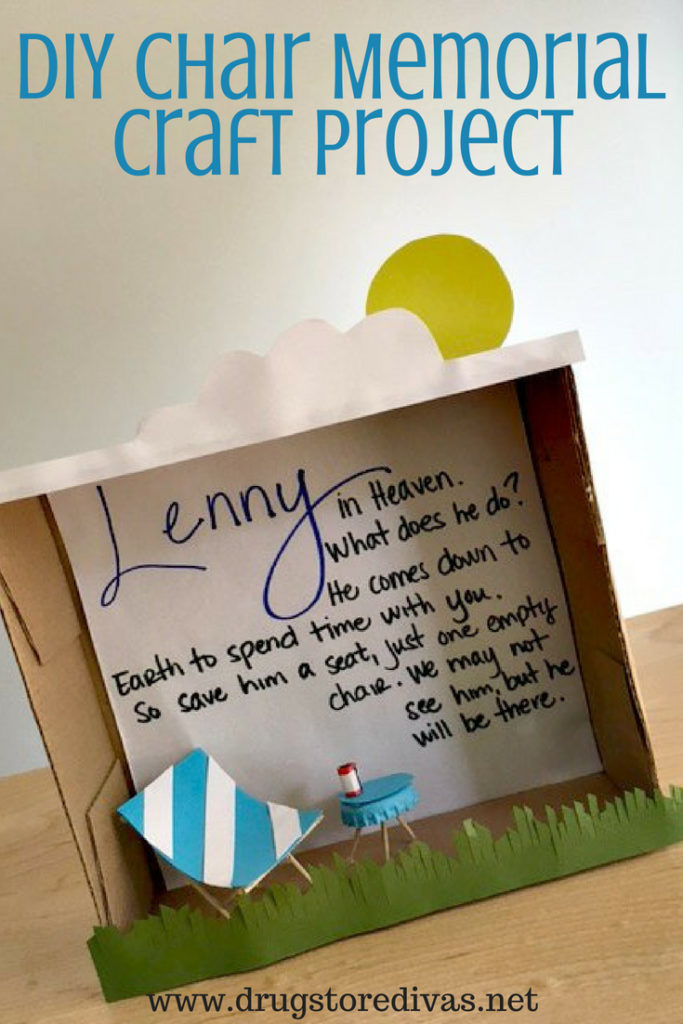
 We have a memorial/celebration of life party to go to today. It’s sad, really sad, for our entire cul de sac. We all hang out often, so missing one person is a huge loss. That’s why I wanted to make the DIY Chair Memorial Craft Project that is so popular online.
I’ve seen it done mostly as memorial crafts for loved ones at Christmas, but I adapted it to be a little more generic.
The gist of it is that you are setting out a chair at Christmas for someone who has passed away. You leave the chair open and he or she will come and visit.
To be honest, as I’m typing this, I sort of remember it as a Passover tradition from when I was visiting a friend’s family. They left out wine for … someone Biblical. He would come during Seder, drink the wine, and hide matza for the children to find. The “finder” would win a prize.
So it’s similar, but your friend or relative who passed away just sits in this chair. No one drinks wine and no one hides matza.
An empty chair at a table is pretty depressing, though. So over time, people have created Christmas Chair Memorial crafts using dollhouse furniture. I don’t have dollhouse furniture anymore, so I found a tutorial on DIY In The Forest to make a lounge chair out of toothpicks. I did that, and then made a toothpick table to go along with it.
You can keep his for yourself or make this as one of the DIY memorial gifts you give to someone who just lost a loved one. They’ll be sure to love it if you do gift it.
DIY Chair Memorial Craft Project
What You’ll Need:
- 9 toothpicks
- Blue card stock
- Green card stock
- White card stock
- Yellow card stock
- Printer paper
- Scissors
- Blue paint
- Bottle cap
- Paint brush
- Glue gun
- Glue gun sticks
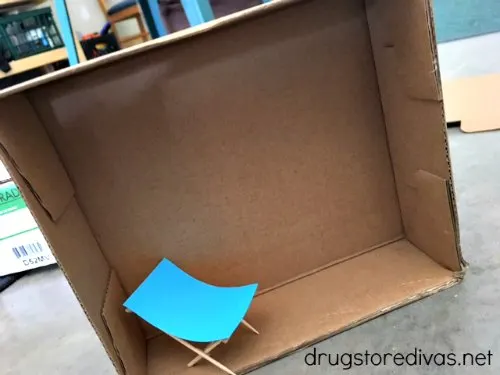
- Empty box
- Blue marker
- Black marker
What You’ll Do:
Follow the tutorial on DIY In The Forest to make the toothpick chair. I added stripes to mine too make it fancy.

Now, it’s time to make the toothpick table.
Cut two toothpicks into one inch pieces (you’ll have a half-inch piece from each left over that you can throw away).
Measure the top of a bottle cap to create a blue circle from the cardstock. Set it aside and paint the edge and the top of the bottle cap blue. When that has dried, glue the cardstock circle to the top.
When it has dried, flip it over and add a dab of glue. Put the toothpick pieces (flat side in) into the glue. Adjust them until the table can stand on its own. Let it dry.
Cut one side off of a box and glue the edges (in case your box had flaps that needed the side you cut off to be secure).
Measure the backside of your box and cut two pieces of white printer paper to fit there.
Set your chair and table where you expect to glue them down. Then, slightly trace around them. You’ll want to leave this space blank. You’ll also want to leave some room at the bottom as well for where the grass will block.
Place this paper with the guidelines behind a clean sheet of printer paper (so you can see the guidelines through). Use them as a guide for where to write your poem.
Using your black and blue markers, write the following poem:
(Name) in Heaven.
What does he do?
He comes down to Earth
to spend time with you.
So save him a seat,
just one empty chair.
We may not see him,
but he will be there.
Side note: You can adjust the poem, like I did. You can change he to she, him to her, and we to you (if you are giving this DIY Chair Memorial Craft Project as a gift).
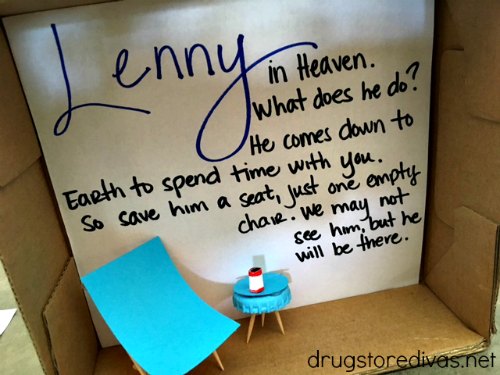
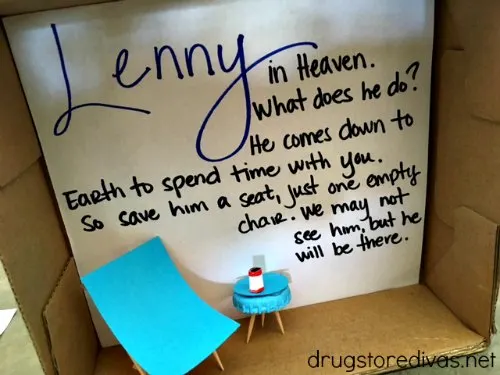
Glue this to the inner back of your box.
Cut a small piece of green cardstock to make grass. The easy way to do this is to cut a piece a slight bit longer than the length of your box and about an inch high. Then, cut very thin strips, from the top then halfway down, across the entire strip.
Go back through and cut each strip on an angle. Flip it and go back through cutting some of them on an angle in the other direction.
Glue this on to the bottom of your box, matching the non-cut edge of your cardstock with the box’s edge.
Now it’s time to make the cloud.
Cut a strip of white cardstock, about two inches high and just slightly longer than your box. Start by cutting a very thin strip, about an inch into the strip. Then, freestyle the cloud. After you made the cloud, continue to cut that very thin strip.
Glue the strip down to the top edge of your box.
Cut a large circle with a small rectangle attached to the bottom for your sun. Fold the rectangle to the back of the circle to make a crease. Then, glue it down so the sun pops up from behind the cloud.
Display it once it’s all dry.
Have you made a similar DIY Chair Memorial Craft Project before?
Madison Moulder
Sunday 24th of November 2019
Love how you used my tutorial! Such a great idea to use a bottle cap for the table.
drugstore diva lisa
Monday 25th of November 2019
Your chair tutorial worked perfectly in this craft! And I'm glad you liked my bottle cap table too.