
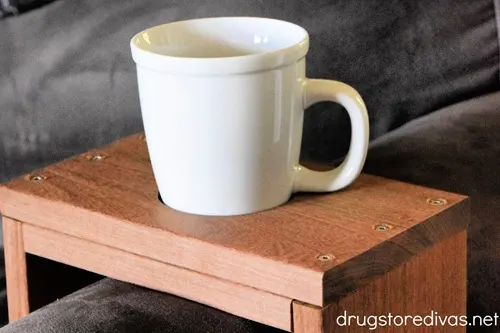
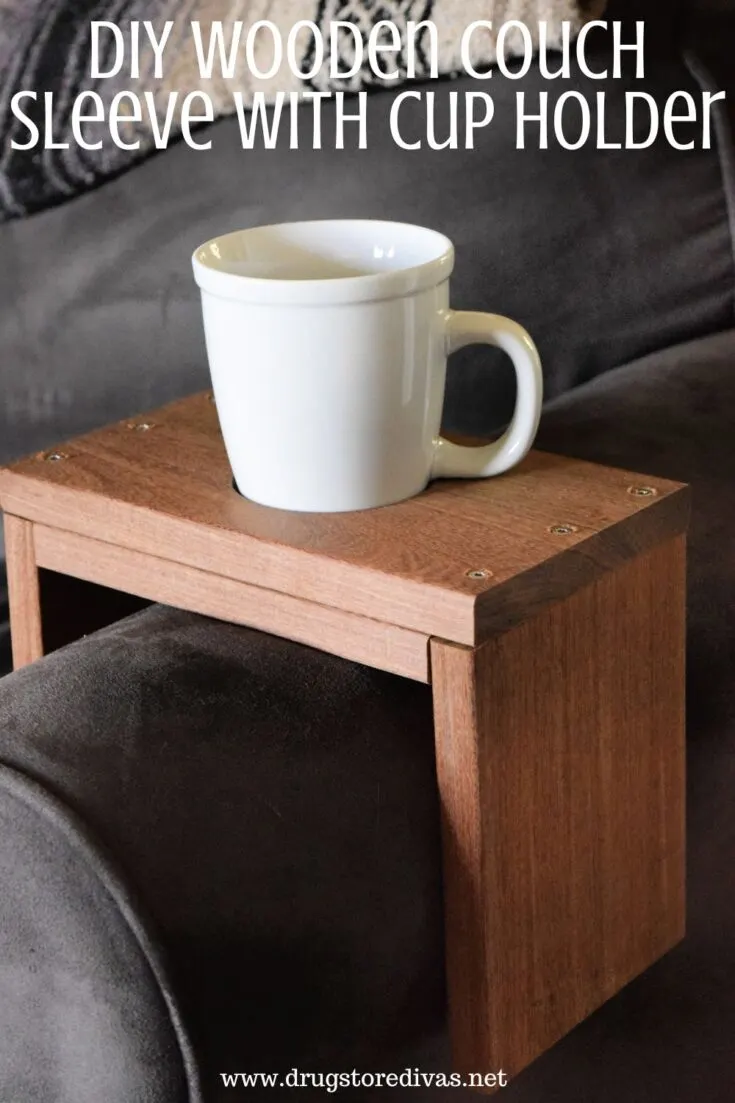
All you need are a few tools and a little time to make this DIY Wooden Couch Sleeve With Cup Holder. It’s the perfect DIY gift for your coffee loving friend who is a little too lazy to reach and put their cup on the coffee table.
For more ideas, check out all of our DIY posts.


We all have those friends who love coffee. They drink it all day long and love to meet up in coffee shops. So when Christmas rolls around, you instantly think, “I can get this friend a coffee mug.”
And sure. You can. But honestly, that’s sort of a cop out. Unless you know of a coffee mug that your gift recipient is yearning for, don’t get a coffee mug.
Instead, break out your tools, clear your afternoon, and make this Wooden Couch Sleeve with cup holder. It’s a much better, much less basic gift than a mug or a bag of coffee.
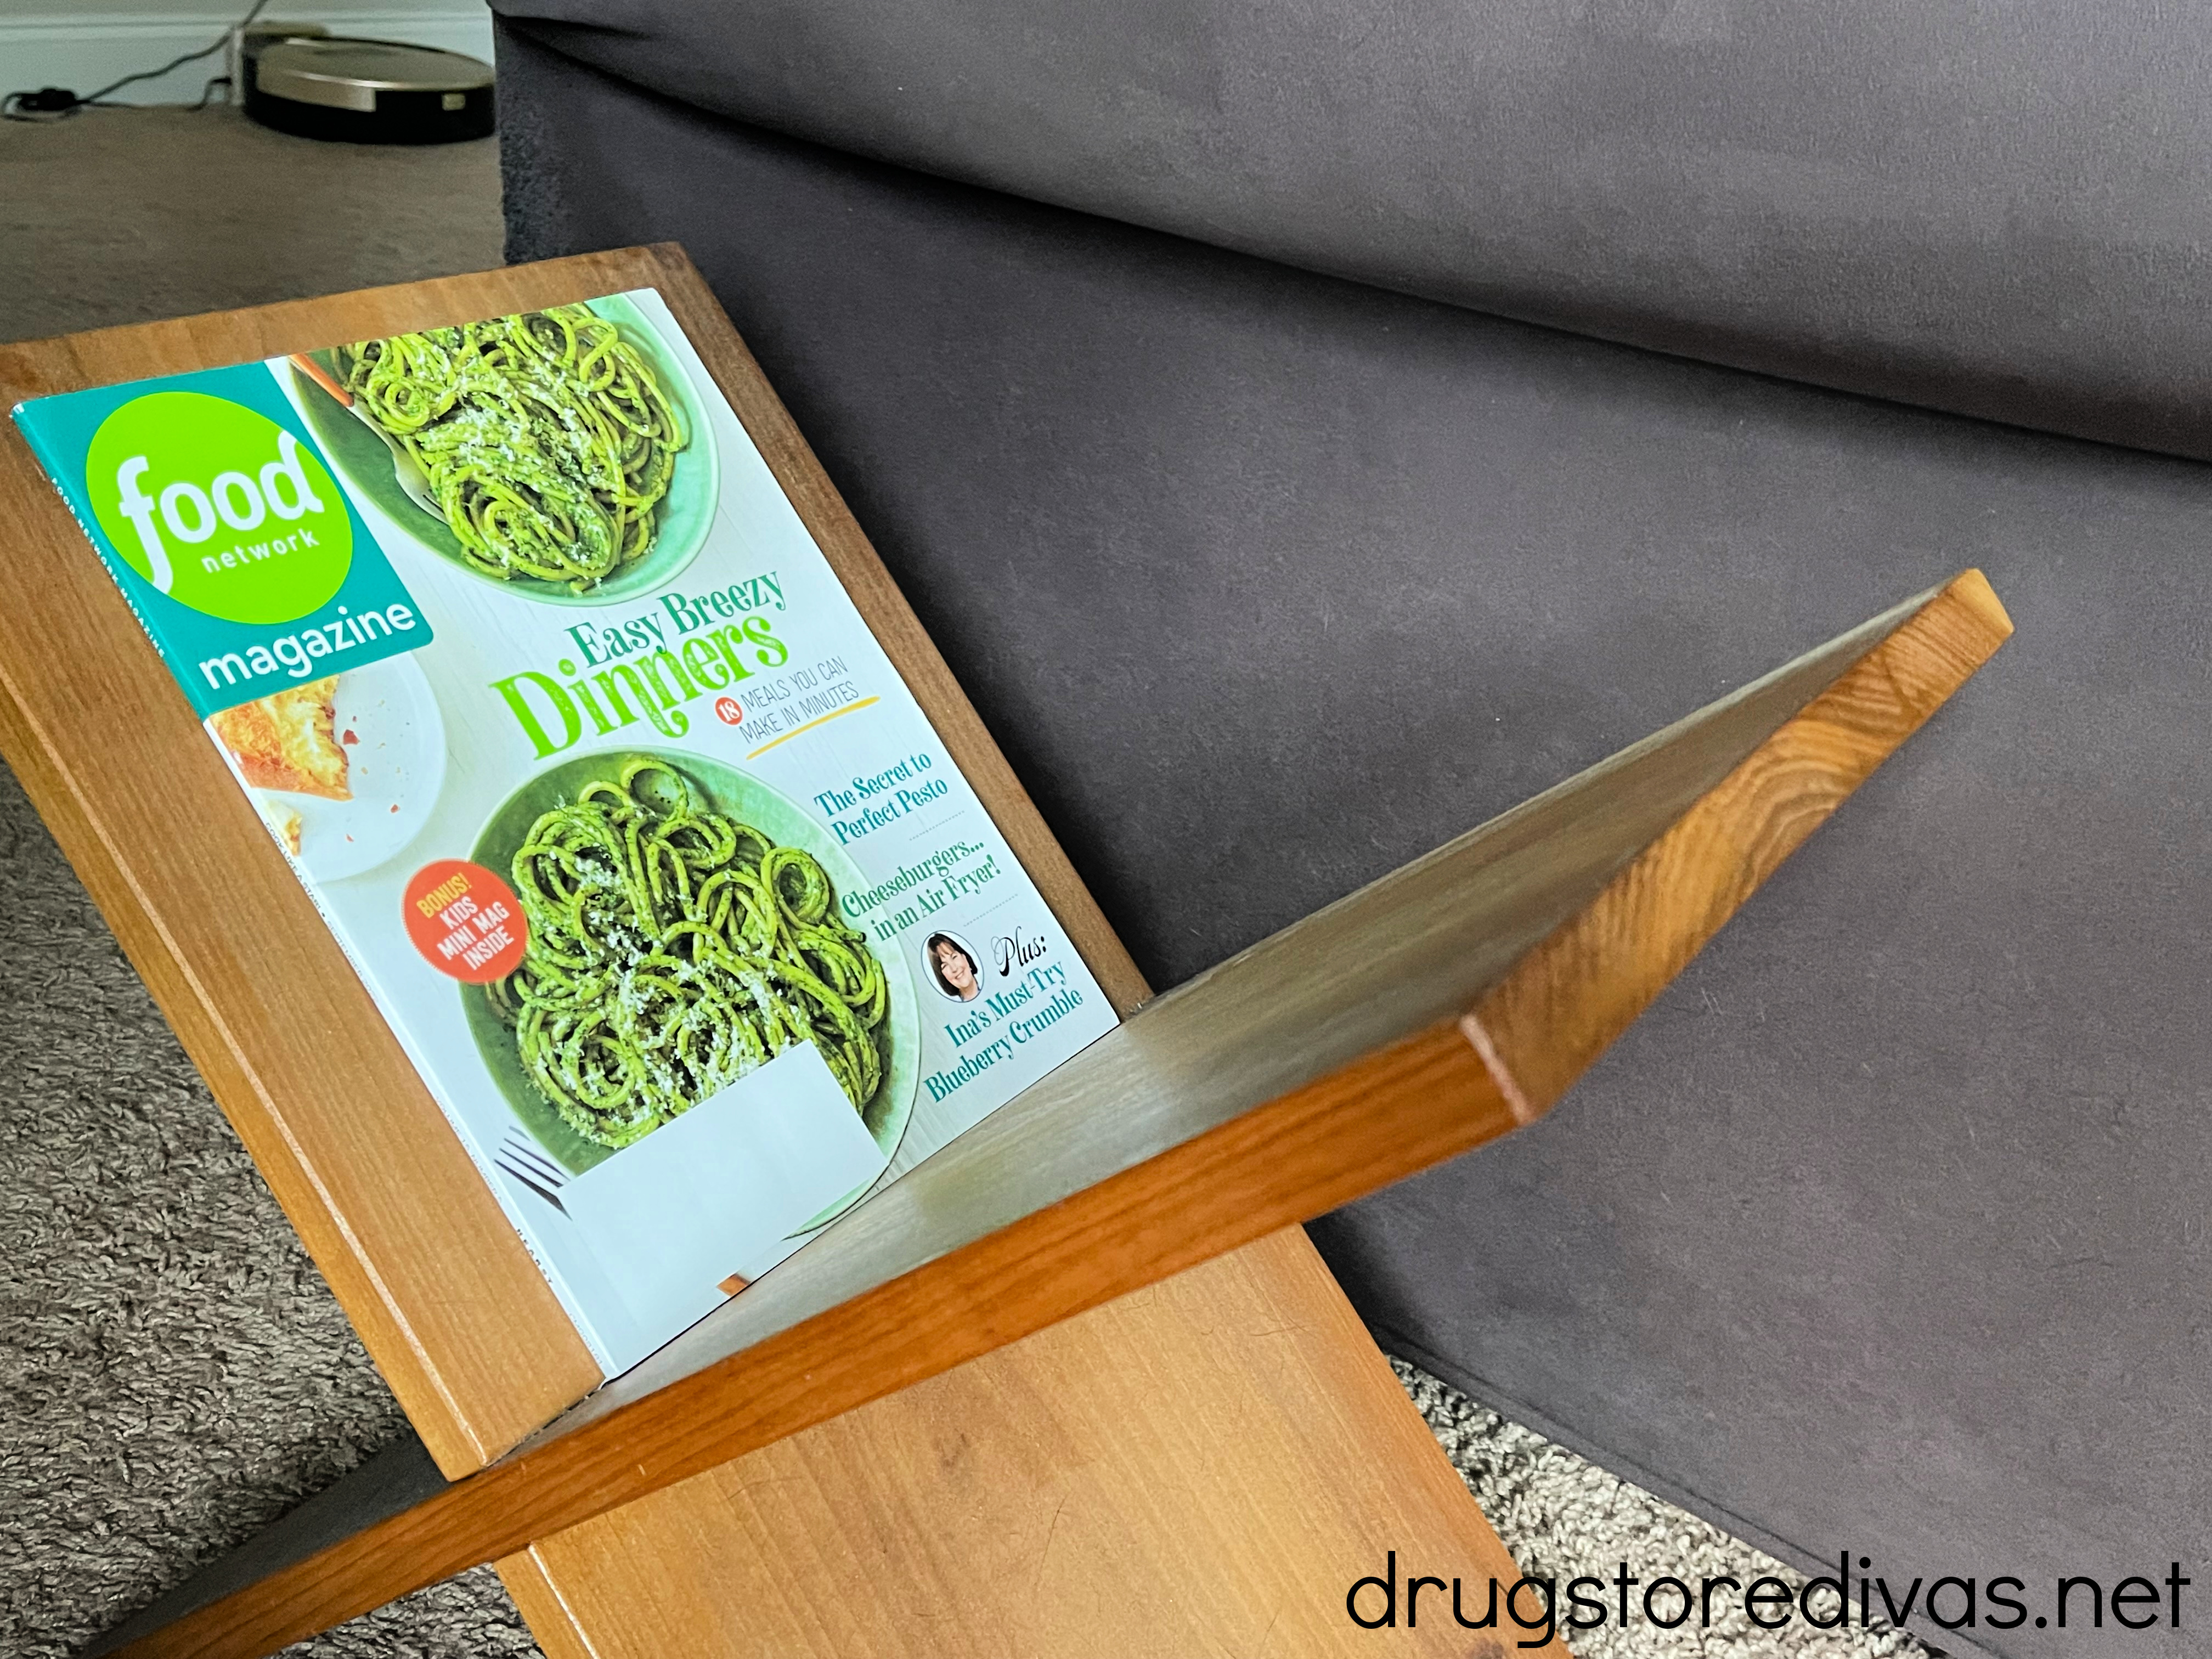
If you have some wood leftover when you’re done making this project, and you want to make something else for your home, go with our X-Shaped DIY Wooden Magazine Holder.
Pete made it years ago and it still looks brand new.
DIY Wooden Couch Cup Holder Tutorial
Affiliate links are included in this post and Drugstore Divas may make a small commission if you use them.
DIY Wooden Couch Cup Holder Supplies:
You can get the full list of supplies in the how to card below.
How To Make A Wooden Couch Cup Holder:
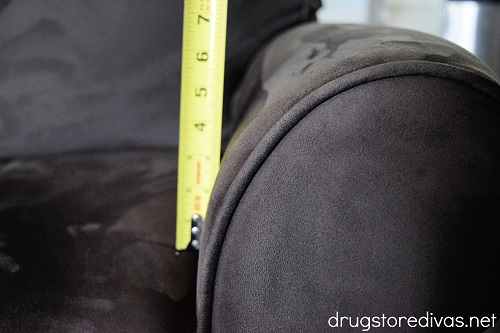

Measure the arm of your couch.
There’s a good chance that your couch is different than ours, so you can follow this tutorial, but don’t necessarily follow the measurements. You’ll want to measure across the arm of your couch, then up and down, to come up with your measurements.
Measure across the arm of the couch and see how long of a piece you’ll need to fit across (ours was 8 inches).
Then, measure up from the couch cushion to the top of the arm. You probably don’t want to take up all the space, so measure as much as you want to take up. For us, this was 6 inches.
Now it’s time for a little math.
Our ipe wood is .75 inch thick. We mounted it under our top piece. So, that would take up some of the space underneath. If we cut the wood the length of the space, it wouldn’t fit. So, we needed to add 1.5 inches to it to make the top piece.
Then, we needed to subtract 1.5 inches from it to make the bottom piece.
Your math may be different depending on the size of your couch, but for us that meant four pieces of wood: one 9-inch piece, two 7-inch pieces, and a 7.5-inch piece.
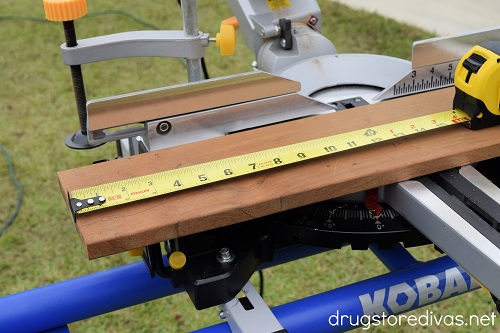

Now that you have your pieces, measure them from the wood.
As every carpenter says, measure twice and cut once.

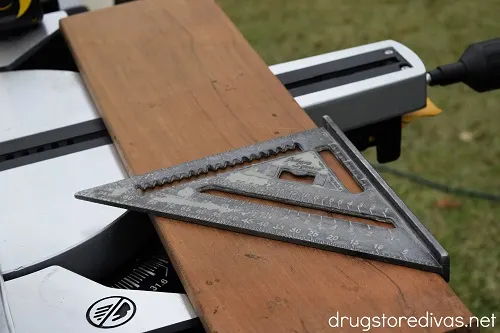
Use a speed square and a pencil to mark your lines.
If you don’t have a speed square, you can use a regular ruler. But a speed square sits in place and just makes things a little easier.
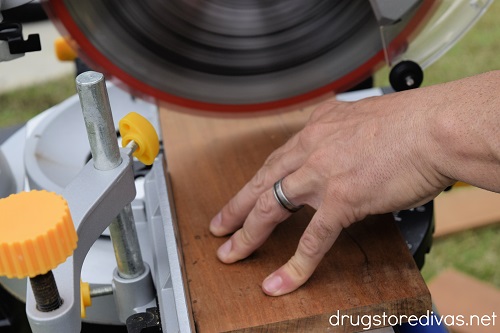

Cut using a miter saw.
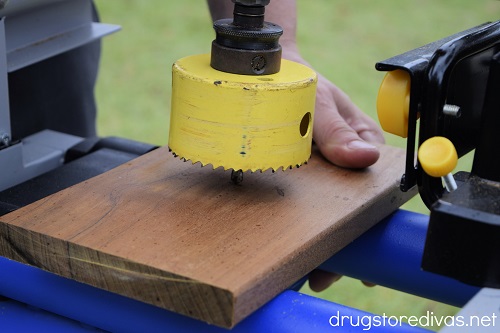
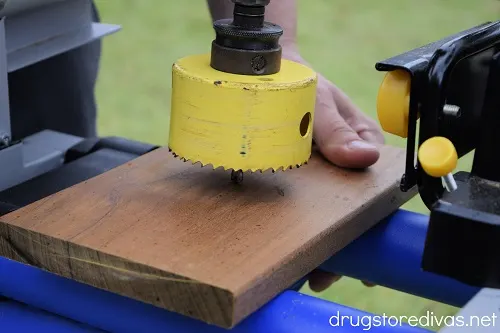
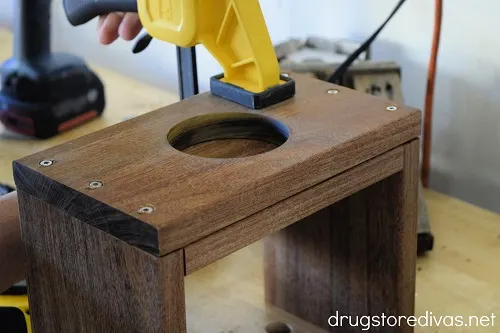
Take the longest piece of wood. Measure to find the center of it.
Use a 3-inch hole saw to cut a hole in it.
This size will perfectly fit a standard coffee cup. If you use a different size, you run the risk of the cup not fitting.
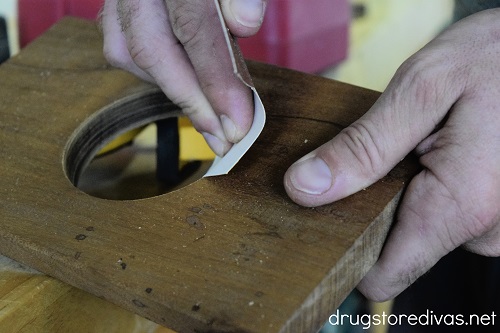

Sand down the hole and the edges with sandpaper, if needed.
Pete does this more out of habit than necessity.
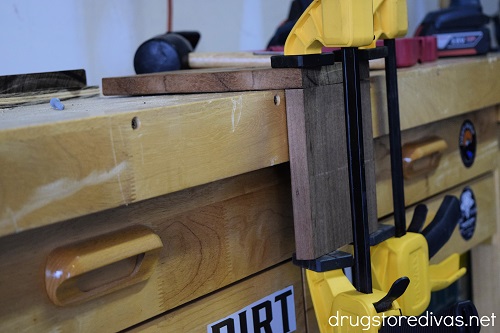

Use the bar clamps to clamp together the piece of wood with the hole and one of the side pieces. Measure to find the middle of the board. Mark the spot with a pencil.
You’re definitely gonna wanna use the clamps to hold the board in place and assure you are drilling a straight hole.
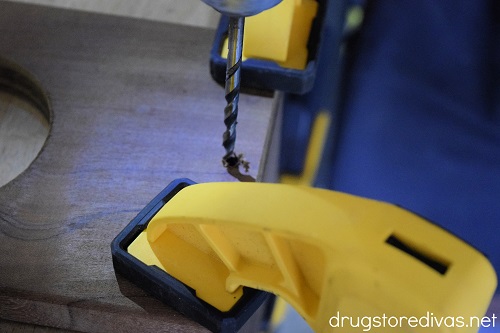

Use a drill to drill a pilot hole at that spot.
The clamps will help make sure you’re going straight down.
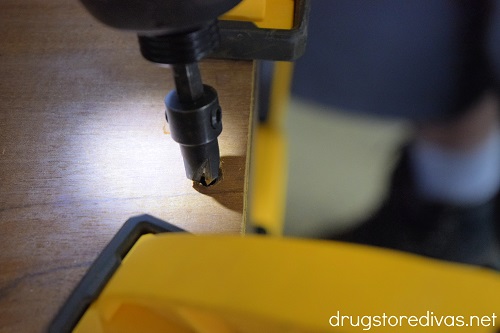

Use a counter sink to create a divot for the head of the screw.
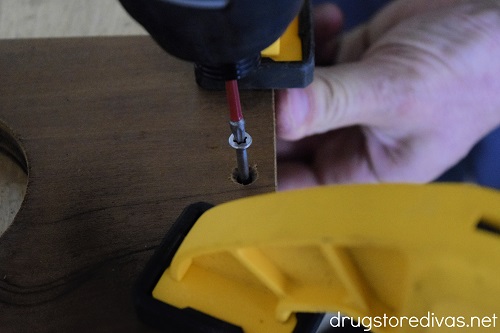
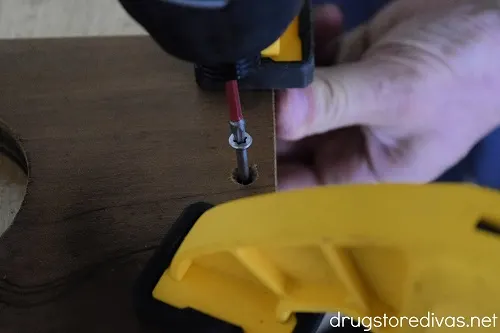
With an impact driver, screw in a 2.5-inch stainless steel trim head screw.
Move the clamps around, then add a screw on either side of that center screw.
Remove the clamps.
Clamp the other side panel to the other side of the piece with the hole.
Again, measure, make a pilot hole, make a divot, and add the screw three times.
Flip the board over.
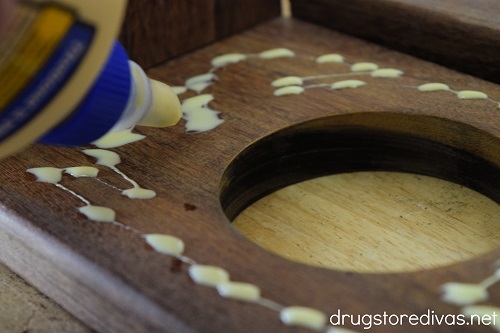
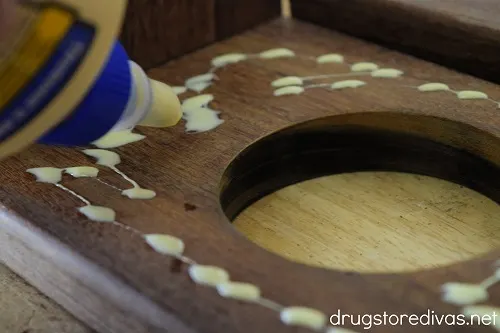
Add some wood glue on the underside, then place the last piece of wood on top.

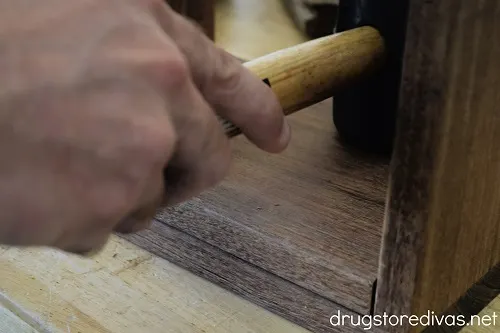
Use a rubber mallet to hit it into place.

Clamp the boards together and let them rest for at least an hour to allow the glue to set.
You can let it sit longer, but an hour is the minimum.

Wooden Couch Sleeve With Cup Holder: Frequently Asked Questions
Ipe is a Brazilian hardwood that’s super durable, super heavy, and sometimes hard to work with. It tends to crack when you’re drilling it, which is why a lot of people don’t really enjoy working with it.
But, it’s gorgeous. And that’s why we like ipe. Our ipe was already this pretty red mahogany color, so we didn’t have to think about staining the wood for our project.
If you don’t want to work with ipe (and some people don’t because it will burn through your drill bits), you can choose another hardwood. Just keep in mind that you will need to stain the wood, which is an additional cost and waiting for it to dry adds time to this project.
Pete’s signature is exposed screws. He absolutely loves the look. If you don’t, you can purchase wood filler to fill on top of the screws to hide them.
If the wood is too thick and you’re not really able to rest your cups in the cup holder (because the handle gets in the way and the cup is wobbly), pick up a 3-inch cork coaster and just pop it in the hole.
DIY Wooden Couch Sleeve With Cup Holder

All you need are a few tools and a little time to make this DIY Wooden Couch Sleeve With Cup Holder. It’s the perfect DIY gift for your coffee loving friend who is a little too lazy to reach and put their cup on the coffee table.
Materials
- 30-inches ipe wood (or a similar hardwood)
- Sand paper
- 2.5-inch stainless steel trim head screw
- Wood glue
Tools
- Tape measure
- Pencil
- Speed square
- Miter saw
- 3-inch hole saw
- Drill
- Woodworking bar clamps
- Counter sink
- Impact driver
- Rubber mallet
Instructions
 Measure the arm of your couch. Measure across the arm of the couch and see how long of a piece you’ll need to fit across. Then, measure up from the couch cushion to the top of the arm.
- Measure them from the wood, use a speed square and a pencil to mark your lines, and cut using a miter saw.
- Take the longest piece of wood. Measure to find the center of it. Use a 3-inch hole saw to cut a hole in it.
- Sand down the hole and the edges with sandpaper, if needed.
- Use the bar clamps to clamp together the piece of wood with the hole and one of the side pieces. Measure to find the middle of the board. Mark the spot with a pencil.
- Use a drill to drill a pilot hole at that spot.
- Use a counter sink to create a divot for the head of the screw.
- With an impact driver, screw in a 2.5-inch stainless steel trim head screw. Move the clamps around, then add a screw on either side of that center screw. Remove the clamps. Clamp the other side panel to the other side of the piece with the hole. Again, measure, make a pilot hole, make a divot, and add the screw three times.
- Flip the board over. Add some wood glue on the underside, then place the last piece of wood on top. Use a rubber mallet to hit it into place.
- Clamp the boards together and let them rest for at least an hour to allow the glue to set.
Notes
Our ipe wood is .75 inch thick. We mounted it under our top piece. So, that would take up some of the space underneath. If we cut the wood the length of the space, it wouldn’t fit. So, we needed to add 1.5 inches to it to make the top piece.
Then, we needed to subtract 1.5 inches from it to make the bottom piece.
Your math may be different depending on the size of your couch, but for us that meant four pieces of wood: one 9-inch piece, two 7-inch pieces, and a 7.5-inch piece.
Did you follow this DIY Wooden Couch Sleeve With Cup Holder Tutorial? Let us know how it went in the comments.
Mie
Monday 12th of December 2022
That' a good idea!
Paula Short
Sunday 11th of December 2022
This is really a great idea. Thank you bunches for sharing.