


If you’re looking for a super sweet gift idea and a kids science experiment in one, look no further than this DIY Grass Head Photo Planter.
Michelle’s 3-year-old son made it at school, and I just thought it was the cutest gift in the world. So of course, I had to blog it so you can make it.
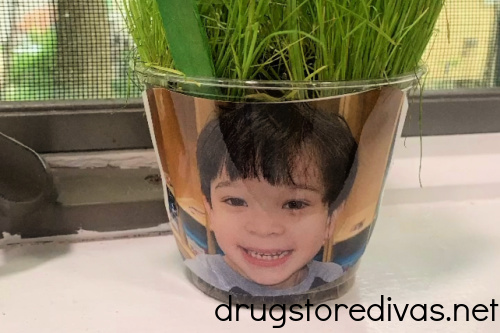
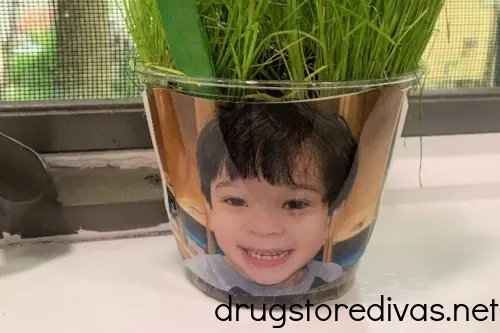
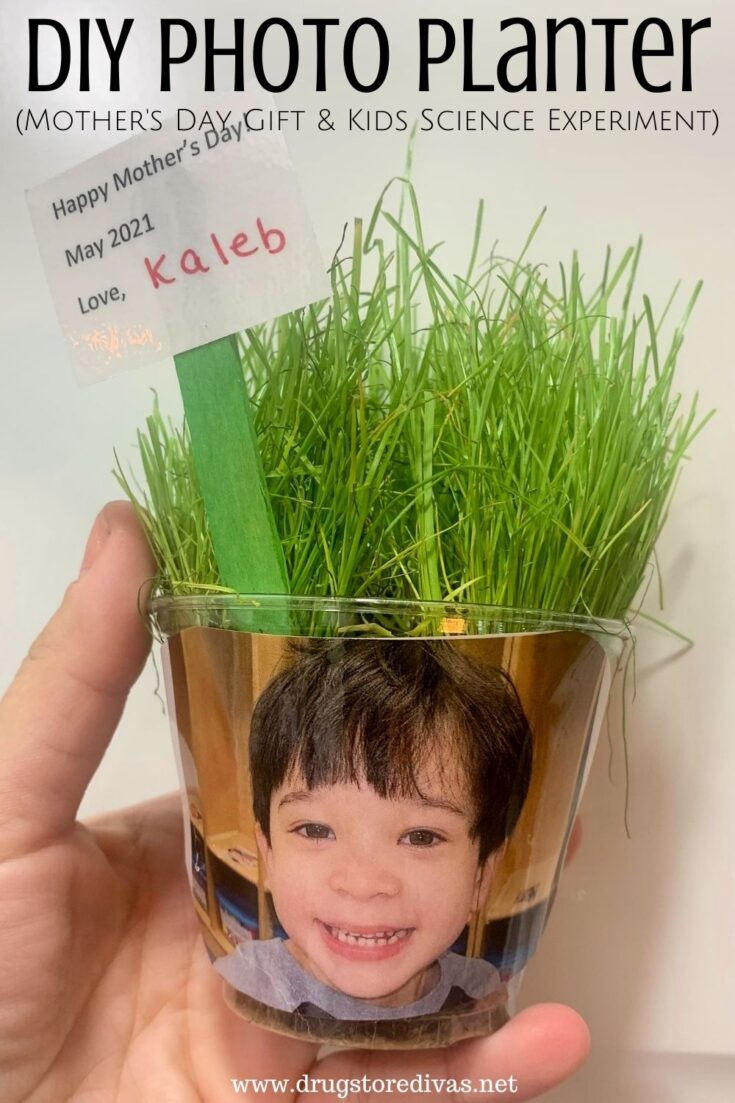
DIY Grass Head Photo Planter (Mother’s Day Gift & Kids Science Experiment)
Since he made it in school, I don’t have step-by-step photos to post. But we did figure out how to make it, so I have the process.
The photo of each child really makes this great for a school setting. It works well if you have multiple kids too. That way, each child knows exactly which photo planter is his or hers. There’s no way to mix them up, for one child to steal another’s if that one if growing faster, etc.
It is an easy way to stop fighting before it starts. It’s also a lot of fun for the kids to find their photo and see how their plant is growing.
DIY Grass Head Photo Planter Supplies:
- Photo
- Clear tape
- Adhesive dots
- Scissors
- 9 oz. plastic cup
- Grass seed
- Potting soil
- Printer paper
- Writing utensil
- Laminator
- Green craft stick
How To Make A DIY Grass Head Photo Planter:
Take an up close photo of your child. You can have him or her smile, make a funny face, whatever.
Ideally, you want the top of the photo to start at your child’s forehead. That way, the “hair” can grow out of your child’s head.
If you don’t care if the grass head looks like a face with hair, you can just take a full photo of your child. Either way is fine. This is your creation.
Print your photo.
Use scissors to cut the photo to fit on the front of the plastic disposable cup. Use tape or adhesive dots to affix the photo to the front of the cup.
Fill the cup about 3/4 of the way full with potting soil.
Generously sprinkle grass seed on top of the potting soil. You want to use a lot of grass seed so that you grow a lot of hair.
Add more potting soil on top of the grass seed, filling up about half the gap that’s left in the cup.
Now it’s time to make the note.
On the piece of printer paper, write your note. It could read “Happy Mother’s Day” if you’re making this a Mother’s Day gift, “Thanks for helping me grow,” if it’s a Teacher’s Appreciation Gift, etc.
Having your kid sign it in his or her little kid handwriting is perfectly adorable.
If you have a laminator, laminate the card. If you don’t have a laminator, you just want remove the card before watering or it will damage the card.
Tape the card onto a green craft stick. Stick that into the front of the photo planter.
Water the seeds daily and watch the grass “hair” grow.
DIY Grass Head Photo Planter Frequently Asked Questions
This Grass Heads science experiment is perfect for kids ages 3 to 5. This science experiment is best suited to pre-school and kindergarten aged kids.
Grass seeds make the most sense to use in Grass Heads since “grass” is literally in the name. It’s also the most economical idea because grass seed is a lot cheaper when you buy it in bulk than, say, wildflower seeds.
You could use wildflower seeds if you wanted, but just keep in mind that you’ll want to purchase a lot of wildflower seeds because growing in abundance is what makes this craft cute.
It will take about 7 to 10 days before the grass will start to sprout. It’ll take about three weeks before your Grass Heads have the lush hair you’re looking for.
If you made this DIY Grass Head before, and you have leftover grass seed you want to use to do it again, you have to make sure that grass seed is still good. If not, you won’t be able to grow it.
To check if grass seed is still good, put it in a cup of water for about 15 minutes. If the grass seed floats, it’s probably not good and not going to sprout. If the grass seed sinks, it’s still good and will probably sprout grass.
When you’re starting out, water the grass seed once daily until the seeds start to sprout. When you start getting grass popping through the soil, you can start watering twice a day.
You only need a bit of water each time to keep the soil moist. A tablespoon or two of water should be more than enough.
You don’t want to overwater the grass heads because you’ll kill the seeds and the grass won’t grow.
Of course! Make sure you pick up a pair of safety scissors for your child, and let him or her trim the hair, cut a mohawk, whatever style work.
It’s grass, and it will keep growing back.
You don’t have to use a plastic cup. We suggest that because plastic cups are cheap to buy in bulk and because you can use the extras.
We also like using plastic cups because if you’re making this with children, plastic is a lot lighter and less fragile than glass.
If you don’t have a plastic cup handy and don’t want to buy a pack for this, you can use an empty soda bottle like we did in our DIY Cat Grass Planter.
Want more kids craft ideas?
If you love this kids craft idea and want more, we have a few others geared towards 3- to 5-year-olds that you might want to try next.
DIY Grass Head Photo Planter

This adorable craft is also a science experiment. Check out this DIY Grass Head Photo Planter tutorial, perfect for 3- to 5-year-olds.
Materials
- Photo
- Clear tape
- Adhesive dots
- 9 oz. plastic cup
- Grass seed
- Potting soil
- Printer paper
- Green craft stick
Tools
- Scissors
- Writing utensil
- Laminator
Instructions
- Take an up close photo of your child. You can have him or her smile, make a funny face, whatever. Print your photo.
- Use scissors to cut the photo to fit on the front of the plastic disposable cup. Use tape or adhesive dots to affix the photo to the front of the cup.
- Fill the cup about 3/4 of the way full with potting soil.
- Generously sprinkle grass seed on top of the potting soil.
- Add more potting soil on top of the grass seed, filling up about half the gap that’s left in the cup.
- On the piece of printer paper, write your note. Laminate the card. Tape the card onto a green craft stick. Stick that into the front of the photo planter.
- Water your seeds daily and watch the grass “hair” grow.
Have you made this DIY Grass Head Photo Planter with your kids? Comment below and let us know how it went.
IceCreamnStickyFingers
Saturday 15th of April 2023
This is a cute idea. And just in time for Mother’s Day.
Michelle
Thursday 28th of April 2022
Cute idea!
Michelle
Pam
Wednesday 27th of April 2022
This is so adorable!
Linda @ Linda's Lunacy
Thursday 21st of April 2022
This is planter is so cute!