
Countdown to Christmas with this DIY Dog Treat Advent Calendar. Fill it with treats for your furry friend.
For more ways to make this the best holiday season, check out all of our Christmas posts.

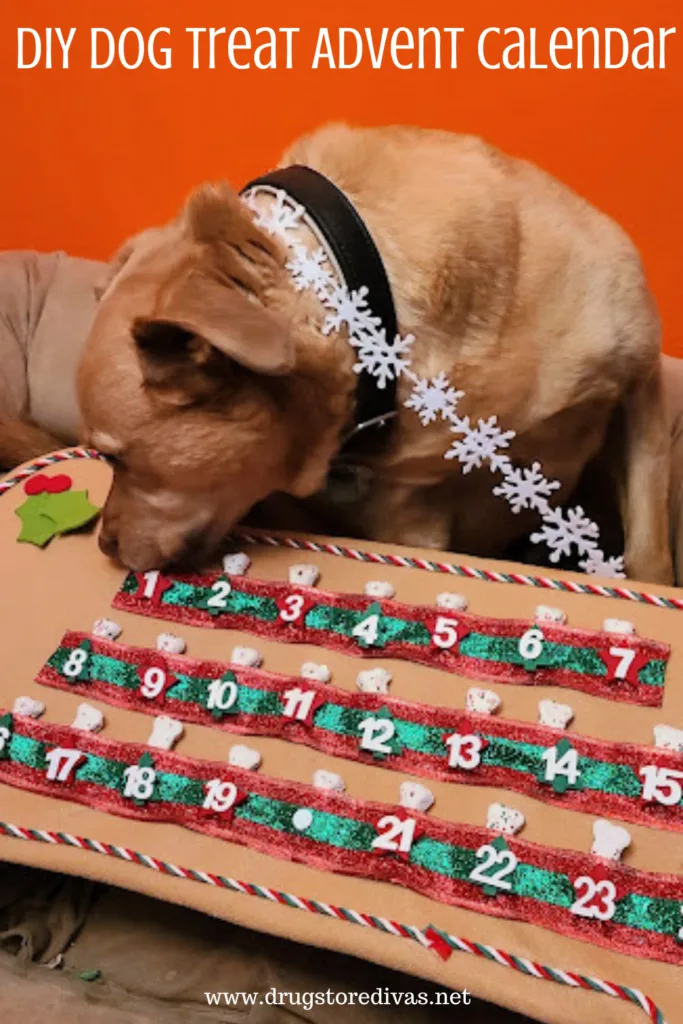
We’re partially through Advent already. I know that and you know that. But you know who doesn’t know that? Your dog. And your dog will love this DIY Dog Bone Advent Calendar — even if part of Advent is already over.
I mean, your dog would love this countdown at any time. Count down to their birthday, summer solstice, a random Tuesday in March.
Treats are treats anytime.
And this is great, especially if you have kids. They’ll love counting down to Christmas with their furry friend.
It’s also great for empty nesters who don’t have kids to count down with.
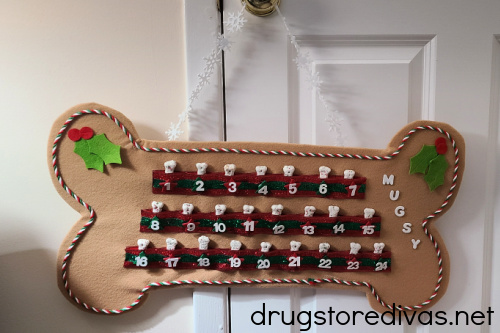
My cousin made this DIY Dog Bone Advent Calendar for her dad’s dog (and, of course her dad) as an early Christmas gift this year. And as you can tell from the photo above, her dad’s dog Mugsy was a huge fan of it.


If you’re looking for a gift for a dog this holiday season (I mean, what else is this dog treat Advent calendar counting down to?), we have a list of 10+ Gifts For Dogs.
DIY Dog Treat Advent Calendar Tutorial
Affiliate links are included in this post and Drugstore Divas may make a small commission if you use them.
DIY Dog Treat Advent Calendar Supplies:
You can get the full list of supplies in the how to card below.
- Ribbon – We use a Wired Edge Ribbon, Red, Green & White Twisted Cord, Holly Felt Trim, and Snowflake Trim Ribbon in this.
- Ruler – You need to measure the ribbon so the pockets are spread evenly.
- Writing utensils – We use a pen and pencil, depending on what we’re doing.
- Scissors – This is to cut everything.
- Glue – You need Gorilla Glue to hold the ribbons down and spray adhesive to glue the felt to the board.
- White paper – This is to create a design that you can trace.
- Foam poster board – This forms the base of your Advent calendar.
- X-acto knife – This is to cut the felt.
- Brown felt – This covers the entire foam board.
- Foam letters – These are to put the dog’s name on top.
- Christmas Felt Number 3D Stickers – These are to add the numbers to the Advent calendar.
- Dog treats – You’ll put one in each pocket.
How To Make A DIY Dog Treat Advent Calendar:
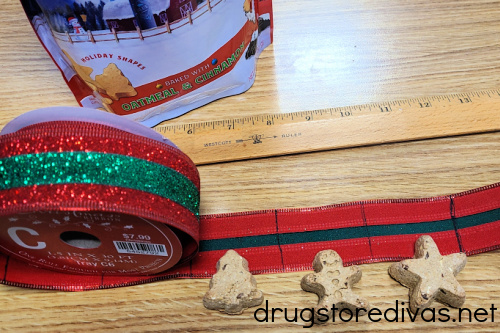

Start with the red and green striped ribbon.
You’re going to be using this ribbon to hold the three rows of dog treats that go across the center of the dog bone Advent calendar.
To make the dog treat Advent calendar a little more interesting, you’ll want to vary the lengths of the three rows.
In our tutorial, we have three lines: days 1 to 7 on the first row (so 7 days), days 8 to 15 on the second row (so 8 days), and days 16 to 24 on the third row (so 9 days).
If you wanted, you could make each row the same length and have three rows of eight days. It’s up to you.
Measure 2-inch intervals and draw a pen line at each 2-inch mark.
For the top row (7 days), measure out 14 2-inch sections. Then, cut the ribbon.
For the second row (8 days), measure out 16 2-inch sections, then cut the ribbon.
Finally, for the third row (9 days), measure out 18 2-inch sections and cut the ribbon.
Next, add a tiny line of Gorilla Glue along half the bottom of each ribbon. Fold the ribbon in half and push down on the glue to seal the bottom.
Add glue down a pen-marked line on each side, then press the ribbon down. When it dries, this is what will create the pocket.
Make sure you don’t go crazy with the glue because it can smear when you press it.

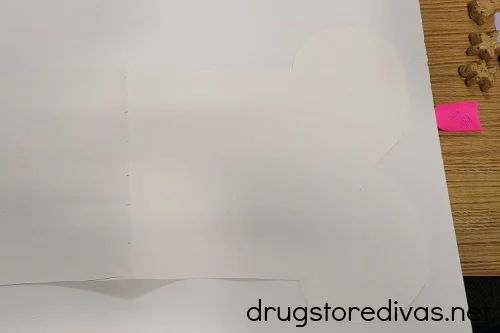
Next, fold a piece of white paper in half. Freehand half a dog bone shape on it and cut it out.
That will be your dog bone stencil. The one in this tutorial ended up being 26-inches by 14-inches, but you can make yours whatever size is best to fit your ribbon.


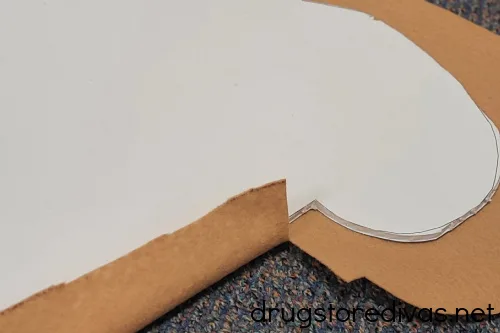
Open the white paper and place it on top of a piece of foam board. Use it to trace the dog bone pattern on the foam board.
Use an X-acto knife to cut the stencil out of the foam board.


Next, lay the dog bone stencil on the brown felt and draw a bone shape onto the felt. Cut the felt, making sure the felt is 1 inch bigger than your stencil (it doesn’t have to be perfect). Don’t cut too wide of a border, though, or it will cause air pockets.

Adhere the felt to the foam bone shape using the spray adhesive (the Gorilla Glue would work for this as well).
Small aside: When you get to an edge, cut a small slit in the fabric. This will help you to fold the felt over onto the foam with a crease.
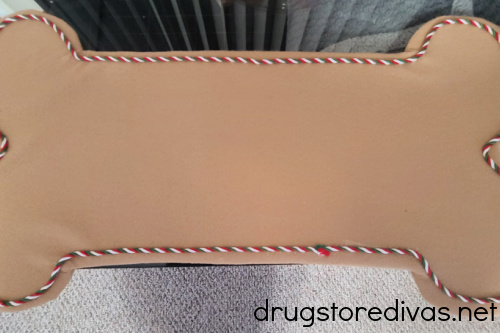

Next, take the Red, Green & White Twisted Cord and glue it around the bone to make it look like a treat.

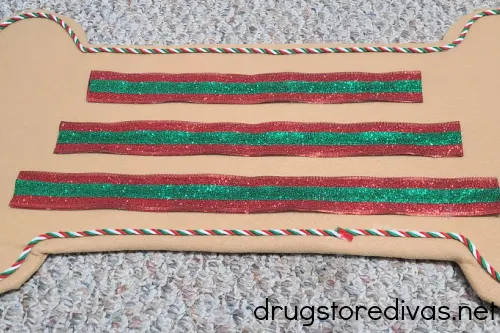
By now, red and green ribbon should be completely dry. Glue them onto the bone, making sure the are centered.
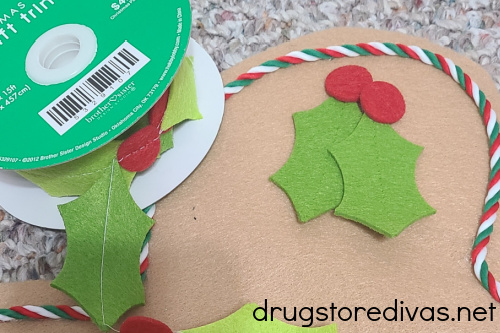

Cut pieces of the holly-shaped ribbon and glue them in the corners (or wherever you want to add a little pizzazz).
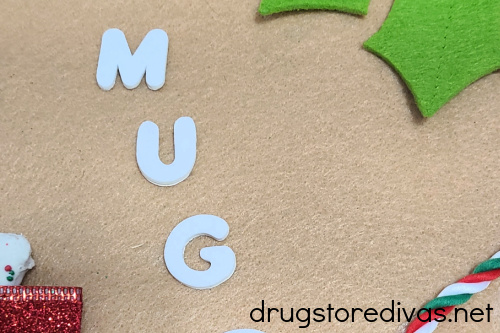

Use foam letters to put the dog’s name on it.

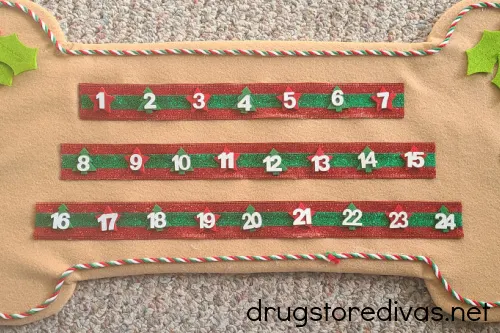
Then, take the Christmas Felt Number 3D Stickers and use a tiny spot of glue to attach them to the pockets.

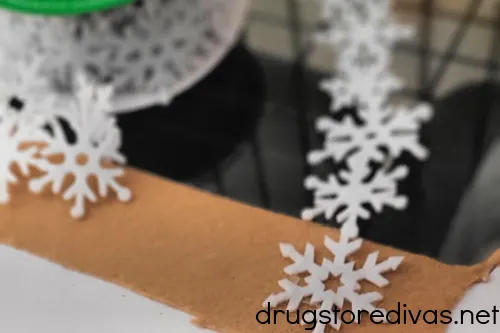
Measure the snowflake ribbon 30 inches. Then, glue it to the back of the calendar for a handle/to hang the homemade Advent calendar.

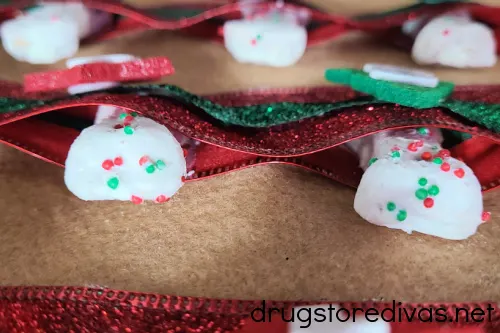
Once everything is dried, take the dog treats and stick one in each of the pockets.
Each day, feed your dog one treat and count down to Christmas.

DIY Dog Treat Advent Calendar: Frequently Asked Questions
If you don’t want the dog bone to sit longways, you can flip it. You’ll just need to make more ribbons since you won’t be able to fit nine days across anymore.
You can use whatever ribbon you want for this. I just listed the ones my cousin used so that the tutorial was easier to follow. But you can change it up and be creative.
You can fill this dog treat Advent calendar with all sorts of dog treats: cookies, meat treats, and more.
DIY Dog Treat Advent Calendar


Countdown to Christmas with this DIY Dog Treat Advent Calendar. Fill it with treats for your furry friend.
Materials
- 1.5-inch Red & Green Glitter Striped Wired Edge Ribbon
- Gorilla Glue
- White paper
- Foam poster board
- Brown felt
- 1/8-inch Red, Green & White Twisted Cord
- Holly Felt Trim
- Foam letters
- Christmas Felt Number 3D Stickers
- Snowflake Trim Ribbon
- Dog treats
Tools
- Ruler
- Pen
- Scissors
- Pencil
- X-acto knife
- Spray adhesive
Instructions
 Start with the red and green striped ribbon. Measure 2-inch intervals and draw a pen line at each 2-inch mark. For the top row (7 days), measure out 14 2-inch sections. Then, cut the ribbon. For the second row (8 days), measure out 16 2-inch sections, then cut the ribbon. Finally, for the third row (9 days), measure out 18 2-inch sections and cut the ribbon. Next, add a tiny line of Gorilla Glue along half the bottom of each ribbon. Fold the ribbon in half and push down on the glue to seal the bottom.
- Add glue down a pen-marked line on each side, then press the ribbon down. When it dries, this is what will create the pocket. Set aside.
- Fold a piece of white paper in half. Freehand half a dog bone shape on it and cut it out. That will be your dog bone stencil. The one in this tutorial ended up being 26-inches by 14-inches, but you can make yours whatever size is best to fit your ribbon.
- Open the white paper and place it on top of a piece of foam board. Use it to trace the dog bone pattern on the foam board. Use an X-acto knife to cut the stencil out of the foam board.
- Lay the dog bone stencil on the brown felt and draw a bone shape onto the felt. Make sure the felt is 1 inch bigger than your stencil.
- Adhere the felt to the foam bone shape using the spray adhesive (the Gorilla Glue would work for this as well).
- Take the Red, Green & White Twisted Cord and glue it around the bone to make it look like a treat.
- Glue the red and green ribbon onto the bone, making sure they are centered.
- Cut pieces of the holly-shaped ribbon and glue them in the corners (or wherever you want to add a little pizzazz).
- Use foam letters to put the dog’s name on it.
- Take the Christmas Felt Number 3D Stickers and use a tiny spot of glue to attach them to the pockets.
- Measure the snowflake ribbon 30 inches. Then, glue it to the back of the calendar for a handle/to hang the homemade Advent calendar.
- Once everything is dried, take the dog treats and stick one in each of the pockets.
Notes
Would you make this DIY Dog Treat Advent Calendar? Let us know in the comments.