
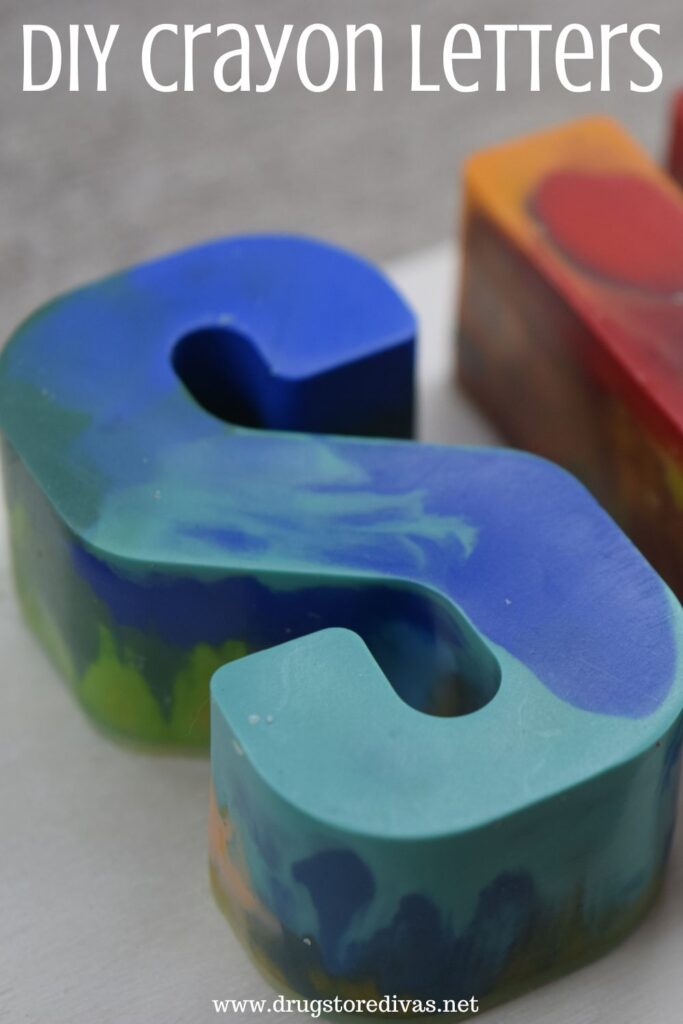
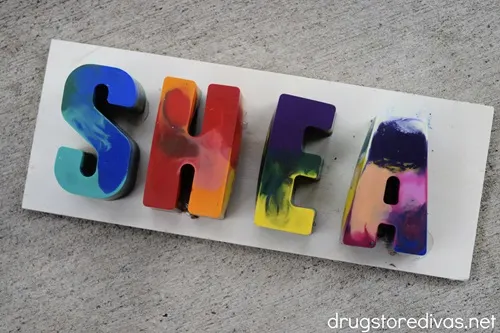
If you have leftover bits of crayons laying around, a fun way to repurpose them is to make DIY Crayon Letters. Spell out your child’s name for even more fun.
For more crafts, check out all our DIY tutorials.

When my cousin was coming down for Thanksgiving, she asked me if I thought custom crayons that spelled out my niece and nephews names was a good idea.
I told her it was such a creative idea and would be the perfect gift for the little kids. The parents would be so impressed with the gift. And it would be a great way for the kids to practice letter recognition.
I also told her that she should take photos so I could blog it. Because not only are homemade crayon letters adorable, they’re a really frugal gift. Sure, they look expensive. And they are expensive if you buy them on Etsy.
But if you make them at home, these DIY letter crayons are really budget-friendly — especially because you can make them from your kid’s old broken crayons.
Yay for upcycling. And yay for inexpensive Christmas gifts.
DIY Crayon Letters Tutorial
Affiliate links are included in this post and Drugstore Divas may make a small commission if you use them.
We used new crayons in this tutorial, but you could use old crayons instead. Just skip the first couple steps in the tutorial.
DIY Crayon Letters Supplies:
You can get the full list of supplies in the how to card below.
- Crayons – You can use new boxes of crayons or use this project as a way to upcycle crayons.
- X-Acto Knife – This is to easily take off the crayon’s wrapper. You could just use scissors.
- Alphabet mold – Of course, this is if you’re making letters, which we are. You could use a different silicone mold if you want to make another shape.
- Glue Dots – If you don’t have these, you could use a small dot of glue from a glue gun, however that may melt the crayon a little.
- Wooden plank – The size of the wood you need depends on the number of letters you’re adding.
- Cellophane – Use a clear cellophane so you can see the crayon letters.
- Tape
- Scissors
How To Make DIY Crayon Letters:


Pre-heat the oven to 275 F.
Take all of your crayons out of their wrapping. You can easily use an X-Acto knife to slice along the crayon wrapper to remove it.
Side note: If you’re making these with kids, of course, you don’t want to give them a blade. Instead, your kids can soak the crayons in warm water until the wrapping comes off.

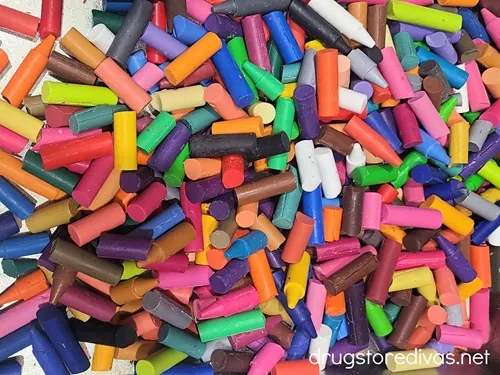
Break your crayons into small pieces about 1-inch long. You want the crayon pieces small enough that they are able to fit in the alphabet mold, but not too small because then the color will bleed together.
If you’re using old crayons, just gather up all the pieces of crayons and peel off the wrapping.

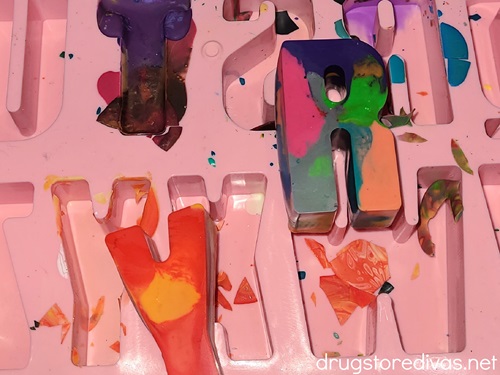
Put the silicone mold on a baking sheet.
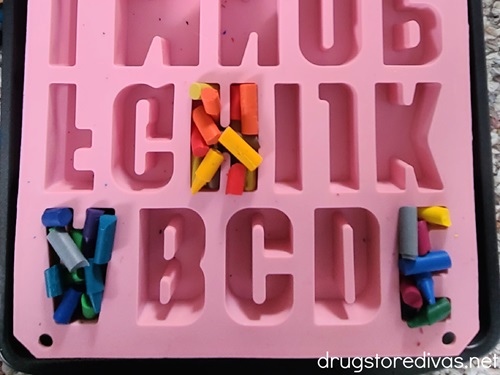
Place your pieces of crayon into the silicone letter mold.
You want to make sure your put more crayons than you may think is needed into the silicone molds. The crayons are going to melt down and your letters will not be completely full if you don’t put enough crayons.
Also, my cousin got advice to not mix together light colors and dark colors. She didn’t listen and mixed different colors together anyway and the crayons came out beautifully. So definitely do whatever you want. This is your craft. Make it your own.
If you’re making the whole alphabet, of course, you can just fill up the entire mold. But, we used these to make crayon names. So, we very specifically filled up the letters that spelled out each child’s name. If you have a name with double letters, this project will take you a little longer since you’ll need to wait for the first batch to cool before you can finish.
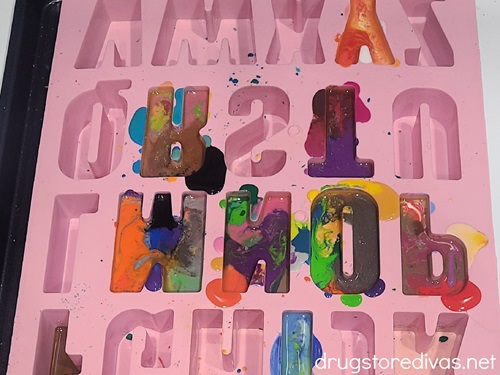

Place the silicone molds in the oven and bake for about 20 minutes until the crayon wax is melted completely.
The amount of time you need may vary depending on your oven and the crayon brand you’re using. Start checking around the 10 minute mark and check every five minutes.
Very carefully, remove the molds from the oven. Make sure to not shake the mold. Shaking will mix up the colors and you might end up with just brown crayons.
Very carefully, remove the molds from the oven by grabbing only the cookie sheet. This is the best way to assure you don’t shake the mold. Shaking the crayon mold will mix up the colors and you might end up with just brown crayons.
Put them in the freezer to cool. Make sure that you’re lying the mold completely flat in the fridge or the crayons won’t end up with a flat back.
Alternatively, you can cool them to room temperature on your kitchen counter. That should take about an hour until they’re cooled.

When the crayons are completely cooled, pop them out of the silicone mold. They’ll pop out really easily without any force. If they’re sticking, they’re not done cooling.
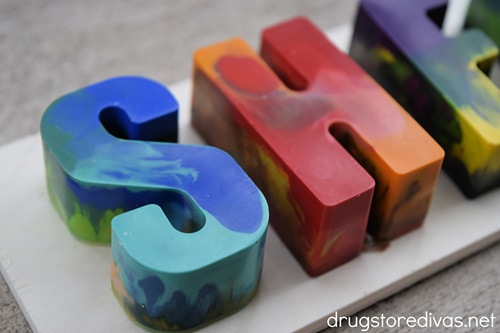

Use Glue Dots to stick the DIY crayons down to a small piece of wood.
If you don’t have Glue Dots, you can use a small dab of hot glue from a glue gun instead. However, you run the risk of melting part of the crayon if you use a glue gun.
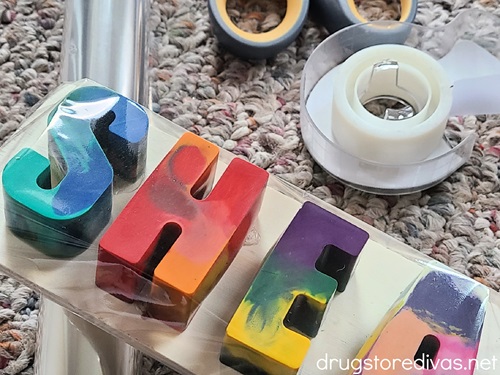

Wrap the wood in cellophane.

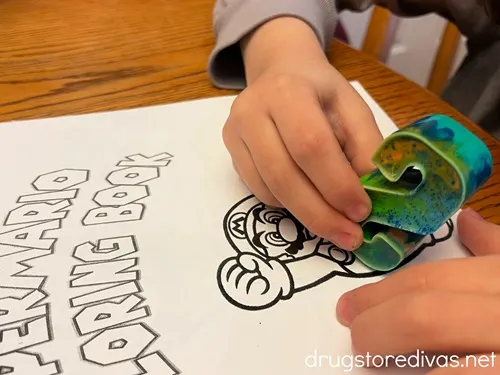
You can gift it like this, put it in a gift box, or stick it to the front of a coloring book, which is what my cousin did.

DIY Crayon Letters: Frequently Asked Questions
This tutorial is to make crayon letters. But, you don’t have to just make letters.
Silicone molds come in so many different shapes. You can use any of them to make homemade crayons. Think heart shapes for Valentine’s Day, cake shapes for birthday party favors, etc. The ideas are endless.
I just would really recommend buying separate silicone molds specifically for crafting. I’m honestly not sure if the molds are still food safe after you melt wax in them. They might be just fine, but I personally keep my cooking and crafting things separate.
If you’re make these for a gift, you can pair them with coloring books. My cousin made homemade coloring books for each kid (that’ll be a separate tutorial), but you could just purchase coloring books online or at your local book store.
If you don’t want to use your oven, you can use a toaster oven to make your melted crayon letters. A toaster oven won’t change the melting process, but it may affect the amount of time you need to melt the crayons.

Purchase Name Crayons Online:
If you love these name crayons, but don’t feel like dealing with melted crayons, you can purchase Personalized Name Crayons, like the set above, at the following stores online:
Be mindful of a store’s minimum cart total to qualify for free shipping. Also, consider instore or curbside pickup to avoid shipping charges.
DIY Crayon Letters


If you have leftover bits of crayons laying around, a fun way to repurpose them is to make DIY Crayon Letters. Spell out your child’s name for even more fun.
Materials
- Crayons
- Glue Dots
- Wooden plank
- Cellophane
- Tape
Tools
- X-Acto Knife
- Alphabet mold
- Scissors
Instructions
- Pre-heat the oven to 275 F.
- Take all of your crayons out of their wrapping. You can easily use an X-Acto knife to slice along the crayon wrapper to remove it.
- Break your crayons into small pieces about 1-inch long. You want the crayon pieces small enough that they are able to fit in the alphabet mold, but not too small because then the color will bleed together.
- Place your pieces of crayon into the silicone letter mold.
- Place the silicone molds in the oven and bake for about 20 minutes until the crayon wax is melted completely.
- Very carefully, remove the molds from the oven. Make sure to not shake the mold.
- Put them in the freezer to cool. Make sure that you’re lying the mold completely flat in the fridge or the crayons won’t end up with a flat back.
- Alternatively, you can cool them to room temperature on your kitchen counter. That should take about an hour until they’re cooled.
- When the crayons are completely cooled, pop them out of the silicone mold.
- Use Glue Dots to stick the DIY crayons down to a small piece of wood. If you don’t have Glue Dots, you can use a small dab of hot glue from a glue gun instead.
- Wrap the wood in cellophane.
Notes
Did you make these DIY Crayon Letters? Let us know how it went in the comments.
Paula Short
Tuesday 26th of December 2023
Wow, what a great idea! I so appreciate you sharing this tutorial.
Jennifer Wise
Tuesday 19th of December 2023
What an awesome idea. Creative, unique, and super fun.
Karen, the next best thing to mummy
Tuesday 19th of December 2023
What a great idea.