

 When I was in middle school, we had to take a quarter of technology classes every year. We used power tools and hand tools, which, now that I think about it, is super dangerous for a 9-year-old kid. But I survived with all my fingers and limbs still attached. I can’t remember how to use them at all, though, so this DIY Wooden Serving Tray is all Pete.
I can’t even joke around and say, “But I supervised” because I didn’t. All I did was follow him around with a camera and take photos of him making this homemade wooden serving tray.
We — hahaha, let me rephrase that: Pete — only used tools that we have at home. So you can definitely make this without any crazy tools.
But skills.
You need to have skills.
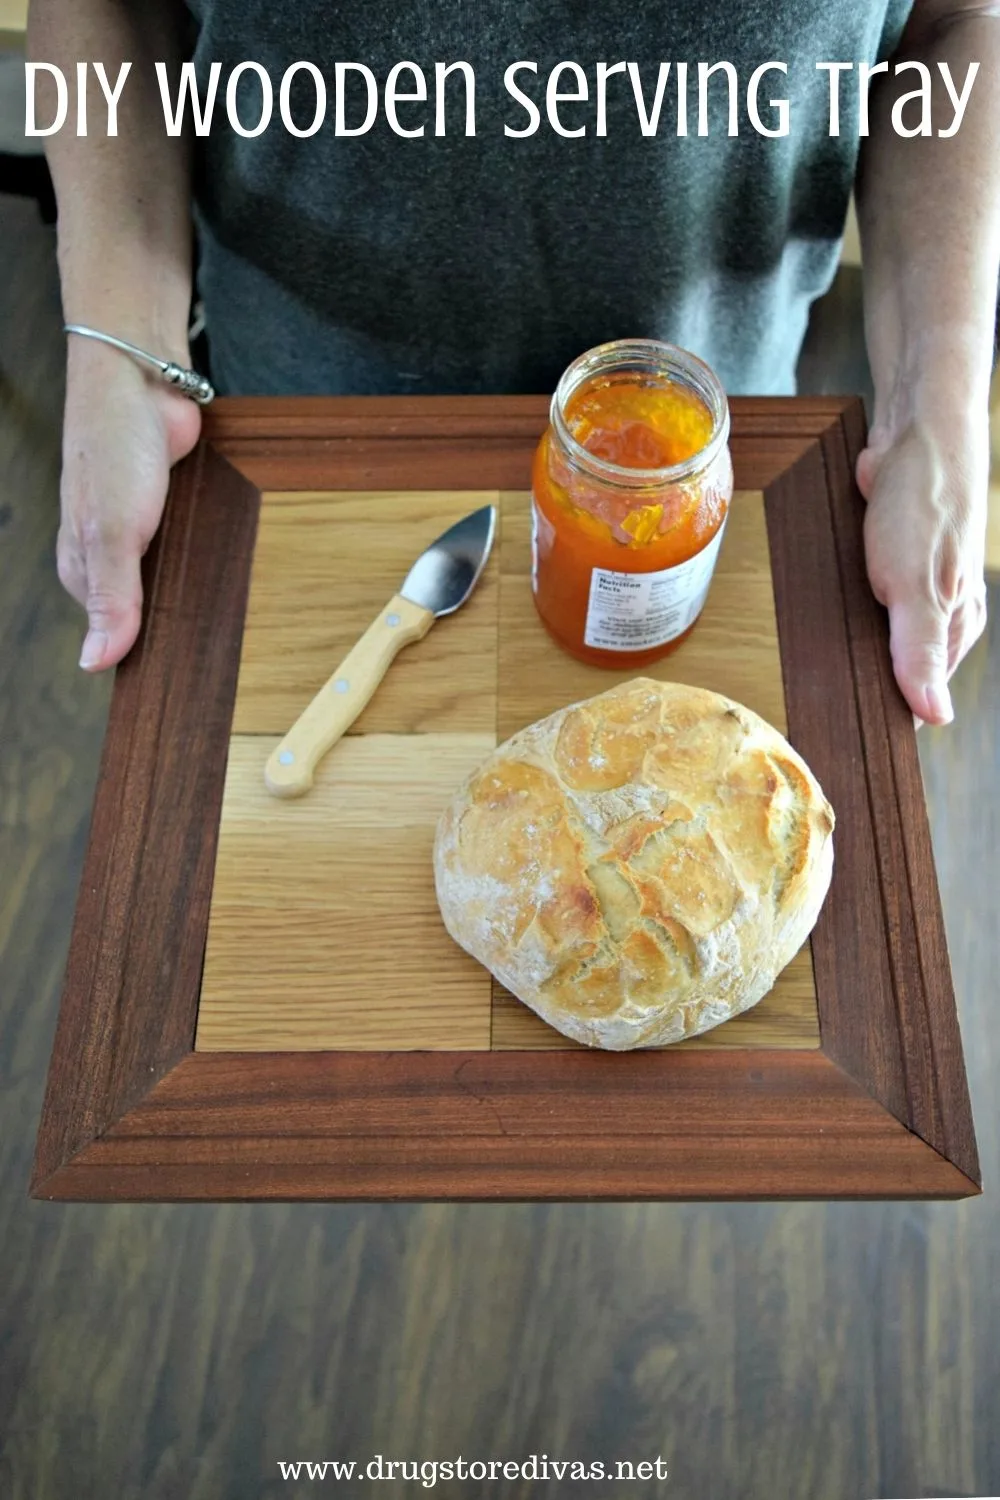
DIY Wooden Serving Tray
What You’ll Need:
- Hardwood flooring
- Door trim
- Wood glue
- Clamps
- Cloth
- Table Saw
- Random Orbit Sander
- Miter Saw
- Mineral Oil
- Butcher block oil
What You’ll Do:
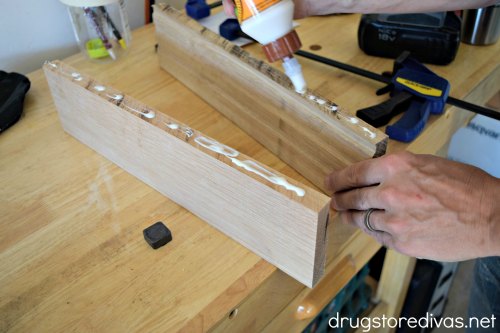

Start with two boards of hardwood flooring (we used oak, but you can use whatever) that are the same thickness. They don’t have to be the same length (because we will cut them to size later), but the thickness should be the same.
If they’re not, you can rip one piece of hardwood flooring down to the second’s thickness, but really, two of the same thickness is a lot easier.
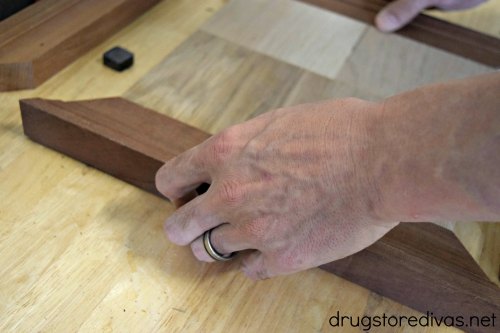
Put wood glue on the two sides that you want to affix together. Then, push those sides together.
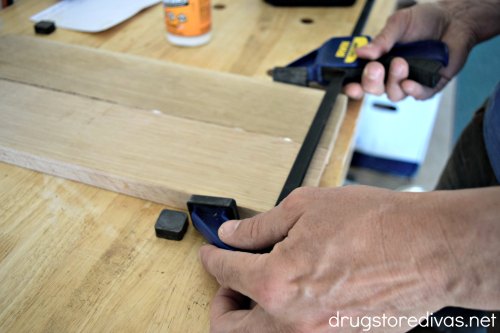

Use clamps to hold the two pieces of wood in place.
As you clamp them together, some of the glue may escape through the crack.

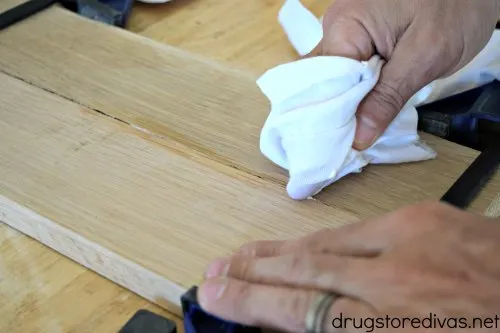
If it does, use a dampened cloth to rub the excess glue away.
Unclamp the wood after 30 minutes, then let it sit for 24 hours so the glue can set.
Use a table saw to cut the wood pieces to identical sizes (if they weren’t already).

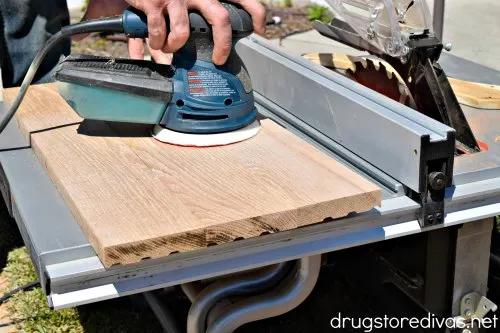
Use a random orbit sander to sand both sides of the wood.
Wipe the wood down with mineral oil. Mineral oil is non-toxic (although be sure to check your package). It doesn’t leave anything behind but will wipe away the sawdust created from sanding.
Now, it’s time for the trim.
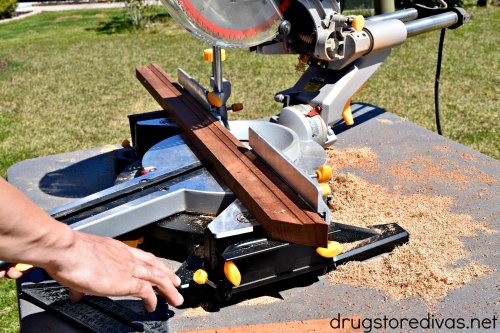
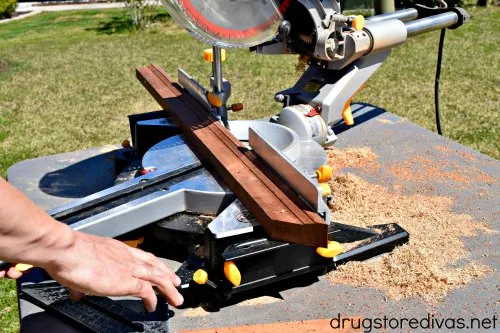
We used mahogany door trim, but you can use whatever color you prefer.
Use a miter saw to cut 45-degree angles to the inside corners. Those are the woodworking words to use.
In layman’s words (which are way more confusing, honestly), cut one 45-degree angle from the wood. Then, measure from the inner point of the angle out the length of your cutting board. Then, cut a 45-degree angle out from there.
Cut two identically sized pieces for the length and two identically sized pieces for the width.

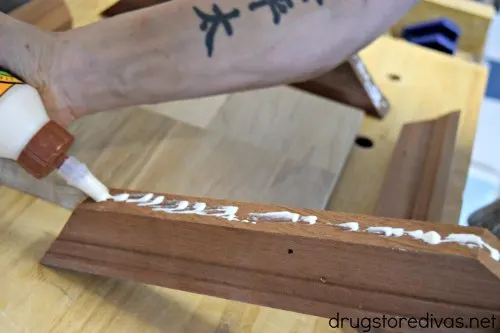
Use wood glue to attach the trim to the center of the serving tray. If there’s any excess glue that comes through, wipe it down with a damp cloth.

Here’s an interesting small aside: Wood glue is always used when making serving trays and cutting boards. If you used wood screws, you run the risk of them eventually rusting and your board is ruined. That doesn’t happen with wood glue.

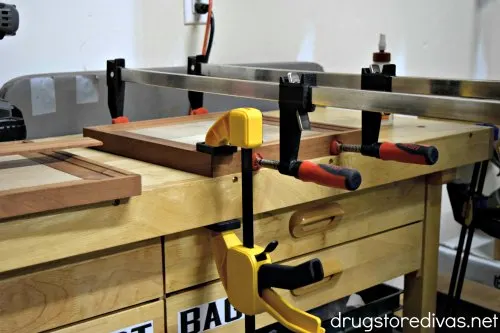
Clamp the board for 30 minutes. Use two clamps to push two sides in, then two on the corners to hold those down. After 30 minutes, move the clamps to hold the other sides and corners. Then, let it dry for a full 24 hours.
Wipe the board down with Butcher block oil. Butcher block oil is basically a food-grade mineral oil that seals the serving tray to prevent drying and cracking. Butcher block oil really brings out the grain in the wood and makes your homemade serving tray look amazing. Since it’s food safe, you can serve food on here without worry.


Another interesting side note: You cannot use vegetable oil to seal your homemade serving trays or cutting boards. They can eventually make the wood smell. You also don’t want to use any oils that you have laying around from previous wood projects because they may not be food safe.
Would you use this as a wooden serving tray or cutting board?