
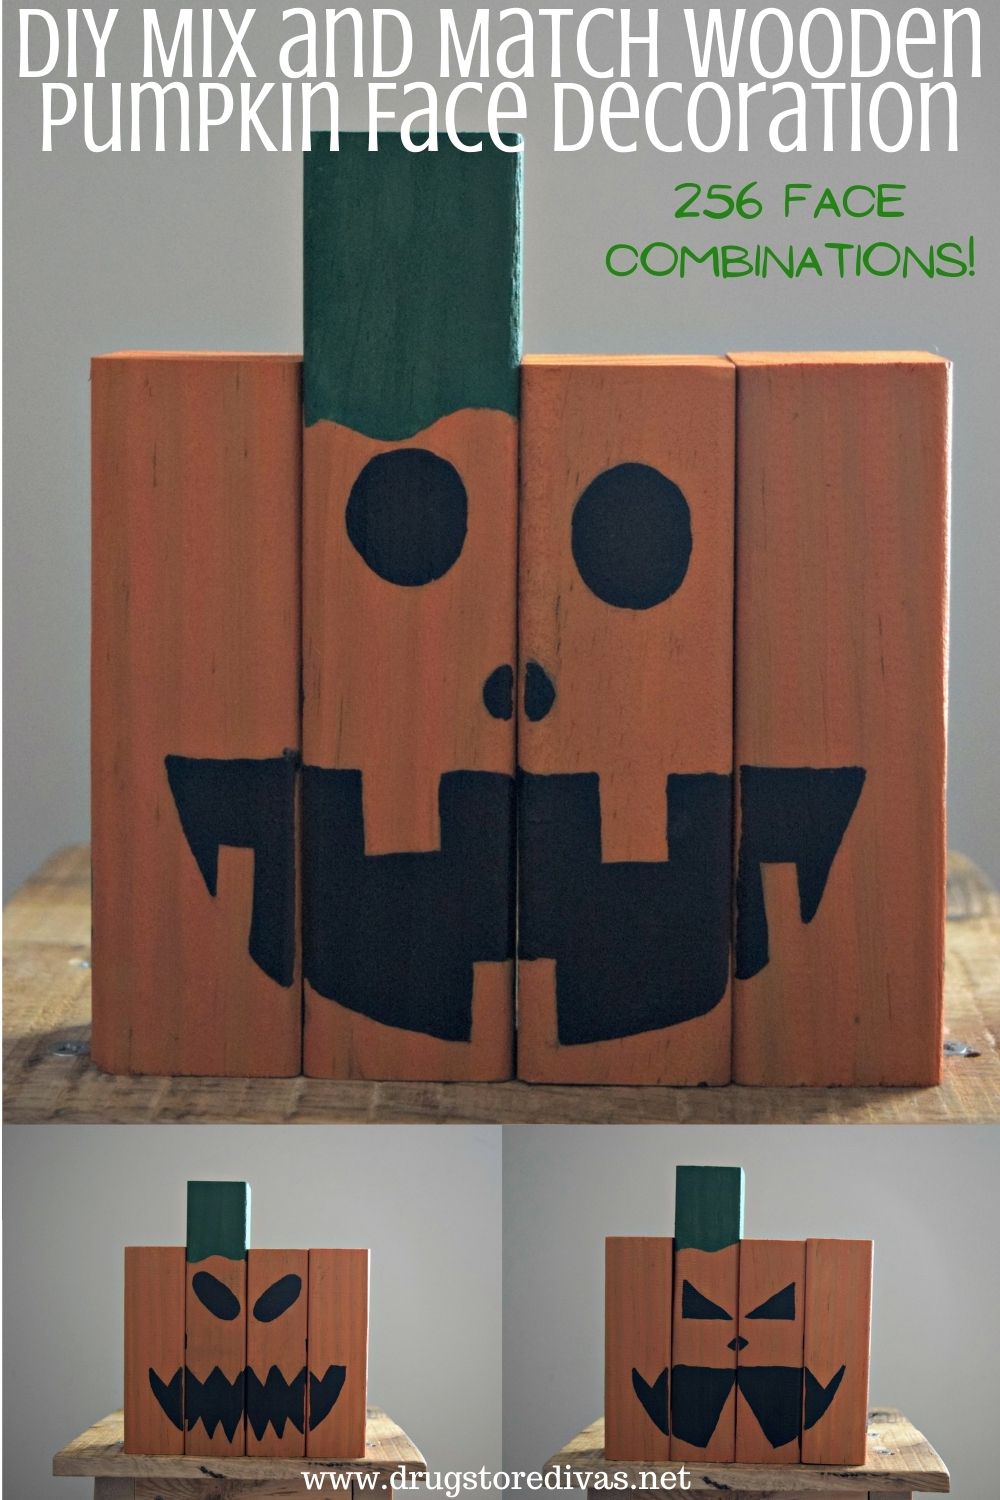
Thank goodness Pete has tools at home so I can just ask him to cut wood for me to make random projects like this DIY Mix and Match Wooden Pumpkin Face Decoration.
I had the idea in my head of exactly how it would work, but oh my gosh. This DIY Mix and Match Wooden Pumpkin Face Decoration turned out better than even I could have expected.
I was sitting on the porch with Pete over the weekend. He was playing guitar, and I was painting wood. We had a few neighbors come over (with proper social distance, of course) and ask what I was painting.
I explained my project, but I’m not sure anyone could visualize what I was going for with this DIY Mix and Match Wooden Pumpkin Face Decoration. When I showed them the final result, they were so impressed. Especially since I didn’t use a stencil for the faces.
So, if you want to impress your friends, this DIY Mix and Match Wooden Pumpkin Face Decoration is the way to do it.
DIY Mix And Match Wooden Pumpkin Face Decoration
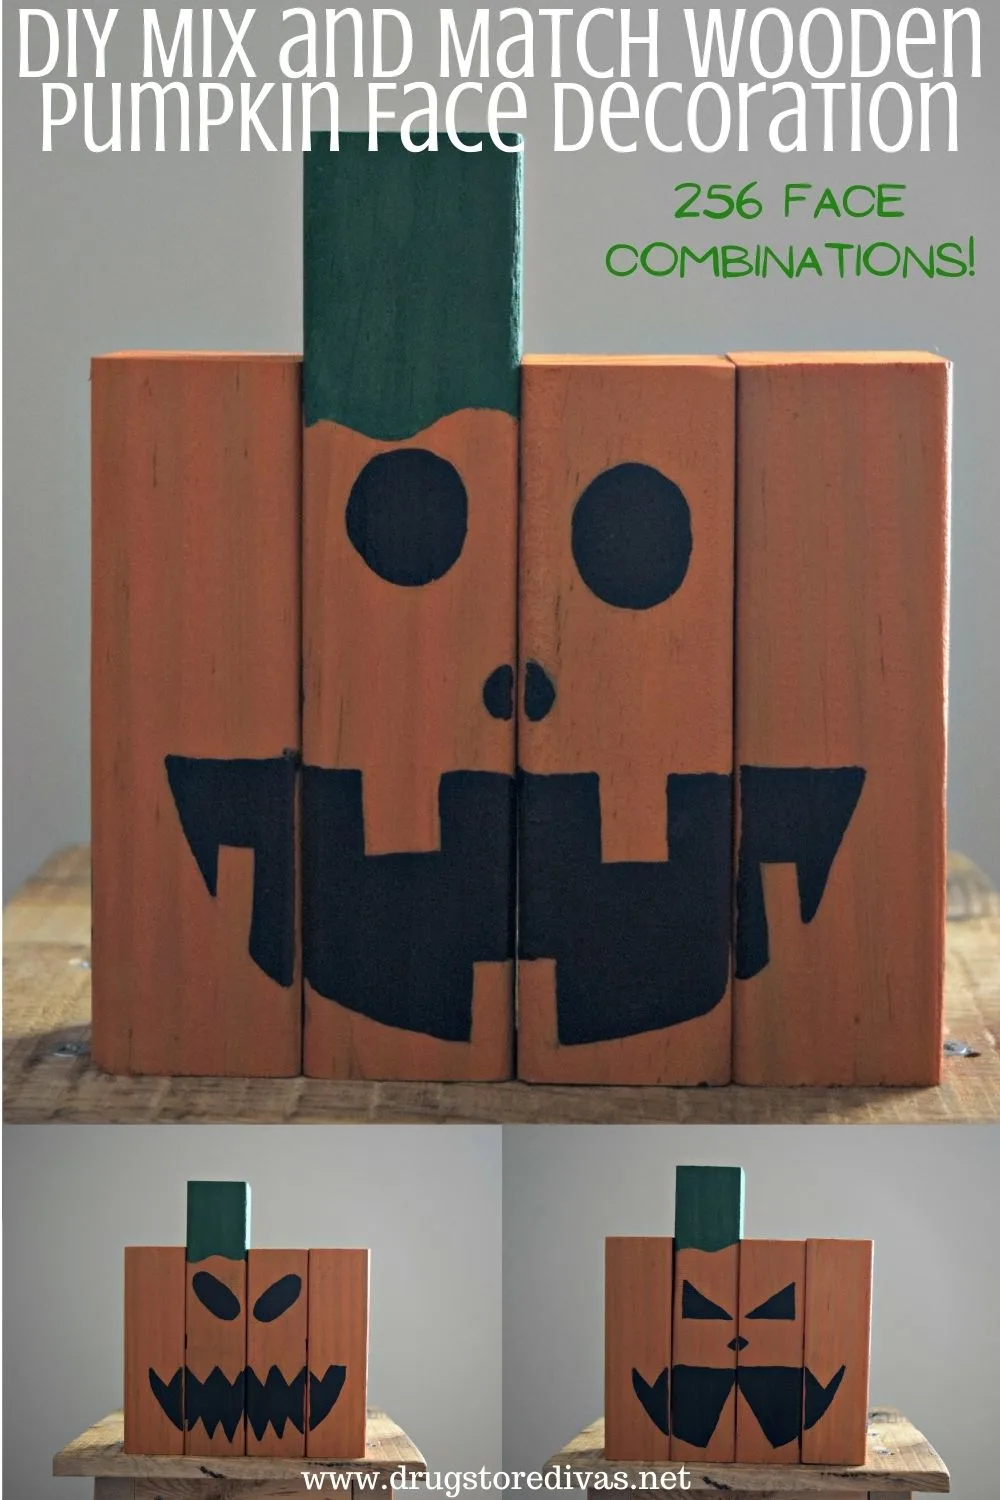
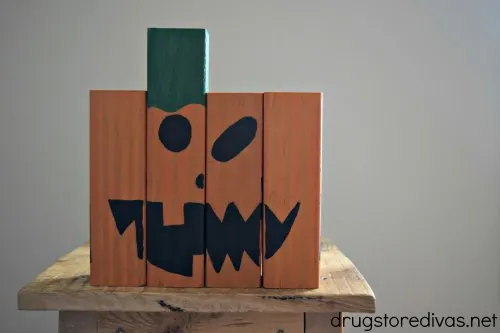
You’re going to end up painting four full faces on this DIY Mix and Match Wooden Pumpkin Face Decoration. But, it actually gives you 256 possible faces.

What You’ll Need:
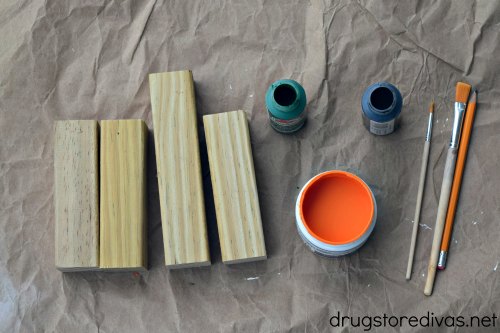
- Pressure treated 2×2 (21.5 inches long)
- Miter saw
- Tape measure
- Pencil
- Sandpaper
- Orange interior paint
- Green paint
- Black paint
- Paint brushes
- Scissors
- Spar urethane
What You’ll Do:
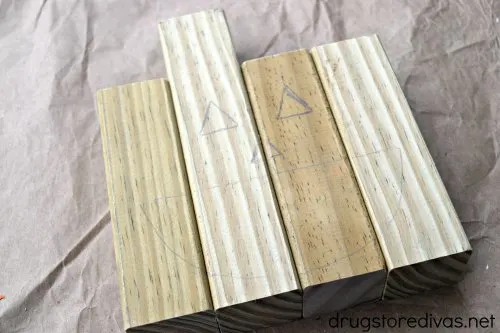
Use the tape measure to measure the 2×2 of pressure treated wood into four pieces. The first three pieces should be 5 inches long and the fourth should be 6.5 inches long. Mark these lengths using the pencil.
Use the miter saw to cut the four pieces of wood.
If you don’t have a miter saw, you can use a circular saw instead.
Gently sand the ends of each piece of wood, just in case and splinters were left behind from cutting the pieces.
Now, here comes the fun part. You’re going to draw four different pumpkin faces on the wood.
I’ll give you a quick tutorial here and then a longer one at the end of the post.
So, quick tutorial:
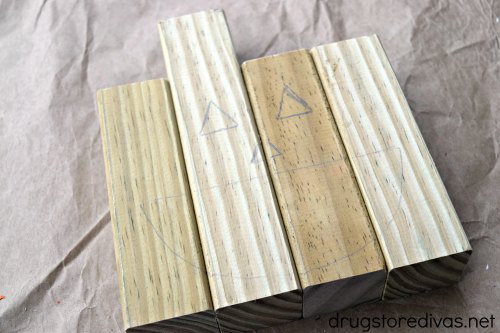
Align the four pieces of wood together, putting the longer of the four pieces as the second piece.
With a pencil, lightly draw a matching pair of eyes on the middle two pieces. Draw a mouth that stretches across all four pieces. If you want, draw a nose.
Flip the pieces one quarter turn to the left.
Draw a second pair of eyes and a second mouth.
Flip the pieces one quarter turn to the left again.
Draw a third set of eyes and a third mouth.
Flip the pieces to the final blank side.
You guessed it. Draw a fourth pair of eyes and a fourth mouth.
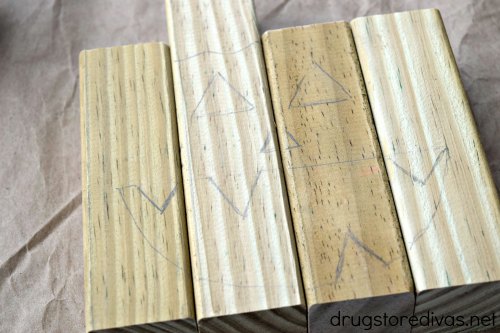

Right under where the second piece is taller than the first, draw a squiggle. This will be where part of the stem falls over the pumpkin. Draw that on all four sides.
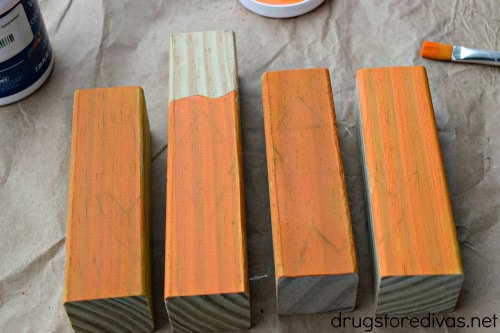
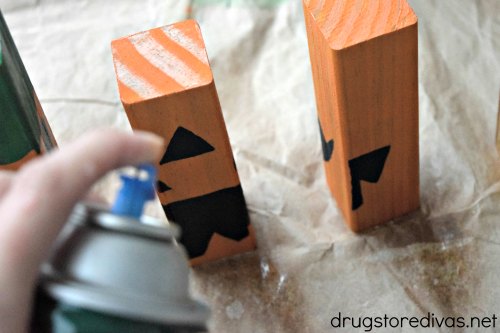
Paint all four pieces of the wood orange, over the pencil marks of your eyes, noses, and mouths. Paint the top of the three shortest pieces as well.
You’re only painting one light coat so you should be able to still see the pencil marks through the orange paint.
Let the orange paint dry completely.


Paint the portion designated for the stem green, including the very top of the piece. Let it dry completely.
Using a small paint brush, paint the eyes, noses, and mouths on each side. Of course, paint one side and let it dry completely before painting another side.

When the pieces are completely dry, spray a coat of spar urethane on each piece. Spar uterthane is an indoor/outdoor coating, so you can use this pumpkin decoration inside or outside.

How To Make The Face For This Mix And Match Wooden Pumpkin Face Decoration
I promised that I would give you a longer tutorial about making the faces of the pumpkin, so here we go.
Personally, I like when everything lines up perfectly and is even. It looks store bought rather than homemade. And even if you make something yourself, you really want it to look like you bought it at the store.
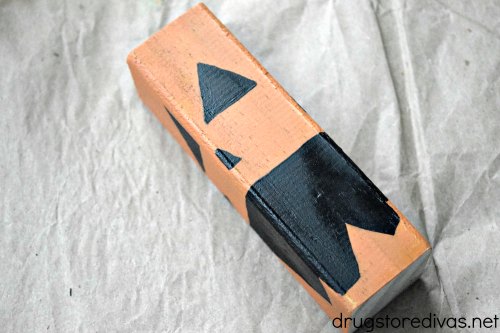
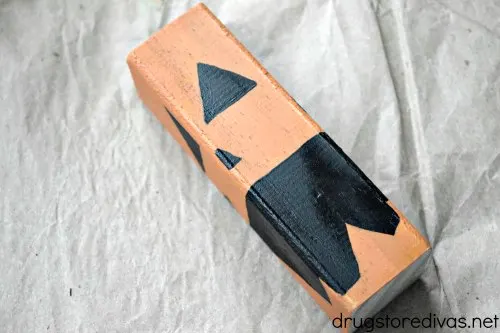
So, I had four sets of eyes in mind first: right-side up triangle, circle, a right triangle, and oval angled eyes.
Honestly, I wanted to do “carve outs” for pupils in the eyes too, but I didn’t have a thin enough paintbrush for that. If I wanted to paint this with a toothpick I could have done that, but it’s just a little easier if you do “full” eyes.
So, let’s start with the triangle eyes.
First, lay the wood flay, making sure all the pieces are aligned at the bottom.
Cut a triangle out of a piece of scrap paper. On the second piece of wood, place the triangle where you want the eye to go, to make sure of the sizing. Trace it with a pencil. Move the triangle to the third piece of wood. Make sure it lines up with the one you just drew, and trace it.
Don’t move the pieces.
Cut a smile out from a piece of scrap paper. Make sure the smile is wide enough that a part of it falls on the first and fourth blocks.
Trace the scrap paper smile onto the blocks.
If you want to draw any “teeth” as cut outs on the smile, do it now, making sure that there’s matching teeth across all four blocks.
Flip one of the blocks a quarter turn. I always started with the second one.
We’re up to the second set of eyes. So, let’s do the circle ones.
Cut a circle from a piece of scrap paper.
On the blank (flipped) block, line the circle up with the triangle eye on the third block. Trace it.
Flip the third block one quarter turn. Trace the circle on that block to make another eye.
Put the scrap paper smile on the blocks, making sure it’s aligned with the smile on the first and fourth blocks. Trace it onto the second and third blocks.
Flip the first block one quarter turn. Retrace the smile.
Flip the fourth block one quarter turn. Retrace the smile.
Now, draw any more cutouts for the teeth.
Repeat these steps to make the third and fourth faces.
It’s a little bit of a pain, sure, but it assures that no matter what combination you flip the DIY Mix and Match Wooden Pumpkin Face Decoration to, it’ll always line up perfectly.
Carol
Thursday 1st of October 2020
Love this. All of the faces are perfect. Thanks so much for sharing!
Marilyn
Monday 28th of September 2020
Pinned and shared. Have a lovely week.
Rebecca Payne
Friday 18th of September 2020
Really cute!