
This How To Design A Gallery Wall post is sponsored.


We built our home, which means everything was brand new. No one lived here before us. No one sat on the toilets and no one put any holes in the walls.
So when we moved in, I didn’t want to hang anything. I was really apprehensive about taking a hammer to our walls because I didn’t want to regret a hole.
You should take this approach when designing a gallery wall, regardless of how new (or not new) your walls are.
Gallery walls are really popular right now because they are a really fun way of displaying numerous photos, signs, art, and trinkets on your walls. Because they display numerous items at once, it’s really easy for them to look cluttered if they’re not done right.
But don’t worry. You’ll do it right. Because you took the right first step: reading this blog post before putting any holes in your walls.
Unless you’ve already picked up a hammer. Then, reading this blog post is a good back up plan.
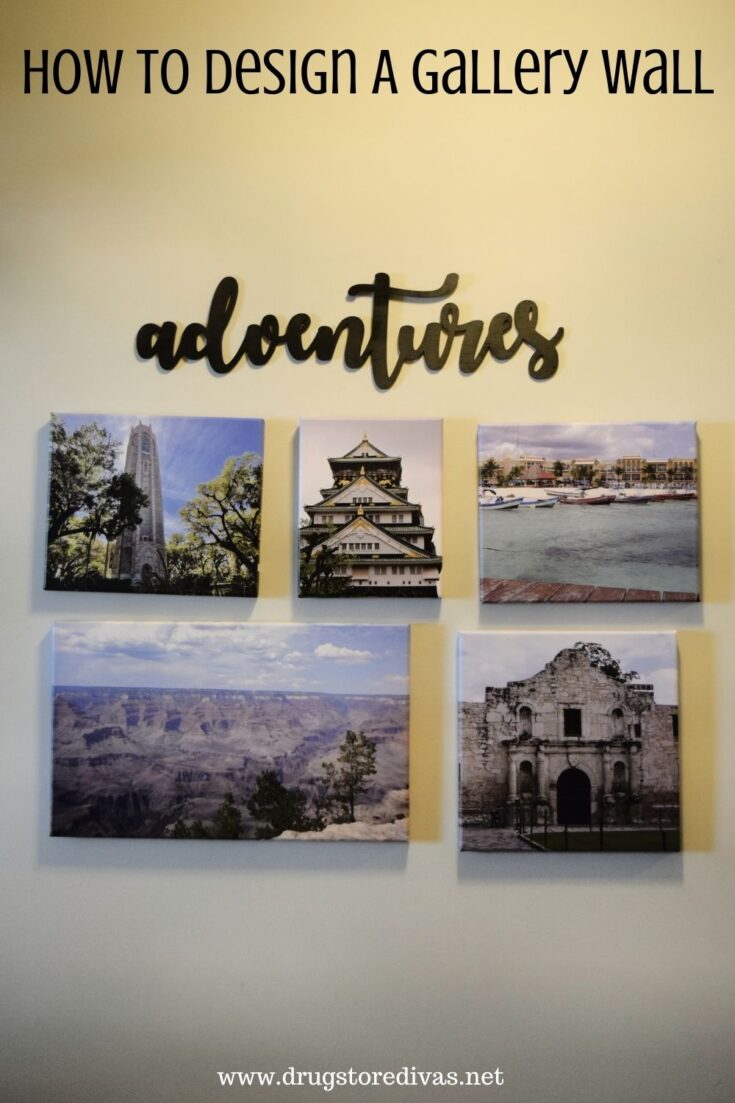
How To Design A Gallery Wall


Pick a theme
Most gallery walls look like random items haphazardly hung on a wall. And actually, that might be a very good textbook definition of what one is (someone call Webster). But really, gallery walls are carefully curated items that cohesively fit together.
Gallery walls that come together start with a theme. If you don’t have one in mind, our suggestions below will help. Of course, the ones below are just to shake your brain. You don’t have to commit to any of ours.
Gallery Wall theme ideas:
A specific color: To create a cohesive home, you need a major color. Each room in the house should have a bit of that color to bring the home together. Whatever color you choose for your home can be the color for your gallery wall.
If it’s blue, for example, look for artwork like the Great Wave of Kanagawa, Single Letter Circle Monograms that you can paint blue, blue flowers or blue vases … you get the idea. Make sure this color is represented in every piece you choose for the gallery wall.
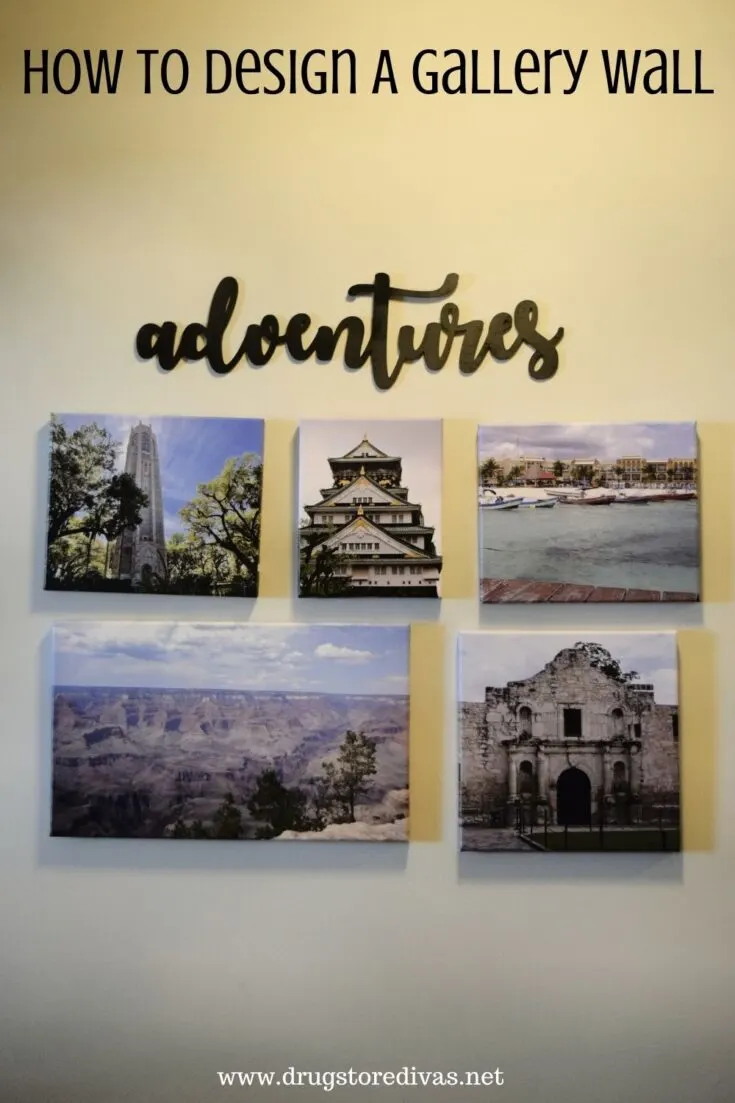
Travel: I’m partial to this because it’s actually what we used for our current gallery wall. You can fill the wall with photos from your travels that you took or purchased, framed maps for places you’ve visited, ticket stubs from airlines or trains, etc.
Family: When we created a gallery wall in our apartment, our theme was family. But not just plain family smiling shots. No, it was my “funny face wall” and I printed and hung photos of our family members making funny faces (on purpose). I was missing them all so bad when we moved to North Carolina, so this was a way for them to brighten my day every day.
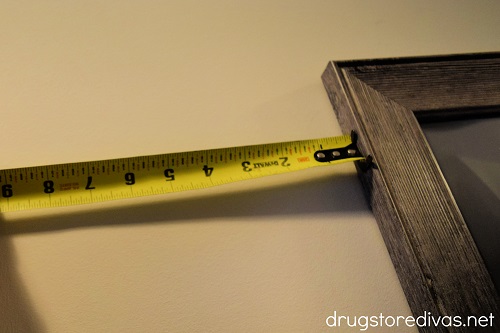
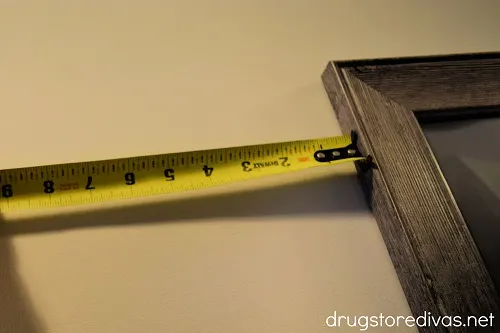
Measure your space
Before you can really design your gallery wall, you have to decide where it’s going to be. You have the theme down, so you know if it will clash with other décor you already have in your home. If it will, you’ll want to design it out of eyesight from your currently decorated walls.
Once you figure out the wall for your gallery wall, narrow that down. Do you want to fill the whole wall? Part of the wall? Eye level and above? Down below?
When you decide on this, measure your space so you know just how much room you have to play with.
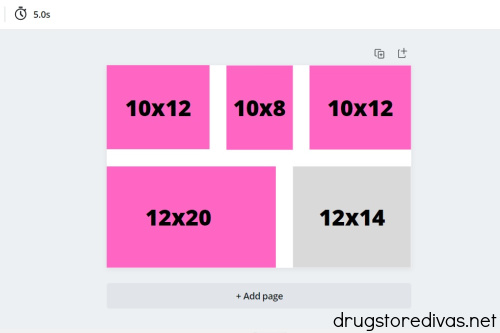
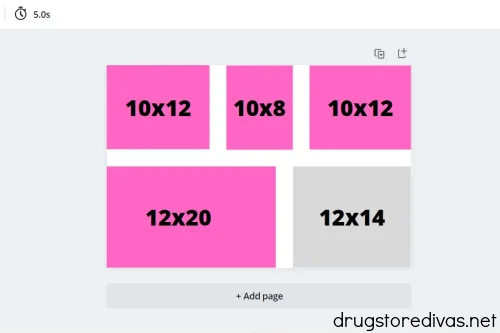
Digitally design your wall
Technology is great. If you are a little bit technologically inclined, digitally designing your wall is a game changer.
Create an image that’s a pixel-sized version of your space. In our case, we were working with a 24-inch by 36-inch space. So I created an image that was 2400 pixels by 3600 pixels.
I then made squares and rectangles, clicked and dragged them into different areas of the space, and adjusted the sizing until I found a design that I really liked. I wanted balance, so I did create a pretty symmetrical (though not mirrored) shape.
If you already have framed art or shelves that you want to incorporate into your gallery wall, create those as shapes on your digital wall. Make sure to create a square, rectangle, or circle that’s to scale. If not, your wall will be off.
It’s so easy to see envision your wall when it’s digitally on a screen. You can move boxes around and around until you are able to get everything — including the spacing — the way you want.

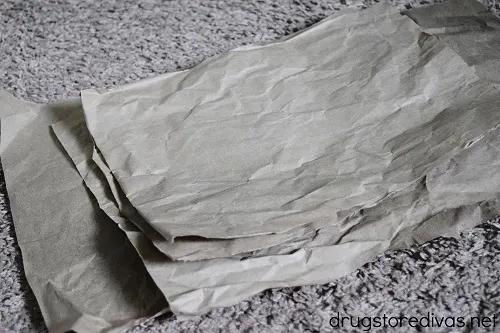
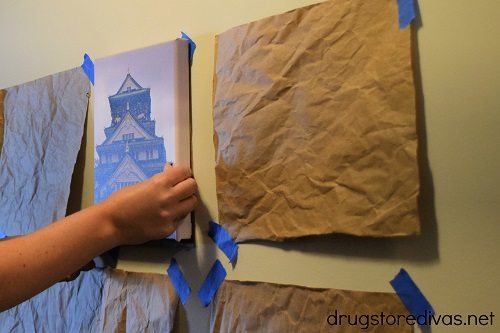
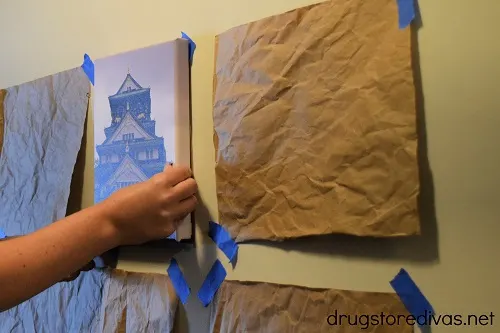
Measure butcher paper in the size of your images
Once you’ve decided on the perfect gallery wall based on your digital version, measure butcher paper to equal the sizes of your photo.
Butcher paper is great for this because it’s long. If you have any panoramic images incorporated into your gallery wall, you’ll be able to pull a long strip of butcher paper. You can’t exactly do that with something like printer paper.
If you don’t have butcher paper, scrap paper that’s used as filling in packages would work too. We have so much of that from online orders and always save it for a drop cloth for when I’m spray painting, when kids are here coloring, or for packing up boxes we mail. So if you have any of that, it will work too.
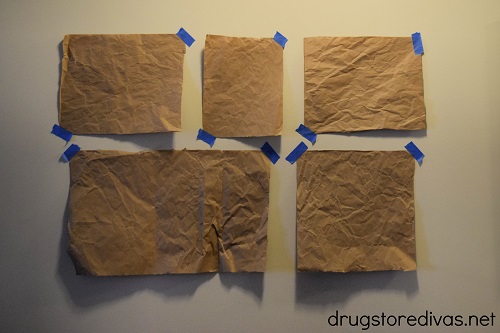
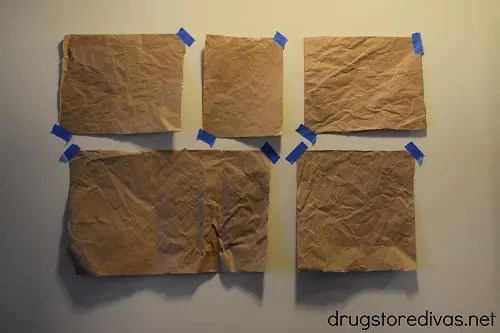
Hang the butcher paper using painter’s tape
Once you have your butcher paper cut, use painter’s tape to hang it on your gallery wall. Painter’s tape is easily removable and won’t leave marks. So you can hang your paper with painter’s tape, decide you hate how it looks (or realize you’re a little off) and easily move your wall around until you get it exactly how you want it.
For any thin decorative items, you can actually just cut a piece of painter’s tape and hang that directly on the wall.
We planned on ordering a wood word to go on top of the images. I used a piece of painter’s tape to figure out the length of the wood cutout to order and to figure out where exactly to hang that. Since it was above the majority of my design, I wasn’t worried about matching the thickness of the sign in my mock wall.
If you have any small embellishments like this, using just painter’s tape like this will work for you too.

Order your prints and any additional decorations
Once you’re absolutely satisfied with how the paper hung on the wall looks, and are excited to see that as your fleshed out gallery wall, order your prints.
We ordered all five of our prints from Canvas Discount for under $100. That’s so cheap. Canvas prints start at $5 for an 8×8 print. Even better, when you shop at CanvasDiscount.com and enter the code DRUGSTOREDIVAS25, you’ll save 25% off your purchase of $50 or more. The code is valid through December 31, 2022, so even if you’re not ready to order your prints for your gallery wall now, save this post and that code for your future orders.
Please note, the above code can be used on all products at CanvasDiscount.com except MIXPIX and face masks.
If you order almost $100 worth, like we did, you’ll get free shipping too (free shipping is available on orders of $70 and over).

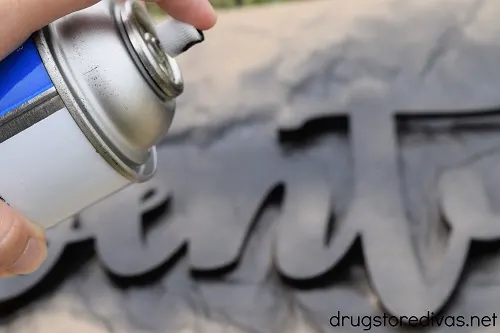
We ordered the personalized wood cutout from Etsy. I wanted the word “adventures” since every time we go somewhere, I’m like, “Let’s go on an adventure.” So our travel photos are photos of our “adventures”. I couldn’t find that exact sign in a font I liked online (most just say “adventure”), so I ordered it on Etsy.
It would have cost an additional $10 to have it painted. So I opted out of that, picked up a $.98 can of spray paint, and painted it myself. It was simple and saved a bunch.
Hang your photos and decorations
Once your prints and any additional décor arrive, hang them.
We ordered ours without any hardware on the back. You can add a hanger set when you order on Canvas Discount for $4 a print, but that would have been an additional $20 for our five photos.
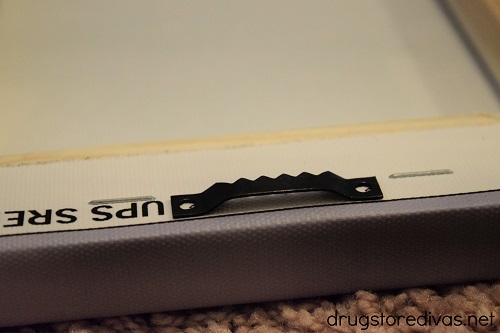
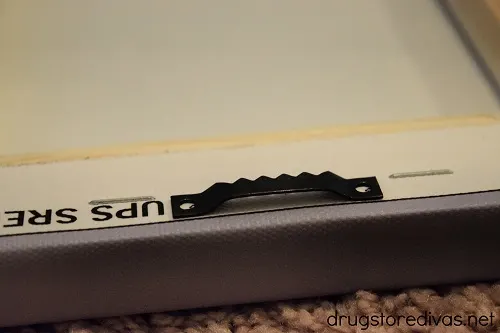
Instead, I ordered sawtooth picture hangers (50 for under $6) and Pete used a cordless drill to affix the picture hangers to the back of each canvas print.
See, the personalized wood cutout that we ordered was already coming without hardware, so I needed the picture hangers for that anyway. It was easy enough for us to just add those ourselves. Plus, it saves a little bit of money.
And if you’re like me, you ball on a budget. So anywhere you can be frugal and cut costs, the better.
Pete had the great idea of nailing while the butcher paper was still up. That way, we were actually able to measure the nails to make sure they were level and were exactly where we wanted them to go.
Pete then used a 24-inch level between the nails, and again when the photos were hung, to assure that all our photos were hung straight.

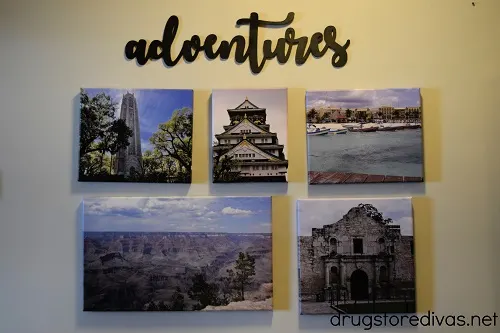
That’s it. We are absolutely in love with our gallery walls. It captures our big adventures perfectly.

More ways to display photos:
If you’re looking for other ways to display photos in your home, we have a couple posts to help with that, which you might love.
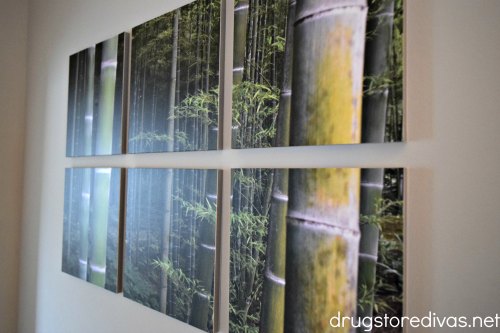
- How To Create Your Own Multi Panel Split Canvas Print
- 5 Ways To Display Photos In Your Home (without nailing anything to the wall)
How To Design A Gallery Wall
A gallery wall is a great way to display numerous photos, decorations, trinkets, and more. Find out how to design a gallery wall here.
Materials
- Butcher paper
- Painter's tape
- Canvas prints
- Wood word
- Nails
- Sawtooth picture hangers
Tools
- Hammer
- Level
Instructions
 Pick a theme
- Measure your space
- Digitally design your wall
- Measure butcher paper in the size of your images
- Hang the butcher paper using painter’s tape
- Order your prints and any additional decorations
- Hang your photos and decorations
Notes
Did this How To Design A Gallery Wall help you create a gallery wall? Let us know in the comments.
nimoraa
Wednesday 18th of February 2026
I love how you emphasized planning before hanging anything on the wall.
Jumpinggoose
Thursday 5th of February 2026
I really appreciate how this post breaks down the process of designing a gallery wall into manageable steps. One thing I’ve found helpful, especially when mixing posters and framed art, is considering the overall design system — thinking about how the different elements like poster design and label design work together visually. It’s similar to how product packaging design or brand logobrand design needs to feel cohesive to create a strong impression. The balance you mention is key.